You Won’t Believe These 14 Wall Painting Hacks for Transforming Old Walls Instantly!
Those old walls in your home they’ve seen trends come and go, witnessed countless family moments, and perhaps, picked up a few character marks (a.k.a. imperfections) along the way. If you’re staring at tired, dated, or slightly flawed walls and dreaming of a fresh, modern space, you might think a major renovation is the only answer. But what if I told you that your secret weapon for an incredible transformation is already in your toolkit, or at least readily available at your local hardware store? Yes, it’s paint!
Prepare to be amazed, because with the right techniques, paint can do more than just change a color; it can perform near-miracles on aging walls. We’re not talking about a simple coat of beige here. We’re diving deep into “14 Wall Painting Hacks for Transforming Old Walls Instantly!” These ingenious, often budget-friendly strategies will help you conceal imperfections, modernize dated looks, and breathe vibrant new life into even the most weary of walls, making your rooms feel brand new.
The Magic of Paint: More Than Just Color Deep
Before we unveil these transformative tricks, let’s appreciate why paint is such a powerhouse for revitalizing old walls:
- Camouflages Imperfections: The right finish and technique can make minor cracks, uneven textures, and patches virtually disappear.
- Modernizes Styles: Dated color schemes or finishes can be instantly updated with contemporary palettes and applications.
- Brightens & Lightens: Old walls can often make a room feel dark or dingy. Paint can dramatically improve light reflection and overall brightness.
- Adds Personality & Charm: Beyond just covering up, paint can introduce character, depth, and unique style.
- Cost-Effective Makeover: Compared to re-plastering, wallpapering, or other intensive renovations, painting offers the most significant visual return for a modest investment.
Get ready to look at your old walls with newfound hope and excitement!
14 Wall Painting Hacks to Revive and Rejuvenate Old Walls:
1. The “Flawless Foundation” Hack: Meticulous Prep & Prime
- The Hack: Not a painting technique itself, but the absolute most crucial first step for old walls: thorough cleaning, repairing, and priming.
- Why it Transforms Instantly (Behind the Scenes): Old walls often harbor grease, grime, dust, cobwebs, and unseen residues. They might have hairline cracks, nail pops, or loose paint. Painting directly over these issues is like putting a band-aid on a broken leg – it won’t work in the long run and your new paint job will fail quickly.
- Cleaning removes barriers to adhesion.
- Repairing (filling cracks, sanding bumps) creates a smoother canvas.
- Priming is the real game-changer: it seals stains (water marks, nicotine, tannins from old wood), ensures even paint absorption (old plaster can be thirsty!), improves adhesion for the topcoat, and can even help bridge minor imperfections. A good quality stain-blocking primer is liquid gold for old walls.
- How to Nail It:
- Clean: Use TSP (trisodium phosphate) solution or a strong degreasing detergent. Rinse well.
- Repair: Scrape any loose or flaking paint. Fill cracks and holes with appropriate filler, let dry, and sand smooth. Caulk gaps around trim.
- Sand: Lightly sand glossy surfaces to help new paint adhere. Smooth out any repaired areas.
- Prime: Use a high-quality primer suited to your wall’s condition. For significant stains or problematic surfaces (like old wallpaper residue or paneling), an oil-based or shellac-based primer might be necessary, followed by a latex topcoat. For general imperfections and to ensure even color, a good latex primer will do.
- The “Instant” Factor: While it takes time, the result of proper prep is an instantly better-looking paint job that lasts. Your topcoat will go on smoother, look more uniform, and won’t be marred by old issues bleeding through.
2. The Matte Finish Miracle: Softening Time’s Touch
- The Hack: Choosing a high-quality flat or matte paint finish for your old walls.
- Why it Transforms Instantly: Old walls are rarely perfectly smooth. They often have subtle waviness, minor bumps, or evidence of past repairs. Glossy or even eggshell finishes reflect light, which highlights every single one of these imperfections, making them glare out. Matte paint, with its low-sheen formula, absorbs light. This diffusion of light creates a soft, velvety appearance that beautifully camouflages minor textural flaws, making them far less noticeable. It’s like an instant soft-focus filter.
- How to Nail It:
- Invest in a reputable brand of matte paint. Modern formulations offer improved washability compared to older flat paints.
- This finish works exceptionally well over slightly uneven plaster or drywall.
- Remember, while forgiving, it’s not a complete fix for major bumps – good prep (Hack #1) is still vital.
- Consider: For slightly more durability in higher-traffic areas while still getting good flaw-hiding, look for “washable matte” or “flat enamel” options.
3. The Textured Paint Disguise: Adding Character to Hide Flaws
- The Hack: Using paints with built-in texture (like sand, stone, or suede finishes) or employing techniques to create an intentionally textured surface.
- Why it Transforms Instantly: If your old walls have more than just minor flaws – perhaps some noticeable unevenness, patched areas that are hard to blend, or even old wallpaper texture that’s difficult to remove completely – adding new, deliberate texture can be a lifesaver. The intentional pattern or tactile quality of the finish draws the eye to the new effect, effectively camouflaging the underlying imperfections.
- How to Nail It:
- Pre-mixed Textured Paints: Explore options like suede paint for a soft, brushed look, or paints with fine sand or stone particles for a more pronounced tactile effect.
- DIY Texture Additives: You can purchase texture additives to mix into regular paint.
- Techniques:
- Subtle Sponging/Rag Rolling: Using similar colors, these techniques can create a gentle, mottled texture.
- Skip Troweling (with joint compound): For a more rustic or industrial look, apply a thin skim coat of joint compound and use a trowel to create a light texture before priming and painting. This is more advanced but very effective for rough walls.
- Best For: Walls with moderate surface imperfections, old plaster, or where you want to add a distinct stylistic element like a Mediterranean or rustic feel.
4. Color Washing or Limewash: Embracing Imperfect Elegance
- The Hack: Applying a color wash (a thin, translucent glaze of paint over a base coat) or using traditional limewash paint.
- Why it Transforms Instantly: Both techniques create a finish with natural, beautiful variations in color depth and texture. This inherent “imperfection” is the key – actual wall flaws simply blend into the artistic, multi-tonal effect. The eye registers the overall soft, mottled appearance rather than focusing on minor defects. Limewash, being a natural, breathable paint, is particularly well-suited for old, solid walls and offers a unique, chalky patina that evolves over time.
- How to Nail It:
- Color Washing: Apply a solid base coat. Once dry, mix your top color with a glazing medium and apply with a rag, large brush, or sponge, often wiping some away to create depth.
- Limewash: Requires a porous surface or specific primer. Apply with a large block brush in feathery, multi-directional strokes. It appears darker when wet and lightens to reveal characteristic tonal shifts.
- Ideal For: Older homes with plaster walls, adding a touch of rustic European charm, or when you want a “living finish” that feels organic and timeless.
5. Strategic Stripes: Directing the Eye & Hiding Flaws
- The Hack: Painting vertical or horizontal stripes, especially using tone-on-tone variations or low-contrast colors.
- Why it Transforms Instantly: Stripes are an optical illusion powerhouse.
- Vertical Stripes: Draw the eye upward, making ceilings appear higher and distracting from horizontal imperfections or unevenness along the wall’s length.
- Horizontal Stripes: Can make a room feel wider or longer and can help camouflage vertical flaws or cracks.
- The pattern itself breaks up the flat surface, making minor dings or patches less obvious as the eye follows the lines.
- How to Nail It for Old Walls:
- Tone-on-Tone: Use the same color in different sheens (e.g., matte base with satin stripes) for a sophisticated, subtle pattern that’s excellent at hiding flaws.
- Low-Contrast Colors: Choose two closely related shades to avoid a jarring effect that might highlight imperfections between the stripes.
- Precision is key. Use a level and high-quality painter’s tape for crisp lines.
- Tip: Wider stripes often look more modern and are more forgiving on slightly uneven old walls than very thin, busy stripes.
6. The “Dark & Dramatic” Concealment (with Matte Finish)
- The Hack: Painting an old wall, or even an entire room with less-than-perfect walls, in a darker, saturated color using a matte finish.
- Why it Transforms Instantly: While counterintuitive for some, dark colors, especially in a matte finish, are excellent at hiding imperfections. They absorb light, minimizing shadows that would typically highlight bumps and dips. The richness of the color itself can also create a focal point, drawing attention away from minor textural issues. It can make an old room feel cozy, sophisticated, and intentionally moody.
- How to Nail It:
- Choose rich jewel tones (deep sapphire, emerald green), moody charcoals, or sophisticated earthy browns.
- A matte finish is crucial to avoid any reflection that would expose flaws.
- Ensure good artificial lighting to prevent the room from feeling too somber and to highlight the depth of the color.
- Consider: This works well for creating a feature wall that has some imperfections, or for a den, library, or bedroom where a more intimate atmosphere is desired.
7. The “Fifth Wall” Feature: Distraction Above
- The Hack: Painting the ceiling (the “fifth wall”) an interesting color, a subtle pattern, or even a high-gloss finish to draw the eye upwards and away from less-than-perfect walls.
- Why it Transforms Instantly: Old walls often come with old ceilings, which might also have their share of issues. However, if your ceiling is in reasonable condition (or can be easily smoothed), making it the star can be a brilliant distraction technique. Guests will be looking up, not scrutinizing your vertical surfaces!
- How to Nail It:
- Subtle Color: A pale blue can mimic the sky and feel airy. A soft, warm tone can make a large room cozier.
- High Gloss (for smooth ceilings): A high-gloss white or pale color reflects light beautifully and adds a touch of unexpected glamour, making the ceiling appear higher and more interesting.
- Metallic Paint: A subtle metallic sheen can add a luxurious touch.
- Simple Stencil: A large, subtle stencil pattern can be very effective.
- Pair With: Keep the walls relatively simple (perhaps using Hack #1 or #2) to let the ceiling shine.
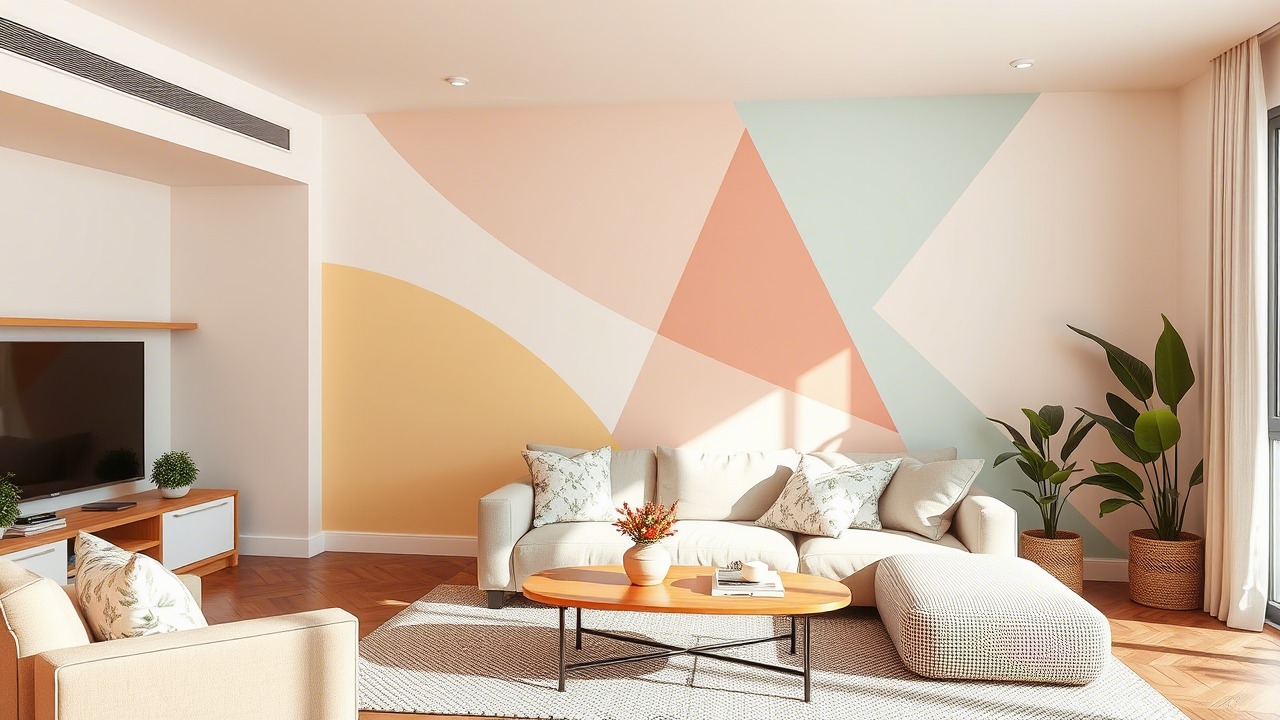
8. The “Color Blocking” Camouflage
- The Hack: Using distinct blocks of color in geometric shapes or asymmetrical patterns to break up large expanses of old wall and create visual interest that masks imperfections.
- Why it Transforms Instantly: Large, uninterrupted old walls can make flaws more apparent. Color blocking divides the wall into smaller, more manageable visual sections. The crisp lines and contrasting colors become the focal point, and minor inconsistencies within each block are less noticeable.
- How to Nail It:
- Plan your design carefully. Consider the scale of the room and furniture placement.
- Use high-quality painter’s tape for sharp, clean edges between color blocks.
- You can use a mix of bold and neutral colors, or a palette of related shades for a more harmonious look.
- Great For: Modernizing a dated space, adding a playful touch, or defining zones in an open-plan area with older walls.
9. The “Half-Painted” or “Dipped” Wall Illusion
- The Hack: Painting only the bottom or top portion of the wall a new color, often a darker or more textured finish on the bottom to hide wear and tear.
- Why it Transforms Instantly: This technique, also known as a two-tone wall, is excellent for old walls because:
- The lower portion of walls often suffers the most damage (scuffs, dents). Painting this section a darker, more durable, or even slightly textured color can effectively hide these issues.
- It creates a strong horizontal line that can make the room feel more grounded or, if the top section is lighter, make the ceiling appear higher.
- It’s a modern look that instantly updates an older space.
- How to Nail It:
- Use painter’s tape and a level for a perfectly crisp dividing line.
- Consider a matte or eggshell finish for the top (lighter) portion and a satin or even a textured paint for the bottom (darker or accent) portion.
- Budget Tip: If the top half of your old walls is in decent shape, you might only need to paint the bottom half, saving on paint and time.
10. The “Faux Shiplap” or “Board & Batten” Painted Effect
- The Hack: Creating the illusion of shiplap or board and batten detailing using only paint and careful taping, or very thin, inexpensive wood strips that are then painted.
- Why it Transforms Instantly: These styles add architectural interest and a sense of structure that can cleverly disguise uneven old walls. The lines and perceived depth break up the flat surface.
- How to Nail It (Paint-Only Shiplap):
- Paint the wall your desired “gap” color (often a dark gray or black).
- Once dry, apply thin horizontal strips of painter’s tape (e.g., 1/4 inch wide) evenly spaced.
- Paint over the entire wall and tape with your main shiplap color (usually white or off-white).
- Carefully remove the tape while the topcoat is still slightly tacky to reveal the “gaps.”
- Board & Batten: Attach thin MDF strips vertically and horizontally to the wall, caulk, prime, and then paint the entire wall and strips one uniform color (often white or a neutral). The shadows created by the strips add dimension.
- Impact: Instantly adds farmhouse, coastal, or traditional charm and does an excellent job of hiding underlying wall surface irregularities.
11. The Artful Stencil Revival
- The Hack: Using stencils to apply a repeating pattern or a large motif, particularly with paints that have a bit of body or a metallic sheen.
- Why it Transforms Instantly: A well-chosen stencil pattern can be a stunning distraction from minor flaws. The eye is drawn to the beauty and intricacy of the design. If the stencil paint has a slight texture or a metallic sheen, it further helps to obscure subtle imperfections in the underlying wall.
- How to Nail It for Old Walls:
- Choose an all-over pattern rather than small, isolated motifs for better camouflage. Geometric, damask, or botanical patterns work well.
- Use a stencil brush or a dense foam roller with minimal paint to prevent bleeding, especially on slightly uneven surfaces.
- A base coat in a matte finish with a slightly more lustrous stencil paint (e.g., satin or metallic) can be very effective.
- Benefit: Much cheaper and more customizable than wallpaper for achieving a patterned look that hides flaws.
12. The “Embrace the Character” Transparent Wash
- The Hack: For old plaster walls with interesting (but not damaged) character, applying a very thin, transparent color wash that enhances, rather than hides, the subtle variations and history of the wall.
- Why it Transforms Instantly: Instead of trying to make an old wall look perfectly new and flat, this celebrates its age and texture. The transparent wash settles into the slight undulations, highlighting the depth and unique character in a beautiful, subtle way.
- How to Nail It:
- The wall must be sound, clean, and free of loose material, but minor, stable imperfections are okay.
- Greatly dilute your chosen paint color with water or a glazing medium to achieve transparency.
- Apply with a large brush or rag in soft, sweeping motions.
- This is not about opaque coverage but about adding a veil of color.
- Best For: Historic homes or spaces where you want to preserve and highlight the authentic charm of old plaster.
13. The “Erasure” Hack: Painting Out Unwanted Features
- The Hack: If your old walls have dated or non-functional features you can’t remove (like an old intercom box, a disconnected thermostat, or a strange alcove), paint them the exact same color and finish as the surrounding wall.
- Why it Transforms Instantly: While it doesn’t remove the feature, painting it to blend seamlessly with the wall makes it recede visually and become far less noticeable. The eye is less likely to register it as a separate, distracting element.
- How to Nail It:
- Ensure the feature is clean and properly primed if it’s a different material (e.g., plastic or metal).
- Use the identical wall paint and apply it carefully for a uniform look.
- Impact: A simple but highly effective way to “declutter” an old wall visually.
14. The “Highlight the Positive” Approach: Accentuate the Good
- The Hack: If your old room has one redeeming architectural feature (e.g., a beautiful window, original molding, a decent fireplace), make that the star with a carefully chosen paint treatment, drawing the eye away from less appealing wall surfaces.
- Why it Transforms Instantly: By creating a stunning focal point, you give guests (and yourself) something beautiful to focus on, making the flaws on other walls less significant.
- How to Nail It:
- Paint the window trim a striking contrasting color.
- Paint the wall around the fireplace a rich accent color.
- If you have beautiful crown molding, paint it a crisp white or a contrasting color to make it pop, while keeping the flawed walls in a forgiving matte neutral.
- Strategy: This is about strategic visual hierarchy – guiding the eye to the best parts of the room.
Frequently Asked Questions
1. What’s the most important first step before painting any old wall?
Thorough preparation (Hack #1) is non-negotiable. This includes cleaning off grease and grime, repairing any significant cracks or holes, scraping loose paint, sanding for a smooth surface, and applying a quality primer suited to the wall’s condition and any stains present.
2. What paint finish is generally best for hiding imperfections on old walls?
A flat or matte finish (Hack #2) is almost always the best choice. It absorbs light rather than reflecting it, which significantly minimizes the appearance of bumps, minor textures, and slight waviness common in older walls.
3. Can I use dark paint colors on old walls, or will that highlight flaws?
Dark colors, especially in a matte finish (Hack #6), can actually be excellent for hiding flaws on old walls. They absorb light and can make imperfections recede. However, ensure good room lighting to prevent the space from feeling too gloomy.
4. My old walls have some slight texture I don’t like. What’s a good paint hack?
Textured paint finishes (Hack #3), color washing or limewash (Hack #4), or even a subtle patterned stencil (Hack #11) can help. These techniques introduce a new, intentional texture or pattern that camouflages the existing unwanted texture.
5. Are there any paint hacks to make old, low ceilings look higher?
Yes! Painting the ceiling a lighter color than the walls (often crisp white) is very effective. Vertical stripes (Hack #5) on the walls can also draw the eye upward. The “Fifth Wall” Feature (Hack #7), if done with a light or high-gloss finish on the ceiling, can also create an illusion of height.
6. What’s a budget-friendly way to use paint to update an old room quickly?
The “Half-Painted” or “Dipped” Wall (Hack #9) can be very budget-friendly if the upper (or lower) portion of your wall is in decent condition, as you only need to paint half the area. A simple matte finish in a fresh, modern neutral (Hack #2) is also a cost-effective overall refresh.
7. My old walls have some stains (e.g., old water marks). Will paint hide these?
You MUST use a stain-blocking primer (part of Hack #1) specifically designed for those types of stains before applying your topcoat. Otherwise, the stains will likely bleed through your new paint eventually. Oil-based or shellac-based primers are often best for severe stains.
8. Can I paint over old wallpaper if it’s too hard to remove?
It’s generally not recommended, as wallpaper can bubble or peel later, ruining your paint job. However, if the wallpaper is extremely well-adhered, sound, and not textured, you can prime it with an oil-based or shellac-based primer (to seal in the adhesive and prevent bleeding) and then paint over it. Test a small, inconspicuous area first. Hacks like textured paint might work better over less-than-perfectly removed wallpaper remnants (after priming).
9. How do I choose a modern color palette to update old walls?
Look at current neutral trends (warm grays, greiges, muted greens, earthy beiges) for main wall colors. For accents, consider sophisticated blues, terracotta, olive green, or even rich jewel tones if your style leans bolder. Avoid overly bright or primary colors from past decades unless you’re specifically going for a retro look.
Conclusion – New Life for Your Old Walls is Just a Paint Can Away!
Old walls tell stories, but they don’t have to shout about their imperfections. With these 14 painting hacks, you’re now equipped with an arsenal of creative and effective techniques to instantly transform those tired surfaces. From the foundational magic of meticulous preparation and the forgiving embrace of matte finishes to the clever distractions of patterns and feature walls, paint offers an accessible and powerful way to rejuvenate your home.
Don’t let dated or slightly flawed walls hold back your interior design dreams. Choose the hacks that best suit your wall’s condition and your personal style, roll up your sleeves (or call a trusted painter), and prepare to be amazed at how dramatically you can refresh and modernize your space. Your old walls are ready for their stunning comeback!
Leave a Reply