What Happens if You Paint Treated Wood Too Soon?
Treated wood is a popular choice for outdoor projects, thanks to its resistance to rot, insects, and other environmental factors. However, if you’re considering painting treated wood, timing is crucial. Painting too soon can lead to a variety of problems that may compromise your project’s integrity and appearance.
We’ll explore the implications of painting treated wood too early, the best practices for preparation and application, and some frequently asked questions.
Understanding Treated Wood
Before diving into the painting process, it’s important to understand what treated wood is and why it’s used.
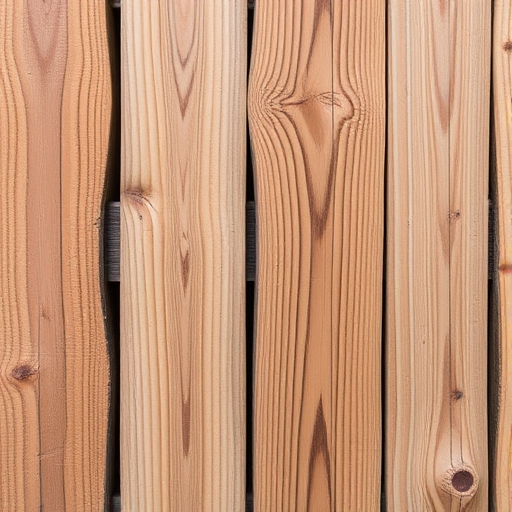
What is Treated Wood?
Treated wood is lumber that has been infused with chemical preservatives to protect it from decay, insects, and other environmental damage. The most common methods of treatment include:
-
- Pressure Treatment: Wood is placed in a pressure chamber where preservatives are forced deep into the fibers.
- Non-Pressure Treatment: Chemicals are applied to the surface, but they do not penetrate as deeply.
Common Uses of Treated Wood
Treated wood is often used in:
-
- Decking
- Fencing
- Landscaping timbers
- Outdoor furniture
- Playground equipment
The Importance of Proper Drying Time
One of the key factors in successfully painting treated wood is allowing it to dry properly. When wood is treated, it retains moisture from the chemicals used in the process.
How Long Should You Wait?
The drying time for treated wood can vary based on several factors, including:
-
- Type of Treatment: Pressure-treated wood may require more time to dry than non-pressure-treated wood.
- Environmental Conditions: Humidity, temperature, and airflow can significantly impact drying times.
General Guidelines:
-
- Wait at least 4 to 8 weeks after treatment before painting.
- Conduct a moisture test to ensure the wood is dry enough.
Signs of Moisture
Before painting, check for these signs that indicate the wood may still be wet:
-
- Dark coloration compared to surrounding dry areas.
- A damp feeling when touched.
- Presence of condensation on the surface.
Consequences of Painting Too Soon
Painting treated wood before it has fully dried can lead to several issues:
1. Poor Adhesion
Paint requires a clean, dry surface to adhere properly. If the treated wood is still wet, the paint may not stick, leading to:
-
- Peeling
- Bubbling
- Flaking
2. Mold and Mildew Growth
Moisture trapped beneath the paint can create a perfect environment for mold and mildew to thrive. This can lead to:
-
- Unsightly stains
- Structural damage over time
- Health risks from mold exposure
3. Reduced Lifespan of Paint
Even if the paint initially adheres well, moisture can compromise its longevity. This results in:
-
- Frequent repainting
- Increased maintenance costs
- Wasted time and effort
4. Chemical Reactions
Certain chemicals in the wood treatment can react with paint, leading to:
-
- Discoloration
- Unpleasant odors
- Reduced effectiveness of the paint
Preparing Treated Wood for Painting
To ensure a successful paint job, proper preparation is essential. Follow these steps:
Step 1: Wait for the Right Time
As mentioned earlier, allow the wood to dry for at least 4 to 8 weeks. Use a moisture meter to check the wood’s moisture content. Ideally, it should be below 15%.
Step 2: Clean the Surface
Before painting, clean the treated wood to remove dirt, debris, and any potential contaminants. Use:
-
- A stiff brush
- A mixture of water and mild detergent
- A hose to rinse off the soap
Step 3: Sand the Surface
Sanding the surface of the treated wood can help improve paint adhesion. Use medium-grit sandpaper (around 120-grit) to lightly sand the surface.
Step 4: Apply a Primer
Using a primer specifically designed for treated wood can enhance paint adhesion and durability. Look for:
-
- Oil-based primers for oil-based paints
- Water-based primers for latex paints
Step 5: Choose the Right Paint
Select a high-quality exterior paint that is compatible with your primer. Consider:
-
- Oil-based Paints: More durable and resistant to moisture but take longer to dry.
- Latex Paints: Easier to clean, quick-drying, and flexible.
Painting Treated Wood: Step-by-Step Guide
Once you’ve prepared the surface, follow these steps to paint treated wood:
Step 1: Gather Your Materials
You’ll need:
- Paintbrushes or rollers
- Paint tray
- Drop cloths
- Ladder (if needed)
- Safety gear (mask, gloves, goggles)
Step 2: Apply the Primer
Using a paintbrush or roller, apply a coat of primer evenly across the surface. Allow it to dry according to the manufacturer’s instructions.
Step 3: Sand Again
Once the primer is dry, lightly sand the surface again to ensure a smooth finish.
Step 4: Apply the Paint
Using the same method as with the primer, apply your chosen paint. Depending on the color and type of paint, you may need to apply multiple coats.
Step 5: Allow to Dry
Follow the drying times specified on the paint can. Avoid exposing the painted surface to moisture until it is fully cured.
Comparison Table: Oil-Based vs. Latex Paint for Treated Wood
| Feature | Oil-Based Paint | Latex Paint |
|---|---|---|
| Drying Time | Longer (6-8 hours) | Shorter (1-2 hours) |
| Cleanup | Requires solvents | Soap and water |
| Durability | More durable in harsh conditions | Flexible, less prone to cracking |
| Yellowing | Can yellow over time | Stays true to color |
| Odor | Stronger odor | Low odor |
Frequently Asked Questions
Can I paint treated wood immediately after installation?
No, it is crucial to allow treated wood to dry for at least 4 to 8 weeks before painting to ensure proper adhesion and prevent mold growth.
How can I tell if the treated wood is dry enough for painting?
Use a moisture meter to check the moisture content of the wood. Ideally, it should be below 15%. You can also look for signs of dryness, such as a lighter color and lack of dampness.
What type of paint should I use for treated wood?
Choose a high-quality exterior paint that is compatible with your primer. Both oil-based and latex paints can be used, depending on your preference and the specific conditions of your project.
Is it necessary to use a primer on treated wood?
Using a primer is highly recommended as it improves adhesion and durability of the paint, ensuring a better finish.
What if I’ve already painted treated wood too soon?
If you’ve painted treated wood too soon and are experiencing issues like peeling or bubbling, you may need to strip the paint, allow the wood to dry properly, and then repaint following the correct procedures.
Conclusion
Painting treated wood can be a rewarding DIY project, but timing is critical. By allowing the wood to dry properly and following the right preparation steps, you can achieve a beautiful, long-lasting finish. Remember, the key to success lies in patience and careful attention to detail. By following the guidelines outlined in this article, you can ensure that your treated wood projects not only look great but also stand the test of time.