How to Smooth Out Touch Up Paint on Your Car
Touching up paint on your car is an essential skill for any car owner. Whether it’s a minor scratch, a chip, or a larger area that needs attention, knowing how to properly apply and smooth out touch-up paint can make a significant difference in the appearance of your vehicle. In this guide, we will walk you through the steps to effectively smooth out touch-up paint, the tools you’ll need, and some tips to achieve a flawless finish.
Why Touch Up Paint?
Paint chips and scratches can occur due to various reasons, including:
- Road debris: Small stones and gravel can chip your paint as you drive.
- Weather: Harsh conditions like hail or heavy rain can cause paint damage.
- Accidental bumps: Minor collisions or contact with other objects can lead to scratches.
- Touch-up paint pen or brush
- Fine-grit sandpaper (2000-3000 grit)
- Masking tape
- Paint thinner or solvent
- Soft cloth or microfiber towel
- Polishing compound
- Clear coat (optional)
- Touch-up paint in the correct color for your vehicle
- Base coat (if necessary)
- Clear coat (if necessary)
- Dampen a piece of fine-grit sandpaper with water.
- Gently sand the touched-up area in a circular motion. Be cautious not to sand too aggressively; your goal is to level the paint with the surrounding surface.
- Rinse the area frequently to remove paint residue and prevent scratching.
- Choose the Right Paint: Always use touch-up paint that matches your vehicle’s color code. You can find this code in the owner’s manual or on a sticker inside the driver’s side door.
- Work in a Controlled Environment: Avoid applying paint in direct sunlight or extreme temperatures, as this can affect drying times and the final appearance.
- Practice Patience: Rushing through the process can lead to a poor finish. Take your time with each step to ensure the best results.
Touch-up paint helps protect your car from rust and corrosion while maintaining its aesthetic appeal.
Tools and Materials Needed
Before you start, gather the following tools and materials:
Tools
Materials
Step-by-Step Guide to Smoothing Out Touch Up Paint
Step 1: Clean the Area
Before applying any paint, ensure the area is clean and free of dirt, wax, or grease. Use soap and water or a dedicated automotive cleaner, and dry it with a soft cloth.
Step 2: Prepare the Surface
1. Masking Tape: Use masking tape to outline the area you will be working on. This will help prevent paint from getting on other parts of the car.
2. Sanding (if necessary): If the damaged area has raised edges, lightly sand it with fine-grit sandpaper. Be careful not to sand too aggressively, as this could damage the surrounding paint.
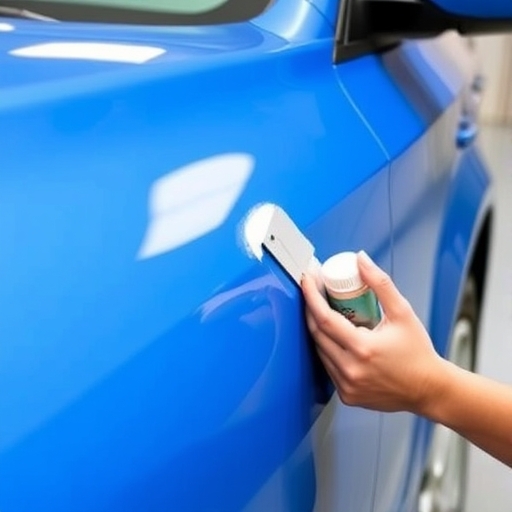
Step 3: Apply Touch Up Paint
1. Shake the Touch-Up Paint: Shake the paint container thoroughly to ensure an even mixture.
2. Application: Using a paint pen or brush, apply the touch-up paint to the damaged area. Use thin layers to avoid drips and uneven textures.
3. Drying Time: Allow the paint to dry according to the manufacturer’s instructions. This usually takes about 30 minutes to an hour.
Step 4: Smooth the Surface
Once the touch-up paint has dried, it’s time to smooth out the area.
1. Wet Sanding:
2. Inspect the Surface: After wet sanding, check the surface to see if it is even. If not, you may need to apply another layer of touch-up paint and repeat the drying and sanding process.
Step 5: Polish the Area
Once the paint is smooth and level with the surrounding surface, it’s time to polish the area.
1. Apply Polishing Compound: Use a small amount of polishing compound on a microfiber towel.
2. Buff the Area: Gently buff the area in circular motions until the surface shines and blends with the surrounding paint.
3. Clean the Surface: Wipe off any excess polishing compound with a clean cloth.
Step 6: Apply Clear Coat (Optional)
For added protection and shine, consider applying a clear coat over the touch-up paint.
1. Apply Clear Coat: Use a clear coat pen or brush to apply a thin layer over the touched-up area.
2. Drying Time: Allow the clear coat to dry completely.
Tips for a Professional Finish
Comparison of Touch-Up Paint Options
| Touch-Up Paint Type | Pros | Cons |
|---|---|---|
| Paint Pen | Easy to apply, precise application | Limited amount of paint, can dry out |
| Brush | Good for larger areas, more paint available | Harder to control, higher risk of drips |
| Spray Can | Quick coverage, suitable for larger areas | Harder to control, potential for overspray |
Frequently Asked Questions (FAQ)
How long does touch-up paint last?
Touch-up paint can last several years if applied correctly and maintained properly. Factors such as exposure to the elements and the quality of the paint can affect longevity.
Can I use regular paint for touch-ups?
It’s not recommended to use regular paint for touch-ups. Automotive touch-up paint is specially formulated to adhere to car surfaces and match the vehicle’s finish.
How do I know if my touch-up paint is the right color?
Check your vehicle’s color code, usually found in the owner’s manual or on a sticker inside the driver’s side door. Purchase paint that matches this code for the best results.
Can I touch up paint in cold weather?
It’s best to avoid applying touch-up paint in cold weather, as low temperatures can affect the drying process and adhesion. Aim for a temperature above 50°F (10°C).
What if the scratch is deep?
If the scratch is deep, you may need to use a filler before applying touch-up paint. This will help level out the surface and provide a better finish.
Conclusion
Smoothing out touch-up paint on your car is a skill that can save you money and keep your vehicle looking its best. By following the steps outlined in this guide and taking your time with the process, you can achieve a professional-looking finish. Remember to gather the right tools, choose the appropriate paint, and practice patience for the best results. With a little effort, your car can look as good as new, free of unsightly scratches and chips.