How to Seal Acrylic Paint: A Comprehensive Guide
Acrylic paint is a versatile medium that has gained popularity among artists, hobbyists, and DIY enthusiasts alike. While its vibrant colors and quick-drying properties make it an excellent choice for various projects, sealing acrylic paint is a crucial step to ensure longevity and durability. We will delve into the importance of sealing acrylic paint, the different sealing methods available, and the best practices to achieve a flawless finish.
Why Seal Acrylic Paint?
Before we dive into the methods of sealing acrylic paint, it’s essential to understand why sealing is necessary. Here are a few reasons:
-
- Protection: Sealing acrylic paint protects it from environmental factors such as moisture, UV rays, and dirt.
- Durability: A sealant can enhance the durability of your artwork, making it resistant to scratches and wear.
- Finish: Sealing can affect the final appearance of your work. Depending on the type of sealant, it can add a glossy, satin, or matte finish.
- Color Preservation: Sealing helps to maintain the vibrancy of the colors over time, preventing fading.
Types of Sealants for Acrylic Paint
When it comes to sealing acrylic paint, there are several options available. Each has its own unique properties, advantages, and disadvantages. Below are the most common types of sealants:
1. Acrylic Varnish
Acrylic varnish is a water-based sealant specifically designed for use with acrylic paint. It comes in various finishes, including gloss, satin, and matte.
Advantages:
-
- Non-toxic and easy to clean up
- Fast-drying
- Flexible, allowing for expansion and contraction with the painted surface
Disadvantages:
-
- May require multiple coats for optimal protection
2. Polyurethane
Polyurethane is a durable sealant that can be either water-based or oil-based. It provides a hard finish that is highly resistant to scratches and moisture.
Advantages:
-
- Extremely durable and long-lasting
- Provides excellent protection against moisture and UV damage
Disadvantages:
-
- Oil-based versions can be toxic and require solvents for cleanup
- Longer drying time compared to acrylic varnish
3. Spray Sealants
Spray sealants are convenient for covering large areas or intricate details. They come in various finishes and are easy to apply.
Advantages:
-
- Quick and easy application
- Uniform coverage without brush strokes
Disadvantages:
-
- Can be more expensive than liquid sealants
- Requires proper ventilation during application
4. Gel Medium
Gel medium can be used as both a medium for mixing and a sealant. It provides a glossy finish and can enhance the texture of your artwork.
Advantages:
-
- Adds depth and dimension to the artwork
- Can be mixed with paint for added effects
Disadvantages:
-
- Can be more expensive than traditional sealants
5. Wax
Wax is a traditional method for sealing acrylic paint, often used by artists for its unique finish. It provides a soft luster and is easy to apply.
Advantages:
-
- Provides a natural, soft finish
- Non-toxic and easy to use
Disadvantages:
-
- Not as durable as other sealants
- Requires reapplication over time
How to Seal Acrylic Paint: Step-by-Step Guide
Now that we’ve covered the types of sealants available, let’s discuss how to seal acrylic paint effectively. Follow these steps for a polished finish:
Step 1: Allow the Paint to Dry Completely
Before sealing your acrylic paint, ensure that it has dried completely. This can take anywhere from a few hours to a couple of days, depending on the thickness of the paint and the environmental conditions.
Step 2: Choose Your Sealant
Select the appropriate sealant based on your project needs. Consider factors such as the desired finish, level of protection, and ease of application.
Step 3: Prepare Your Workspace
-
- Ventilation: Ensure that you are working in a well-ventilated area, especially if you are using spray sealants or oil-based products.
- Protect Surroundings: Use drop cloths or newspapers to protect your workspace from overspray or spills.
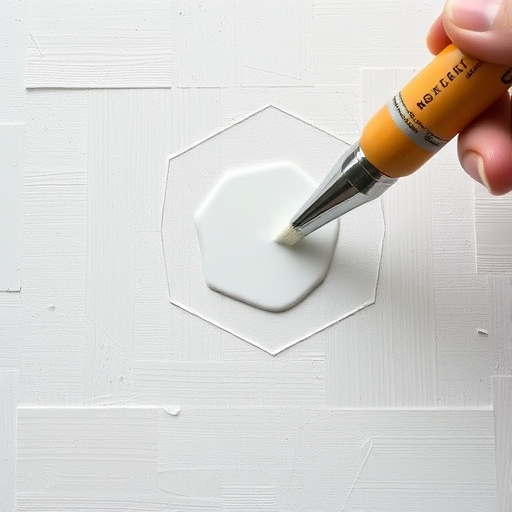
Step 4: Apply the Sealant
For Acrylic Varnish or Polyurethane:
1. Stir the Sealant: Gently stir the sealant to mix it well, avoiding vigorous shaking that can create bubbles.
2. Use a Brush or Foam Applicator: Dip a clean brush or foam applicator into the sealant, removing excess to avoid drips.
3. Apply Evenly: Apply a thin, even coat over the surface of the painted area, working in one direction.
4. Allow to Dry: Follow the manufacturer’s instructions for drying time. Typically, you may need to wait 1-2 hours before applying additional coats.
5. Repeat: For added protection, apply 2-3 coats, allowing sufficient drying time between each coat.
For Spray Sealants:
1. Shake the Can: Shake the can well to mix the contents.
2. Hold the Can at a Distance: Hold the spray can about 12-18 inches from the surface.
3. Spray Evenly: Apply a light, even coat, moving the can in a sweeping motion to avoid pooling.
4. Drying Time: Allow the first coat to dry completely before applying additional coats.
For Gel Medium:
1. Apply with a Brush: Use a clean brush to apply a thin layer of gel medium over the painted surface.
2. Smooth Out: Smooth the medium evenly to avoid streaks.
3. Drying Time: Allow it to dry completely before applying another coat if desired.
For Wax:
1. Apply with a Cloth: Use a soft cloth to apply a thin layer of wax in a circular motion.
2. Buff the Surface: After application, buff the surface with a clean cloth to achieve the desired sheen.
3. Reapply: Wax may need to be reapplied periodically for continued protection.
Best Practices for Sealing Acrylic Paint
To achieve the best results when sealing acrylic paint, consider the following best practices:
- Test on a Sample: Always test the sealant on a small, inconspicuous area or a sample piece to ensure compatibility and desired finish.
- Use High-Quality Products: Invest in high-quality sealants to ensure durability and a professional finish.
- Follow Manufacturer Instructions: Always adhere to the specific instructions provided by the sealant manufacturer for the best results.
Comparison Table of Sealants
| Sealant Type | Finish Options | Durability | Application Method | Toxicity | Drying Time |
|---|---|---|---|---|---|
| Acrylic Varnish | Gloss, Satin, Matte | Moderate | Brush, Spray | Non-toxic | Fast |
| Polyurethane | Gloss, Satin | High | Brush | Varies | Moderate |
| Spray Sealants | Gloss, Satin | High | Spray | Varies | Fast |
| Gel Medium | Gloss | Moderate | Brush | Non-toxic | Moderate |
| Wax | Soft Luster | Low | Cloth | Non-toxic | Fast |
Frequently Asked Questions (FAQ)
Q1: How long should I wait before sealing acrylic paint?
A1: It is recommended to wait at least 24 hours for the acrylic paint to dry completely before applying a sealant.
Q2: Can I use a hair dryer to speed up the drying process?
A2: While using a hair dryer can speed up drying, it is essential to use it on a low setting and keep it at a distance to avoid damaging the paint.
Q3: What is the best sealant for outdoor acrylic paintings?
A3: For outdoor projects, a high-quality acrylic varnish or polyurethane sealant is recommended for its durability and weather resistance.
Q4: Will sealing change the color of my acrylic paint?
A4: Some sealants may slightly alter the appearance of colors, particularly if they have a glossy finish. It is best to test on a sample piece first.
Q5: How often should I reapply sealant?
A5: The frequency of reapplication depends on the environment and usage. For items exposed to high wear or outdoor conditions, reapplication may be necessary every few years.
Conclusion
Sealing acrylic paint is an essential step in preserving your artwork and ensuring its longevity. By understanding the various types of sealants available and following the proper application techniques, you can protect your creations and maintain their vibrancy for years to come. Whether you’re an experienced artist or just starting, mastering the art of sealing acrylic paint will enhance your overall artistic journey. Happy painting!