How to Prep Drywall for Paint
Painting drywall can be a rewarding DIY project that transforms any room in your home. However, proper preparation is key to achieving a smooth and professional finish. In this guide, we’ll walk you through the essential steps to prep drywall for paint, ensuring your walls look stunning and last for years to come.
Why Proper Preparation Matters
Before diving into the steps, it’s important to understand why prepping drywall for paint is crucial. Proper preparation:
- Ensures Adhesion: Clean, smooth surfaces allow paint to adhere better, reducing the chance of peeling or chipping.
- Enhances Finish: A well-prepped surface leads to an even coat, improving the overall appearance.
- Increases Durability: Properly prepared drywall is more resistant to wear and tear, extending the life of your paint job.
- Tools:
- Utility knife
- Drywall knife (6-inch and 12-inch)
- Sanding block or pole sander
- Vacuum or broom
- Paint roller and tray
- Paintbrush
- Materials:
- Joint compound
- Primer
- Drywall tape (if needed)
- Sanding sponge or paper (120-220 grit)
- Drop cloths or plastic sheeting
- Dents and dings
- Cracks
- Rough edges
- Tape seams
- Use a sanding block or pole sander with 120-220 grit sandpaper.
- Sand the repaired areas until smooth and level with the surrounding drywall.
- Tip: Wear a mask and goggles to protect yourself from dust.
- Use a vacuum or a damp cloth to wipe down the walls.
- Make sure there’s no dust left, as it can affect paint adhesion.
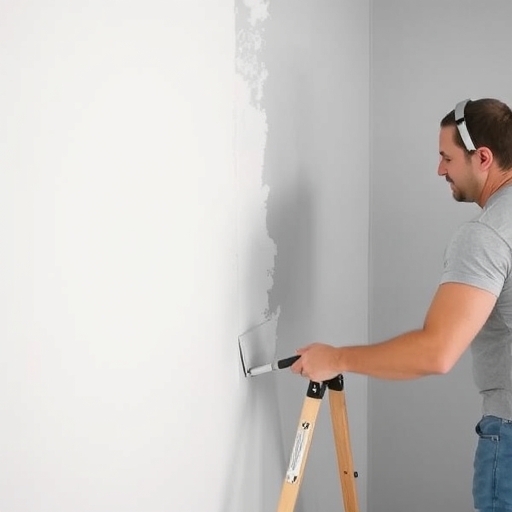
- Choose the Right Primer: Use a high-quality primer designed for drywall. This helps seal the surface and enhances paint adhesion.
- Apply the Primer: Use a paint roller for large areas and a brush for corners and edges.
- Let It Dry: Follow the manufacturer’s instructions for drying times.
- Use a fine-grit sandpaper (220 grit).
- Lightly sand the primed surface to remove any imperfections.
- Clean the dust again before painting.
- Protect Surrounding Areas: Use drop cloths to cover floors and furniture.
- Tape Off Edges: Use painter’s tape to mask off areas you don’t want to paint, like trim and windows.
Materials Needed for Drywall Preparation
Before you begin, gather the necessary materials:
Step-by-Step Guide to Prep Drywall for Paint
Step 1: Inspect the Drywall
Before you start prepping, take a close look at the drywall. Check for any imperfections, such as:
Step 2: Repair Imperfections
Filling Dents and Dings
1. Clean the Area: Remove any dust or debris from the damaged area.
2. Apply Joint Compound: Use a drywall knife to apply joint compound over the dent or ding. Feather the edges to blend it into the surrounding surface.
3. Let It Dry: Allow the compound to dry completely, following the manufacturer’s instructions.
Fixing Cracks
1. Widen the Crack: Use a utility knife to gently widen the crack. This helps the joint compound adhere better.
2. Apply Joint Tape: Place drywall tape over the crack, ensuring it adheres well.
3. Cover with Joint Compound: Apply a thin layer of joint compound over the tape, feathering the edges.
Step 3: Sand the Surface
Once the joint compound is dry, it’s time to sand the surface:
Step 4: Clean the Dust
After sanding, it’s crucial to clean the dust off the surface:
Step 5: Prime the Drywall
Priming is an essential step that prepares the drywall for paint:
Step 6: Final Sanding (Optional)
For an ultra-smooth finish, consider doing a final light sanding after the primer has dried:
Step 7: Prepare for Painting
Before you start painting, ensure the room is ready:
Comparison of Paint Types for Drywall
When choosing paint for your drywall, consider the following options:
| Paint Type | Finish Options | Best For | Pros | Cons |
|---|---|---|---|---|
| Latex Paint | Flat, Satin, Gloss | Interior walls | Easy to clean up, quick drying | May require multiple coats |
| Oil-based Paint | Semi-gloss, Gloss | Trim and moldings | Durable, smooth finish | Longer drying time, strong odor |
| Chalk Paint | Matte | Decorative finishes | Unique look, no priming needed | Less durable, requires sealing |
FAQ
How long should I wait before painting after priming?
Typically, you should wait at least 2-4 hours after priming before painting, but it’s best to follow the manufacturer’s recommendations.
Can I skip priming?
While it’s possible to paint without priming, it’s not recommended. Priming improves adhesion and ensures a more even finish.
What if I have textured drywall?
If you have textured drywall, you may need to adjust your sanding technique and use a thicker nap roller to ensure even paint application.
How can I tell if my drywall needs repair?
Look for visible imperfections, such as cracks, holes, or uneven surfaces. If you can feel blemishes with your hand or see them visually, they need repair.
Is it necessary to use a specific type of primer?
Using a primer specifically designed for drywall is recommended, as it helps seal the surface and improves paint adhesion.
Conclusion
Prepping drywall for paint may seem like a daunting task, but with the right materials and steps, you can achieve a flawless finish. Remember, the key to a successful paint job lies in thorough preparation. By following this guide, you’ll ensure that your painted drywall not only looks great but also stands the test of time. Happy painting!