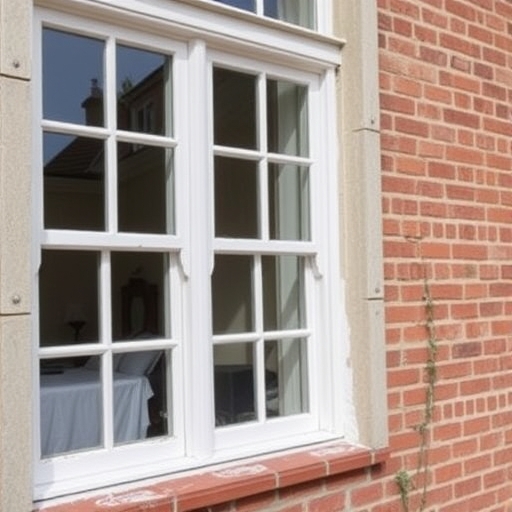
How to Paint Windows: A Comprehensive Guide
Painting windows can be a rewarding project that not only enhances the aesthetic appeal of your home but also protects the wood from the elements. Whether you are refreshing old frames or giving a new coat to recently installed windows, knowing the right techniques and materials is crucial.
We will walk you through the step-by-step process of painting windows, including preparation, painting techniques, and maintenance tips.
Why Paint Windows?
Painting windows serves several purposes:
-
- Aesthetic Appeal: A fresh coat of paint can significantly enhance the look of your home.
- Protection: Paint protects wood from moisture, UV rays, and pests.
- Increased Home Value: Well-maintained windows can boost property value.
- Energy Efficiency: Properly painted and maintained windows can improve insulation and reduce energy bills.
Materials Needed
Before you begin, gather the following materials:
-
- Paint (interior/exterior depending on window location)
- Primer (if needed)
- Paintbrushes (various sizes)
- Paint roller
- Paint tray
- Sandpaper (medium and fine grit)
- Putty knife
- Caulk and caulking gun
- Drop cloths
- Painter’s tape
- Safety goggles and mask
Preparation Steps
Cleaning the Windows
Before painting, clean the windows thoroughly to remove dirt, grime, and old paint. Use a mixture of warm water and mild detergent, and a sponge or cloth to wipe the surfaces.
Sanding the Surface
Sanding helps create a smooth surface for the paint to adhere to. Use medium-grit sandpaper (80-120 grit) for rough areas and finish with fine-grit sandpaper (220 grit) for a smooth finish.
-
- Tip: Always sand in the direction of the wood grain.
Repairing Damages
Inspect the window frames for any damages such as cracks, chips, or peeling paint. Use a putty knife to fill in any gaps with wood filler or caulk. Allow sufficient drying time as per the manufacturer’s instructions.
Protecting Surrounding Areas
To avoid paint splatters, cover surrounding areas with drop cloths and use painter’s tape to mask off edges where the window frame meets the wall or glass.
Choosing the Right Paint
Selecting the right paint is crucial for a successful window painting project.
Types of Paint
-
- Acrylic Latex Paint: Water-based, easy to clean, and suitable for both interior and exterior applications.
- Oil-Based Paint: Durable and provides a smooth finish, but requires solvents for cleanup.
- Enamel Paint: Offers a hard finish and is ideal for high-traffic areas.
Finish Options
-
- Matte: Non-reflective, hides imperfections but may not be as durable.
- Satin: Slight sheen, easier to clean, and more durable than matte.
- Gloss: Highly reflective, very durable, and easy to clean, making it ideal for window frames.
| Paint Type | Durability | Clean-Up | Best For |
|---|---|---|---|
| Acrylic Latex | Medium | Water | Indoor/Outdoor |
| Oil-Based | High | Solvent | Outdoor |
| Enamel | Very High | Solvent | High-traffic areas |
Painting Techniques
Brush vs. Roller vs. Spray
-
- Brush: Ideal for detailed work and corners. Provides good control.
- Roller: Best for larger flat areas. Can speed up the process.
- Spray: Offers a smooth finish but requires more preparation and safety measures.
Step-by-Step Painting Process
1. Apply Primer: If you’re painting bare wood or transitioning between paint types, start with a primer. Use a brush or roller for even application and allow it to dry completely.
2. First Coat of Paint: Using a high-quality paintbrush or roller, apply the first coat of paint. Start with the edges and corners using a brush, then use a roller for flat surfaces.
-
- Tip: Work in small sections to maintain a wet edge and prevent streaks.
3. Drying Time: Allow the first coat to dry as per the paint manufacturer’s instructions. This could take several hours or overnight.
4. Sand Between Coats: Lightly sand the first coat with fine-grit sandpaper to ensure a smooth finish before applying the second coat.
5. Second Coat of Paint: Apply the second coat using the same technique. This coat will provide depth and durability to the color.
6. Final Touches: After the final coat has dried, inspect the windows for any missed spots or imperfections. Touch up as needed.
Post-Painting Care
Once your windows are painted, proper care is essential for longevity:
- Avoid Harsh Cleaners: Use mild soap and water to clean painted windows.
- Regular Inspections: Check for chips or peeling paint regularly and address issues promptly.
- Repaint as Needed: Depending on exposure to elements, repaint every 5-10 years.
Frequently Asked Questions
How long does it take to paint windows?
The time required depends on the number of windows and the complexity of the job. Generally, expect to spend a few hours to a couple of days for preparation and painting, plus drying time.
Do I need to remove the glass to paint the window frames?
It is not necessary to remove the glass, but it can make painting easier. If you choose to leave the glass in place, ensure to tape it off carefully to avoid paint splatters.
Can I paint over old paint?
Yes, but ensure the old paint is in good condition. If it’s peeling or flaking, it’s best to remove it before applying new paint.
Should I paint windows in the summer or winter?
Painting in moderate temperatures is ideal. Avoid extreme heat or cold, which can affect paint application and drying times.
Conclusion
Painting windows can be a fulfilling DIY project that enhances your home’s beauty and protects your investment. By following the steps outlined in this guide, you can achieve professional-looking results. Remember to take your time during preparation and application, choose the right materials, and maintain your painted windows for years of enjoyment. Happy painting!

