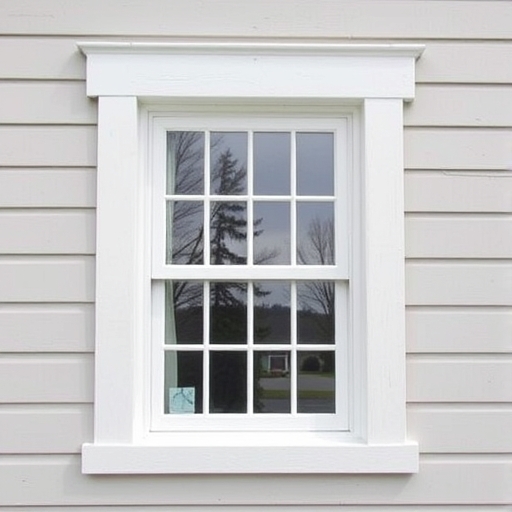
How to Paint Window Trim: A Comprehensive Guide
Painting window trim can dramatically enhance the aesthetic appeal of your home while protecting the wood from damage. This guide will walk you through everything you need to know about painting window trim, from preparation to finishing touches.
Table of Contents
- [Why Paint Window Trim?](#why-paint-window-trim)
- [Tools and Materials Needed](#tools-and-materials-needed)
- [Preparation Steps](#preparation-steps)
- [Painting Techniques](#painting-techniques)
- [Finishing Touches](#finishing-touches)
- [Maintenance Tips](#maintenance-tips)
- [Frequently Asked Questions (FAQ)](#frequently-asked-questions-faq)
- [Conclusion](#conclusion)
- Aesthetic Improvement: A fresh coat of paint can brighten up your space and make your windows stand out.
- Protection: Paint acts as a barrier against moisture, which can cause wood rot, and UV rays that can fade the trim.
- Increased Home Value: Well-maintained and attractive trim can enhance your home’s curb appeal and market value.
- Paintbrushes (angled and flat)
- Roller (if applicable)
- Painter’s tape
- Sandpaper (medium and fine grit)
- Putty knife
- Drop cloths
- Ladder (if necessary)
- Primer (if needed)
- Paint (latex or oil-based)
- Wood filler (for repairing any imperfections)
- Caulk (for sealing gaps)
- Paint thinner (for cleanup, if using oil-based paint)
- Weather Conditions: Aim for dry weather with moderate temperatures (between 50°F and 85°F) to ensure proper drying.
- Indoor vs. Outdoor: If you’re painting indoor trim, ensure proper ventilation.
- Take off any curtain rods, blinds, or window locks to avoid getting paint on them.
- Use a damp cloth to remove dust, dirt, and grease from the surface.
- For stubborn stains, consider using a mild detergent solution.
- Fill any holes or cracks with wood filler using a putty knife.
- Allow the filler to dry completely, then sand it smooth.
- Use medium-grit sandpaper to lightly sand the trim, creating a surface that paint can adhere to.
- Follow up with fine-grit sandpaper for a smooth finish.
- Use painter’s tape to protect adjacent walls, glass, and surfaces from paint splatters.
- When to Prime: If you’re working with bare wood or making a significant color change, priming is essential.
- How to Prime: Apply a thin coat of primer with a brush or roller and let it dry according to the manufacturer’s instructions.
- Latex Paint: Easy to clean up, dries quickly, and is less odorous.
- Oil-Based Paint: More durable and provides a smoother finish but requires solvents for cleanup.
- Brush Technique: Use an angled brush for corners and detailed areas. Start at the top and work your way down.
- Roller Technique: For larger areas, a roller can provide even coverage. Use a brush for edges and corners.
- Thin Coats: Apply multiple thin coats instead of one thick coat to avoid drips and runs.
- Allow the paint to dry completely between coats. Refer to the paint can for specific drying times.
- If necessary, apply a second coat of paint for better coverage and durability.
- Remove the tape before the paint is fully dry to avoid peeling.
- Inspect the trim for any missed spots or imperfections, and perform touch-ups as needed.
- Once the paint is fully cured, reattach any hardware or accessories removed earlier.
- Regular Cleaning: Wipe down the trim with a damp cloth to remove dust and grime.
- Inspect for Damage: Regularly check for chips, cracks, or peeling paint. Address issues promptly.
- Repaint as Needed: Depending on environmental conditions, you may need to repaint every 5-10 years.
Why Paint Window Trim?
Painting window trim serves several purposes:
Tools and Materials Needed
Before you begin, gather the following tools and materials:
Tools
Materials
Preparation Steps
Preparation is key to achieving a professional-looking finish. Follow these steps for optimal results:
1. Choose the Right Time
2. Remove Hardware and Accessories
3. Clean the Trim
4. Repair Imperfections
5. Sand the Surface
6. Tape Off Areas
Painting Techniques
Once you’ve prepared the trim, it’s time to paint. Here are some effective techniques:
1. Priming (If Necessary)
2. Choosing the Right Paint
3. Applying the Paint
4. Drying Time
5. Second Coat
Finishing Touches
After painting, it’s time to add the final touches:
1. Remove Painter’s Tape
2. Touch-Up
3. Reattach Hardware
Maintenance Tips
To keep your painted window trim looking fresh and new, follow these maintenance tips:
Frequently Asked Questions (FAQ)
How long does it take to paint window trim?
The total time can vary based on preparation and drying times, but expect to spend a few hours to a couple of days for the entire process.
Can I paint over old paint?
Yes, but ensure the surface is clean and the old paint is in good condition. If the paint is peeling or cracked, it’s best to strip it down or sand it smooth.
Is it better to use a brush or a roller for painting trim?
An angled brush is generally preferred for window trim due to the detail work required, but a roller can be used for larger flat surfaces.
What type of paint is best for window trim?
Latex paint is generally recommended for indoor trim due to its ease of use and quick drying time, while oil-based paint is more durable for outdoor trim.
Simple Comparison Table
| Feature | Latex Paint | Oil-Based Paint |
|---|---|---|
| Drying Time | Fast (1-2 hours) | Slow (6-8 hours) |
| Cleanup | Soap and water | Paint thinner required |
| Durability | Moderate | High |
| Odor | Low | Strong |
| Finish | Satin or semi-gloss | Gloss or semi-gloss |
Conclusion
Painting window trim is a rewarding DIY project that can significantly enhance the beauty and value of your home. By following the steps outlined in this guide and investing time in preparation and technique, you can achieve a professional-looking finish that will last for years. Remember to keep up with maintenance to ensure your trim remains in excellent condition. Happy painting!

