How to Paint Waves: A Comprehensive Guide
Painting waves can be a challenging yet rewarding endeavor for any artist. Whether you’re a beginner or an experienced painter, capturing the beauty and motion of waves can enhance your artistic skills and allow you to express the dynamic nature of water. In this article, we will explore various techniques, tools, and tips for painting waves, ensuring you have all the information you need to create stunning ocean scenes.
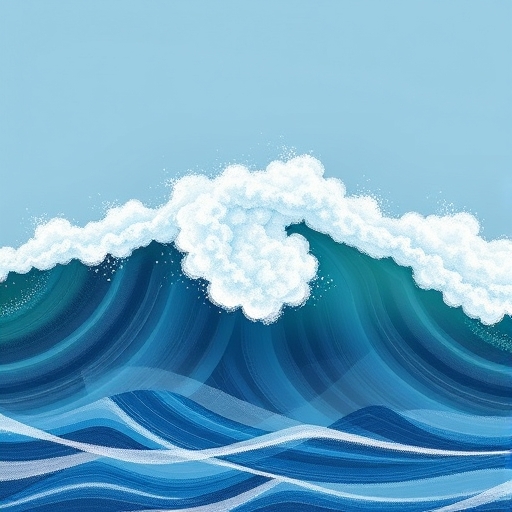
Understanding the Nature of Waves
Before diving into the painting process, it’s essential to understand the characteristics of waves. Waves are formed by the wind as it moves across the surface of the water, creating a rhythmic motion. Here are some key features to consider:
Key Characteristics of Waves
- Shape: Waves can vary in shape, including smooth curves or sharp peaks.
- Color: The color of waves changes depending on the time of day, weather conditions, and water depth.
- Movement: Waves can be calm or tumultuous, reflecting the current weather and wind conditions.
- Paints: Acrylics, oils, or watercolors are popular choices.
- Brushes: A variety of brushes, including flat, round, and fan brushes.
- Palette: For mixing colors.
- Canvas or Paper: Choose a surface that suits your chosen paint medium.
- Water Container: For cleaning brushes (if using water-based paints).
- Rags or Paper Towels: For wiping brushes and hands.
- Palette Knife: For mixing paint and creating texture.
- Spray Bottle: To keep your paints moist.
- Reference Images: Photos of waves for inspiration and guidance.
- Deep Blue: Mix ultramarine blue and a touch of black.
- Turquoise: Combine phthalo blue with white.
- White Foam: Use pure white or mix a little blue to create a cooler foam.
- Base Layer: Start with a solid base color for the water, using broad strokes to cover large areas.
- Mid-Tones: Add mid-tones to create depth. Use a slightly lighter shade of your base color.
- Highlights: Apply highlights with a lighter color, focusing on the crest and froth of the waves.
- Dry Brush Technique: Use a dry brush to apply paint lightly, creating a textured effect.
- Palette Knife: Use a palette knife to create thick, impasto effects that mimic the waves’ texture.
- Sponging: Use a sea sponge to dab on paint for a soft, blended look.
- Foam: Use a small brush to paint white foam, varying the thickness to create realism.
- Reflections: Add darker shades to represent shadows and reflections in the water.
- Background Elements: Incorporate any additional elements like clouds, boats, or the sun.
- Set up your canvas on an easel or flat surface.
- Gather all your materials within reach.
- Lightly sketch the horizon, waves, and any other elements.
- Keep the lines loose to allow for adjustments.
- Use a large brush to apply your base color.
- Work quickly to maintain a wet edge for blending.
- Gradually build up the mid-tones and highlights.
- Focus on the wave crests and where the light hits the water.
- Use various techniques to add texture to the waves.
- Experiment with different brushes and tools.
- Step back and assess your painting.
- Add any final details or corrections.
- Practice Regularly: The more you paint waves, the better you’ll become.
- Study Different Wave Types: Explore various wave forms, such as crashing waves, gentle swells, and turbulent seas.
- Experiment with Colors: Don’t be afraid to play with different color palettes to find what works best for you.
Tools and Materials Needed
To effectively paint waves, you will need the right tools and materials. Here’s a list to get you started:
Essential Tools
Optional Tools
Techniques for Painting Waves
1. Observational Study
Before you start painting, spend some time observing waves in real life or through photographs. Pay attention to their shapes, colors, and the way light interacts with the water.
2. Sketching the Composition
Start with a light pencil sketch of your scene on the canvas. Outline the horizon line, the wave shapes, and any additional elements like the beach or boats.
3. Color Mixing
Waves can have a variety of colors, from deep blues to bright whites. Here’s a simple guide to mixing colors for waves:
4. Layering Techniques
Layering is key to creating depth in your wave painting. Follow these steps:
5. Texture Creation
Texture adds realism to your painting. Here are a few techniques:
6. Detailing
Once the main elements are in place, it’s time to add details:
Step-by-Step Painting Process
Step 1: Prepare Your Workspace
Step 2: Sketch the Outline
Step 3: Paint the Base Layer
Step 4: Add Mid-Tones and Highlights
Step 5: Create Texture
Step 6: Final Touches
Tips for Success
Simple Comparison of Painting Techniques
| Technique | Description | Best For |
|---|---|---|
| Wet-on-Wet | Applying wet paint onto wet paint. | Soft blending and gradients. |
| Dry Brush | Using a dry brush to apply paint. | Texture and fine details. |
| Glazing | Layering thin, transparent colors. | Depth and luminosity. |
| Palette Knife | Applying paint with a knife. | Thick textures and impasto. |
Frequently Asked Questions (FAQ)
Q1: What paint is best for painting waves?
A1: Acrylics are often preferred for beginners due to their quick drying time and versatility. Oils provide richer colors and longer working times, while watercolors can create beautiful, ethereal effects.
Q2: How do I create realistic foam on waves?
A2: Use a small brush to apply white paint in a zigzag pattern along the wave crests. Vary the thickness and opacity for a more realistic effect.
Q3: Can I paint waves from a photograph?
A3: Absolutely! Using reference photos can help you understand the shapes, colors, and details of waves.
Q4: How do I improve my wave painting skills?
A4: Practice regularly, study different wave forms, and try out various techniques. Don’t hesitate to seek feedback from other artists.
Q5: Is it necessary to use a palette knife?
A5: No, but a palette knife can add unique textures and effects that brushes may not achieve. It’s worth experimenting with!
Conclusion
Painting waves can be both an enjoyable and educational experience. By understanding the nature of waves, using the right tools, and applying various techniques, you can create stunning ocean scenes that capture the beauty of water. Remember to practice regularly, stay patient, and let your creativity flow. With time and dedication, your ability to paint waves will improve, and you’ll find joy in each brushstroke. Happy painting!