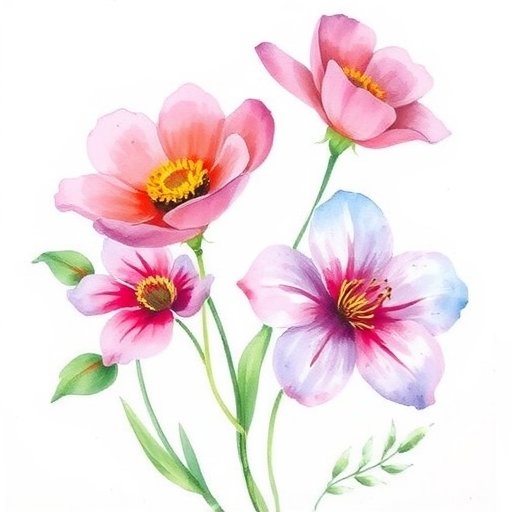
How to Paint Watercolor Flowers
Watercolor painting is a beautiful and versatile medium that allows artists to create stunning floral designs with a unique blend of colors and textures. Whether you’re a beginner or an experienced artist, painting watercolor flowers can be both enjoyable and rewarding. In this article, we will explore the steps and techniques for painting watercolor flowers, essential materials, tips for success, and frequently asked questions.
Materials Needed
Before you dive into painting, gather the necessary materials. Here’s a list of essential supplies:
Essential Supplies
-
- Watercolor Paints: Tubes or pans, preferably artist-quality for better pigmentation.
- Watercolor Brushes: A variety of sizes, including round, flat, and detail brushes.
- Watercolor Paper: 200 lb (or 425 gsm) cold-pressed paper is ideal for beginners.
- Palette: For mixing colors.
- Water Container: For rinsing brushes.
- Paper Towels or Cloth: For blotting excess water.
- Pencil: For sketching outlines.
- Masking Tape: To secure your paper and create clean edges.
Optional Supplies
-
- Salt: For texture effects.
- Plastic Wrap: To create unique patterns.
- Gouache: For opaque highlights.
Basic Techniques
Understanding some basic watercolor techniques will help you create beautiful floral paintings. Here are a few essential techniques to practice:
Wet-on-Wet
-
- Apply wet paint onto wet paper to create soft, diffused edges.
- Ideal for painting petals and leaves that need a gentle blend.
Wet-on-Dry
-
- Apply wet paint onto dry paper for more defined edges.
- Useful for adding details or layering colors.
Dry Brush
-
- Use a dry brush with a small amount of paint to create texture.
- Great for adding fine details like veins on leaves.
Glazing
-
- Apply a thin layer of transparent paint over a dry layer.
- Allows for depth and richness in color.
Step-by-Step Guide to Painting Watercolor Flowers
Now that you have your materials and techniques ready, let’s go through a step-by-step process of painting watercolor flowers.
Step 1: Choose Your Flower
Decide on the type of flower you want to paint. Popular choices include:
-
- Roses
- Sunflowers
- Peonies
- Tulips
- Daisies
Step 2: Sketch the Outline
1. Lightly sketch the flower’s shape and petals using a pencil. Keep the lines soft and avoid heavy pressure.
2. Focus on proportions and the overall shape rather than details at this stage.
Step 3: Prepare Your Palette
1. Squeeze out or activate your watercolor paints.
2. Create a color palette that includes:
-
- Base colors for petals (e.g., pinks, reds, yellows)
- Green shades for leaves and stems
- A few complementary colors for depth
Step 4: Paint the Base Layer
1. Wet the petals with clean water using a round brush.
2. Apply the base color while the paper is still wet, allowing the paint to spread naturally.
3. For petals, use a wet-on-wet technique to create soft edges.
Step 5: Add Depth and Details
1. Once the base layer is dry, add darker shades to the petals for depth. Use a wet-on-dry technique for sharper edges.
2. Layer colors gradually, building up from light to dark to create dimension.
Step 6: Paint the Leaves and Stem
1. Sketch the leaves lightly with a pencil.
2. Use green shades to paint the leaves, applying a wet-on-wet technique for a soft blend.
3. Add darker green shades for shadows and texture.
Step 7: Final Touches
1. Once everything is dry, add details using a small brush. This might include veins on leaves or highlights on petals.
2. If desired, sprinkle salt on wet paint to create texture effects.
Step 8: Remove the Masking Tape
1. Once the painting is completely dry, carefully remove any masking tape.
2. Touch up any areas as needed.
Tips for Success
- Practice Regularly: The more you paint, the better you’ll become. Practice different flowers and techniques.
- Experiment with Colors: Don’t be afraid to mix colors to find unique shades.
- Stay Loose: Avoid overthinking and allow your brushstrokes to flow naturally.
- Learn from Mistakes: Each painting is a learning experience. Analyze what works and what doesn’t.
- Use Reference Photos: Study real flowers or photos for inspiration and accuracy.
Comparison of Watercolor Techniques
| Technique | Description | Best For |
|---|---|---|
| Wet-on-Wet | Applying wet paint on wet paper | Soft blends and gradients |
| Wet-on-Dry | Applying wet paint on dry paper | Defined edges and details |
| Dry Brush | Using a dry brush for texture | Fine details and textures |
| Glazing | Layering transparent colors over dry paint | Depth and richness in color |
Frequently Asked Questions
Q1: What type of watercolor paper should I use for flowers?
A1: Use 200 lb (425 gsm) cold-pressed watercolor paper for best results. It holds water well and allows for multiple washes without warping.
Q2: Can I use regular watercolor paints for flowers?
A2: While student-grade paints can work, artist-quality paints offer better pigmentation and blending capabilities, resulting in more vibrant colors.
Q3: How do I fix mistakes in watercolor painting?
A3: You can lift wet paint with a damp brush or paper towel. For dry paint, use a clean, damp brush to soften edges, or paint over with a new layer once dry.
Q4: How do I create a background for my flower painting?
A4: Use a wet-on-wet technique to create a soft background. Light washes of color can add depth without competing with the flowers.
Q5: Is it necessary to use masking fluid?
A5: Masking fluid can be helpful for preserving white areas or highlights, but it’s not necessary. You can also paint around areas you want to keep white.
Conclusion
Painting watercolor flowers can be a delightful and fulfilling experience. With the right materials, techniques, and practice, you can create beautiful floral compositions that capture the essence of nature. Remember to enjoy the process, and don’t be afraid to explore and experiment with your style. Happy painting!