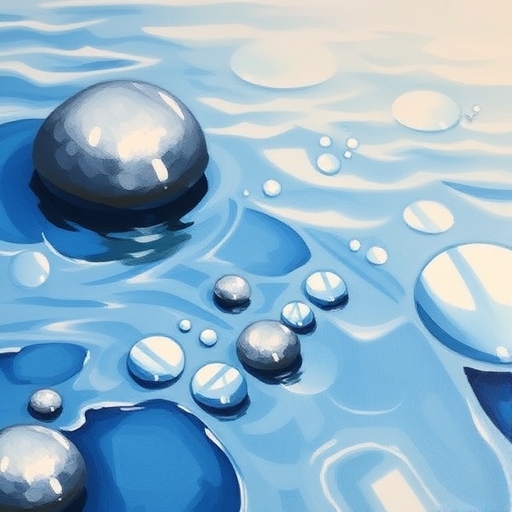
How to Paint Water With Acrylics
Painting water can be one of the most rewarding yet challenging aspects of acrylic painting. Whether you’re looking to capture the serene beauty of a lake, the dynamic movement of ocean waves, or the reflective quality of a stream, mastering the technique of painting water with acrylics can elevate your artwork to new heights. In this article, we will explore various techniques, tips, and tools you need to effectively paint water using acrylic paints.
Understanding Water
Water is a unique element in nature that reflects light and color in various ways. Understanding how to represent its different forms is crucial in painting. Here are some characteristics of water to consider:
-
- Transparency: Water can be clear or murky, affecting how colors appear beneath or within it.
- Movement: The surface of water can be still or dynamic, with ripples, waves, and reflections.
- Reflections: Objects above or near water often reflect on its surface, creating a mirror effect.
Materials You Will Need
Before you begin painting, gather the following materials:
-
- Acrylic Paints: A basic set of colors, including blues, greens, whites, and browns.
- Brushes: Various sizes, including flat, round, and detail brushes.
- Palette: For mixing colors.
- Canvas or Acrylic Paper: Choose a suitable surface for your painting.
- Water Container: For cleaning brushes.
- Paper Towels: For blotting brushes and cleaning up.
- Palette Knife: For mixing paint and creating texture.
Techniques for Painting Water
Color Mixing
Understanding how to mix colors is essential for creating realistic water. Here are some tips:
-
- Blues and Greens: Mix ultramarine blue with phthalo green for deep water. For shallower water, use lighter shades.
- Reflections: Use the colors of the objects above the water to create reflections. Mix similar colors with white to lighten them.
- Highlights: Add white or a light tint of your main color to create highlights.
Brush Techniques
Different brush techniques can simulate various water effects:
-
- Dry Brushing: Use a dry brush to create the appearance of ripples or texture on the water’s surface.
- Washing: Apply a wash of color with a wet brush for a smooth, blended look.
- Stippling: Use the tip of a brush to create the illusion of movement or texture.
Layering
Layering is a crucial technique in acrylic painting. It allows you to build depth and complexity in your water painting:
-
- Underpainting: Start with a base layer to establish color and form.
- Glazing: Apply thin layers of transparent paint to create depth.
- Highlighting: Add lighter colors on top for highlights, making the water appear dynamic.
Step-by-Step Guide to Painting Water
Setting Up Your Palette
1. Choose Your Colors: Select a palette of colors that reflects the type of water you want to paint.
2. Mix Base Colors: Mix a few shades of blue and green to create variations.
Sketching the Composition
1. Lightly Sketch: Use a pencil to lightly outline where the water will be in your composition.
2. Reference Images: Use photographs or real-life references to guide your sketch.
Painting the Base Layer
1. Apply a Wash: Start with a wash of your base color (e.g., blue for a lake or green for a river).
2. Blend: Blend the colors smoothly to create a gradient effect.
Adding Details and Highlights
1. Create Ripples: Using a lighter color, paint small horizontal strokes to suggest ripples on the water’s surface.
2. Reflections: Add darker and lighter shades below the reflections of objects above the water.
Final Touches
1. Add Texture: Use a dry brush technique to create texture on the water.
2. Final Highlights: Add final highlights with a small brush to enhance the reflective quality.
Common Mistakes to Avoid
- Overworking the Paint: Acrylics dry quickly, and overworking can lead to muddy colors.
- Ignoring Reflections: Forgetting to add reflections can make your water look flat.
- Using Too Much White: While highlights are important, too much white can make the water look unnatural.
FAQs
What colors should I use for painting water?
Use a mix of blues and greens, along with whites for highlights and darker shades for depth.
Can I use watercolors instead of acrylics for painting water?
Yes, watercolors can also effectively depict water, but acrylics offer more versatility and opacity.
How do I create the illusion of depth in water?
Layering colors, using darker shades for depth, and adding highlights can help create the illusion of depth.
How can I make my water painting look more realistic?
Focus on the reflections, use various brush techniques, and pay attention to the surrounding environment.
Conclusion
Painting water with acrylics is a skill that requires practice and patience. By understanding the properties of water, gathering the right materials, and employing effective techniques, you can create stunning representations of this beautiful element. Remember to experiment and develop your unique style, as each artist’s interpretation of water will be different. With time and practice, your ability to paint water will surely improve, allowing you to create breathtaking works of art. Happy painting!

