How to Paint Tile Floor: A Comprehensive Guide
Painting tile floors can be an affordable and transformative way to refresh the look of your home. Whether you’re looking to update an outdated bathroom or bring new life to a kitchen, painting tiles can be a DIY project that yields impressive results. In this guide, we will cover everything you need to know about how to paint tile floors, from preparation to finishing touches.
Table of Contents
1. [Understanding Tile Types](#understanding-tile-types)
2. [Materials Needed](#materials-needed)
3. [Preparation Steps](#preparation-steps)
4. [Painting Process](#painting-process)
5. [Finishing Touches](#finishing-touches)
6. [Maintenance Tips](#maintenance-tips)
7. [FAQ](#faq)
8. [Comparison Table](#comparison-table)
Understanding Tile Types
Before you start painting, it’s essential to understand the type of tile you are dealing with. Common tile types include:
- Ceramic Tiles: Often found in kitchens and bathrooms, these are durable and relatively easy to paint.
- Vinyl Tiles: These are less porous and may require special preparation.
- Porcelain Tiles: Similar to ceramic but denser and more challenging to paint due to their smooth finish.
- Natural Stone Tiles: These can be painted but may require a specific primer and sealant.
- Surface Texture: Smooth tiles may need more preparation than textured tiles.
- Tile Condition: Ensure that the tiles are in good condition; cracked or chipped tiles should be repaired before painting.
- Tile cleaner or degreaser
- Sandpaper (220-grit)
- Paintbrushes (various sizes)
- Paint roller with a tray
- Painter’s tape
- Clean cloths or rags
- Primer (specifically designed for tile)
- Tile paint or epoxy paint
- Sealant (optional, but recommended for durability)
- Gloves
- Mask
- Goggles
- Choose the Right Primer: Select a primer that is compatible with your tile type. A bonding primer is usually a good choice.
- Application: Use a paint roller for larger areas and a brush for edges and corners. Apply an even coat and allow it to dry according to the manufacturer’s instructions.
- Select Your Paint: Use a high-quality paint designed for tile or an epoxy paint for durability.
- First Coat: Apply the first coat using a roller for large areas and a brush for detailed work. Allow it to dry completely.
- Second Coat: Apply a second coat for even coverage. Depending on the color and type of paint, you may need a third coat. Make sure each coat dries completely before applying the next.
- Regular Cleaning: Use a mild soap and water solution to clean the floor. Avoid harsh chemicals that can damage the paint.
- Avoid Scrubbing: Use a soft mop or cloth instead of scrubbing brushes to prevent wear on the paint.
- Reapply Sealant: Depending on traffic, consider reapplying sealant every few years to maintain protection.
Key Considerations
Materials Needed
Gather all the materials you will need for the job before you begin. Here’s a checklist:
Essential Tools
Painting Supplies
Safety Gear
Preparation Steps
Preparation is crucial for a successful paint job. Follow these steps to ensure that your tile floor is ready for painting:
1. Clean the Tile
Thoroughly clean the tile floor using a tile cleaner or degreaser to remove any dirt, grease, or grime. Rinse well and allow it to dry completely.
2. Sand the Surface
Using 220-grit sandpaper, lightly sand the surface of the tiles. This helps the primer and paint adhere better. Be sure to vacuum up any dust after sanding.
3. Repair Any Damage
If you notice any cracks or chips in the tiles, repair them with a suitable filler. Allow the filler to dry completely before proceeding.
4. Tape Off Areas
Use painter’s tape to mask off areas you don’t want to paint, such as baseboards, walls, or fixtures. This will help achieve clean lines.
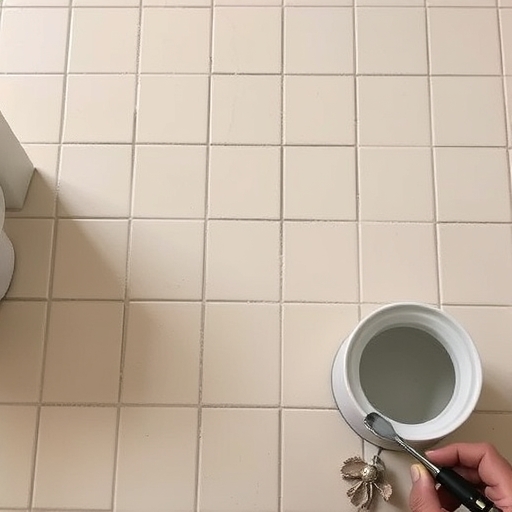
Painting Process
Now that you’ve prepared your tile floor, it’s time to start painting. Follow these steps carefully:
Step 1: Apply Primer
Step 2: Paint the Tiles
Step 3: Seal the Paint (Optional)
To enhance durability, especially in high-traffic areas, consider applying a clear sealant over the painted tiles once they are fully dry. Follow the manufacturer’s instructions for application.
Finishing Touches
Once your paint job is complete, it’s time to add the finishing touches:
1. Remove Painter’s Tape
Carefully remove the painter’s tape while the paint is still slightly tacky to ensure a clean line.
2. Allow Curing Time
Let the paint cure for at least 24-48 hours before walking on it. For heavy traffic areas, a week may be necessary before regular use.
3. Clean Up
Clean your brushes, rollers, and trays with water or the appropriate solvent, depending on the paint used.
Maintenance Tips
To keep your painted tile floor looking great, follow these maintenance tips:
FAQ
Can I paint over existing tile?
Yes, you can paint over existing tile, but proper preparation is key for the best results.
How long does painted tile last?
With proper preparation and sealing, painted tile can last several years, typically 3-5 years or longer.
Can I use regular paint on tile?
No, regular paint is not recommended for tile surfaces. Use paint specifically designed for tile or epoxy paint for durability.
Is it necessary to use primer?
Yes, using a primer is essential for ensuring the paint adheres properly to the tile surface.
Can I walk on painted tiles immediately after painting?
No, it is best to wait at least 24-48 hours before walking on painted tiles to allow the paint to cure properly.
Comparison Table: Paint Options
| Paint Type | Durability | Ease of Application | Drying Time | Cost |
|---|---|---|---|---|
| Tile Paint | Moderate | Easy | 1-2 hours | $$ |
| Epoxy Paint | High | Moderate | 6-8 hours | $$$ |
| Regular Paint | Low | Very Easy | 1-2 hours | $ |
| Chalk Paint | Moderate | Easy | 1-2 hours | $$ |
Conclusion
Painting your tile floor can be a rewarding DIY project that not only enhances the aesthetics of your space but also saves you money on renovations. By following the steps outlined in this guide, you can achieve a professional-looking finish that revitalizes your home. Remember to take your time during the preparation and painting process, and don’t hesitate to ask for help if needed. Happy painting!