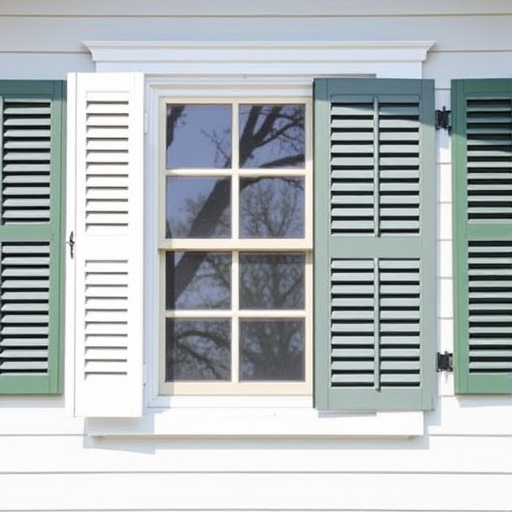
How to Paint Shutters: A Comprehensive Guide
Painting shutters can dramatically enhance the curb appeal of your home while also protecting these exterior features from the elements. Whether you’re looking to refresh the look of your shutters or change their color entirely, this guide will walk you through the steps necessary to achieve a professional finish.
Table of Contents
1. [Why Paint Your Shutters?](#why-paint-your-shutters)
2. [Materials Needed](#materials-needed)
3. [Preparing Your Shutters](#preparing-your-shutters)
4. [Choosing the Right Paint](#choosing-the-right-paint)
5. [Painting Techniques](#painting-techniques)
6. [Curing and Finishing Touches](#curing-and-finishing-touches)
7. [Maintenance Tips](#maintenance-tips)
8. [Frequently Asked Questions](#frequently-asked-questions)
9. [Conclusion](#conclusion)
Why Paint Your Shutters?
Shutters serve both functional and aesthetic purposes. Here are a few reasons why you might consider painting them:
- Enhance Curb Appeal: A fresh coat of paint can make your home look more inviting and well-maintained.
- Protect Against the Elements: Paint acts as a barrier against moisture, UV rays, and other environmental factors.
- Personalize Your Space: Changing the color can reflect your personal style and make your home stand out.
- Paintbrushes (2-inch angled brush for edges, a larger brush or roller for flat surfaces)
- Paint roller tray
- Sandpaper (120 and 220 grit)
- Drop cloths or plastic sheeting
- Painter’s tape
- Ladder (if needed)
- Exterior acrylic latex paint or oil-based paint
- Primer (if necessary)
- Paint thinner (for cleaning brushes)
- Caulk (if needed for repairs)
- Cracks: Fill them with caulk. Allow the caulk to dry according to the manufacturer’s instructions.
- Peeling Paint: Scrape off any loose paint with a paint scraper. Sand the area smooth.
- Existing Color Scheme: Ensure the new color complements your home’s exterior.
- Neighborhood Trends: Look out for colors that are popular in your area.
- Personal Preference: Ultimately, choose a color that you love!
- Lay down drop cloths to protect the ground.
- Use painter’s tape to mask off any areas you don’t want to paint, such as hinges or trim.
- Brush Method: Start with an angled brush for edges and corners, then use a roller for larger flat areas.
- Spray Method: Hold the spray can or gun about 12-18 inches away from the surface, applying in even strokes.
- Dispose of any used materials properly.
- Clean your brushes and tools with the appropriate solvent based on the type of paint used.
- Regular Cleaning: Wipe down shutters at least once a year to remove dirt and debris.
- Inspect for Damage: Check for signs of wear, such as peeling or cracking, and address them promptly.
- Touch-Up Paint: Keep a small amount of leftover paint for touch-ups if needed.
Materials Needed
Before you begin painting your shutters, gather the following materials:
Tools
Materials
Preparing Your Shutters
Preparation is key to achieving a smooth and lasting finish. Follow these steps to prepare your shutters:
Step 1: Remove the Shutters
If your shutters are removable, take them down carefully. This will allow you to work on them more easily and avoid any mess on your home’s exterior.
Step 2: Clean the Shutters
Use a mixture of water and mild detergent to clean the shutters. Scrub away dirt, dust, and any mildew. Rinse thoroughly and allow them to dry completely.
Step 3: Inspect and Repair
Check for any damage, such as cracks or peeling paint. If you find any issues, address them:
Step 4: Sand the Surface
Lightly sand the entire surface of the shutters using 120-grit sandpaper. This will help the new paint adhere better. After sanding, wipe down the shutters with a damp cloth to remove dust.
Step 5: Prime (If Necessary)
If you are painting bare wood or making a significant color change, apply a coat of primer. This will ensure better coverage and adhesion of the topcoat.
Choosing the Right Paint
Types of Paint
When selecting paint, you have several options:
| Type | Description | Best For |
|---|---|---|
| Acrylic Latex | Water-based, easy to clean, quick drying | Most shutters, especially vinyl |
| Oil-Based | Durable, provides a hard finish, takes longer to dry | Wood shutters, for a classic look |
| Spray Paint | Quick application, good for intricate designs | Detailed shutters, small projects |
Color Selection
Consider the following when choosing a color:
Painting Techniques
Step 1: Set Up Your Workspace
Step 2: Apply the First Coat
Step 3: Drying Time
Follow the manufacturer’s instructions for drying times. Typically, you’ll want to wait at least 2-4 hours before applying a second coat.
Step 4: Apply the Second Coat
Once the first coat is dry, apply a second coat for even coverage. This is especially important if you are using lighter colors over darker ones.
Curing and Finishing Touches
Step 1: Allow for Curing
After the final coat, allow the paint to cure for at least 24-48 hours before re-installing the shutters. This ensures that the paint has fully hardened.
Step 2: Reinstall the Shutters
Once the paint is cured, carefully reattach your shutters. Ensure they are level and secure.
Step 3: Clean Up
Maintenance Tips
To keep your newly painted shutters looking great, consider the following maintenance tips:
Frequently Asked Questions
How long will the paint last on my shutters?
Typically, well-applied exterior paint can last anywhere from 5 to 10 years, depending on the quality of the paint and the environmental conditions.
Can I paint vinyl shutters?
Yes, you can paint vinyl shutters, but it’s essential to use a paint specifically designed for vinyl surfaces to ensure proper adhesion and durability.
Should I remove the shutters for painting?
While it’s not strictly necessary, removing the shutters allows for better access and can help achieve a more professional finish.
How can I prevent paint from peeling?
Proper preparation, including cleaning, sanding, and priming, is crucial to prevent peeling. Additionally, choose high-quality paint designed for exterior use.
Conclusion
Painting your shutters can be a rewarding DIY project that enhances the beauty and longevity of your home. By following the steps outlined in this guide, you can achieve a professional-looking finish that adds character to your property. Remember to take your time during the preparation phase, choose the right materials, and enjoy the process of transforming your shutters!