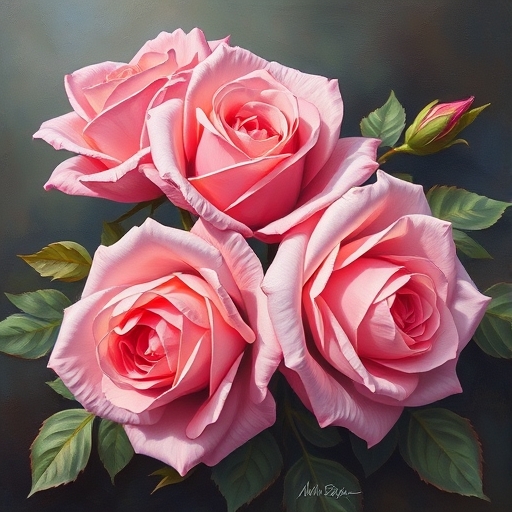
How to Paint Roses: A Comprehensive Guide
Roses are one of the most beloved flowers in the world, known for their beauty and symbolism. Painting roses can be a delightful experience, whether you’re an amateur artist or a professional looking to refine your skills. This article will guide you through the process of painting roses, from the materials you’ll need to the techniques that will help you create stunning and lifelike representations of these beautiful flowers.
Materials Needed
Before diving into the painting process, gather the following materials:
Essential Supplies
-
- Paints: Acrylics, watercolors, or oils (choose based on your preference)
- Brushes: A variety of sizes (round, flat, detail)
- Canvas or Paper: Suitable for your chosen medium
- Palette: For mixing colors
- Water Container: For rinsing brushes (if using water-based paints)
- Paper Towels or Rags: For cleaning brushes and dabbing excess paint
Optional Supplies
-
- Pencil: For sketching outlines
- Eraser: For correcting mistakes
- Varnish: To protect finished paintings
- Reference Images: Photos of roses for inspiration
Understanding Rose Structure
To paint roses effectively, it’s important to understand their structure. This knowledge will help you capture the essence of the flower in your artwork.
Anatomy of a Rose
-
- Petals: Soft, delicate, and often layered; the colors can vary significantly.
- Sepals: Green structures that protect the bud before it blooms.
- Stems: Typically green and thorny, supporting the flower.
- Leaves: Usually dark green with serrated edges, providing a beautiful contrast to the petals.
Color Variations
Roses come in a myriad of colors, including:
-
- Red
- Pink
- Yellow
- White
- Orange
- Blue (dyed)
Understanding these colors will help you mix the right shades and create realistic representations.
Choosing Your Style
Decide on the style you want to pursue:
-
- Realistic: Focus on accurate colors and details.
- Abstract: Emphasize shapes and colors over realism.
- Impressionistic: Capture the essence of the rose with loose brushwork.
Comparison Table of Painting Styles
| Style | Characteristics | Best For |
|---|---|---|
| Realistic | Detailed, true-to-life colors | Portraits, botanical illustrations |
| Abstract | Bold colors, shapes, and forms | Modern art, expressive pieces |
| Impressionistic | Loose brush strokes, vibrant colors | Landscape, floral compositions |
Basic Techniques for Painting Roses
Brush Techniques
-
- Wet-on-wet: Apply wet paint on wet surfaces for soft blends.
- Dry brush: Use a dry brush for texture and detail.
- Glazing: Layer transparent paint to create depth.
Color Mixing
-
- Primary Colors: Red, blue, and yellow.
- Secondary Colors: Mix primary colors (e.g., red + yellow = orange).
- Tints and Shades: Add white for tints and black for shades.
Layering
Building up layers will add dimension to your roses. Start with a base color and gradually add highlights and shadows.
Step-by-Step Guide to Painting Roses
Now that you have the materials and techniques down, let’s walk through the process of painting a rose.
Step 1: Sketch the Outline
-
- Use a pencil to lightly sketch the basic shape of the rose. Focus on the placement of petals and leaves.
Step 2: Base Color
-
- Mix your base color and apply it to the petals using a flat brush. Start from the center and work your way outwards.
Step 3: Add Shadows
-
- Use a darker shade of your base color to create shadows. Focus on areas where petals overlap or where the light doesn’t hit directly.
Step 4: Highlight
-
- Mix a lighter shade or add white to your base color. Apply this to the edges of the petals to give them dimension.
Step 5: Paint the Leaves
-
- Use different shades of green for the leaves, adding shadows and highlights to create depth.
Step 6: Final Details
-
- Add fine details with a small brush, such as veins on the leaves and texture on the petals.
Step 7: Background
-
- Consider painting a simple background that complements the rose. Soft colors like light blue or creamy tones work well.
Step 8: Varnish (Optional)
-
- Once dry, apply a varnish to protect your painting and enhance its vibrancy.
Tips for Enhancing Your Rose Paintings
-
- Experiment with Color: Don’t be afraid to mix colors and create unique shades.
- Practice Patience: Allow layers to dry before adding more to avoid muddy colors.
- Use Reference Images: Study real roses to understand their nuances.
- Try Different Brushes: Different brushes can create various textures; experiment to find what works best for you.
Common Mistakes to Avoid
- Rushing the Process: Take your time to develop layers and details.
- Neglecting Composition: Consider the overall layout—balance your rose with surrounding elements.
- Overworking Areas: It’s easy to get carried away; know when to stop to maintain freshness in your painting.
FAQs
What type of paint is best for beginners?
Acrylic paints are often recommended for beginners due to their fast drying time and ease of use.
How can I make my roses look more realistic?
Focus on color variation, layering, and understanding light and shadow.
Can I paint roses on different surfaces?
Yes, roses can be painted on canvas, paper, wood, and even fabric.
How do I clean my brushes?
Use warm, soapy water for water-based paints; for oils, use a solvent like turpentine.
What should I do if I make a mistake?
You can either paint over it or use a damp cloth to wipe away wet paint. For dried acrylics, you may need to paint over it with a new layer.
Conclusion
Painting roses can be a rewarding and enjoyable artistic endeavor. With the right materials, techniques, and a little practice, you can create stunning representations of these beautiful flowers. Remember to take your time, experiment with colors and styles, and most importantly, enjoy the process. Happy painting!

