How to Paint Clouds: A Comprehensive Guide
Painting clouds can be a rewarding experience, allowing artists to express themselves through the beauty of the sky. Whether you’re a beginner or an experienced artist, understanding the techniques and nuances of painting clouds can elevate your artwork. In this guide, we will explore various methods, materials, and tips to help you master the art of painting clouds.
Understanding Clouds
Before you start painting, it’s essential to understand what clouds are and their different types. Clouds are formed from water vapor that condenses into tiny droplets or ice crystals. They can vary in shape, size, and color, influenced by factors like weather conditions and time of day.
Types of Clouds
-
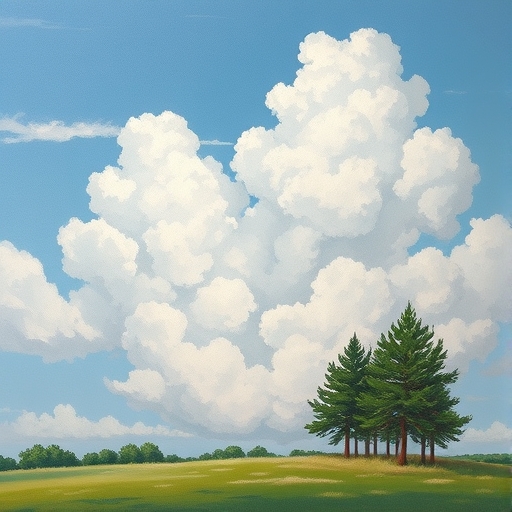
- Cumulus: Fluffy, white clouds with a flat base, often seen on sunny days.
- Stratus: Low, gray clouds that cover the sky like a blanket.
- Cirrus: Thin, wispy clouds high in the atmosphere, usually indicating fair weather.
- Nimbostratus: Thick, dark clouds that bring continuous rain.
- Cumulonimbus: Towering clouds associated with thunderstorms.
Materials Needed
To paint clouds effectively, you will need the right materials. Here’s a list of essential supplies:
Basic Supplies
-
- Canvas or Paper: Choose a suitable surface based on your medium.
- Paints: Acrylic, oil, or watercolor paints.
- Brushes: A variety of brushes (flat, round, and fan brushes) in different sizes.
- Palette: For mixing colors.
- Water Container: For cleaning brushes (especially for watercolors).
- Paper Towels or Rags: For wiping brushes and cleaning up.
Optional Supplies
-
- Palette Knife: For mixing and applying paint.
- Spray Bottle: To keep the paint moist when working with acrylics.
- Sponges: For texture effects.
- Reference Images: Photos of clouds for inspiration.
Techniques for Painting Clouds
There are several techniques you can use to create stunning cloudscapes. Each method offers unique results, so feel free to experiment.
Wet-on-Wet Technique
The wet-on-wet technique involves applying wet paint onto a wet surface. This method allows colors to blend seamlessly, creating soft edges typical of clouds.
Steps:
1. Wet your canvas with clean water.
2. Use a large brush to apply a base color (like light blue for the sky).
3. While the paint is still wet, add white or lighter colors for the clouds and blend.
Dry Brush Technique
The dry brush technique uses a brush with very little paint, allowing you to create texture and detail.
Steps:
1. Choose a stiff brush and dip it lightly into paint.
2. Wipe off excess paint on a paper towel.
3. Using quick, light strokes, apply paint to create the appearance of wispy clouds.
Glazing Technique
Glazing involves layering transparent colors over dried paint to create depth and luminosity.
Steps:
1. Paint your base layer and let it dry completely.
2. Mix a transparent color (like a light gray or blue) with a glazing medium.
3. Apply the glaze over the dried layer, allowing the base color to show through.
Color Mixing for Clouds
Clouds can appear in various colors depending on the time of day and weather conditions. Here’s a simple color mixing guide to help you create realistic cloud colors.
Color Palette for Clouds
| Time of Day | Base Color | Highlight Color | Shadow Color |
|---|---|---|---|
| Morning | Light Blue | White | Soft Gray |
| Noon | Bright Blue | White | Pale Blue |
| Sunset | Warm Orange | Pale Yellow | Deep Purple |
| Stormy Weather | Dark Gray | Off-White | Charcoal Gray |
Tips for Color Mixing
-
- Use a limited palette: This helps maintain harmony in your painting.
- Experiment with tints and shades: Add white to lighten colors or black to darken them.
- Observe real clouds: Pay attention to how light interacts with clouds in different conditions.
Step-by-Step Guide to Painting Clouds
Now that you understand the materials and techniques, let’s go through a step-by-step guide to painting clouds.
Step 1: Prepare Your Workspace
-
- Set up your canvas or paper on an easel or flat surface.
- Gather all your materials and ensure good lighting.
Step 2: Sketch the Basic Shape
-
- Lightly sketch the outline of your clouds with a pencil. Focus on the general shapes and sizes.
Step 3: Apply the Sky Color
-
- Use a large brush to paint the sky background. Start with a light blue and blend in darker shades as you move away from the horizon.
Step 4: Add the Clouds
-
- Using the wet-on-wet technique, add a base color for the clouds, focusing on the areas where you want them to appear.
Step 5: Build Texture
-
- Switch to a smaller brush or a dry brush technique to build the texture of the clouds. Use white and other lighter colors to highlight areas.
Step 6: Add Depth
-
- Use a glazing technique to add depth to the clouds. Apply transparent colors over the dried base layer to create dimension.
Step 7: Final Touches
-
- Step back and assess your painting. Add any final highlights or shadows to enhance the clouds’ realism.
Tips for Painting Realistic Clouds
-
- Study Cloud Formations: Take time to observe and study real clouds. Note their shapes, colors, and how they change with light.
- Use References: Keep reference images handy to guide your painting.
- Practice: The more you paint clouds, the better you will become. Don’t hesitate to experiment with different styles and techniques.
- Be Patient: Allow layers to dry before adding more details. This will prevent muddy colors and help maintain clarity.
Common Mistakes and How to Avoid Them
Mistake 1: Overworking the Paint
-
- Solution: Keep your brushstrokes light and avoid excessive blending.
Mistake 2: Using Too Many Colors
-
- Solution: Stick to a limited color palette for cohesion and harmony.
Mistake 3: Neglecting the Background
- Solution: Ensure the sky background complements the clouds. A well-painted background enhances the overall composition.
Cloud Types and Their Characteristics
Understanding the different types of clouds can help you paint them more accurately. Here’s a quick overview:
| Cloud Type | Characteristics | Painting Tips |
|---|---|---|
| Cumulus | Fluffy, white, cotton-like | Use bright whites and soft blues. |
| Stratus | Layered, gray, uniform | Blend shades of gray for depth. |
| Cirrus | Wispy, thin, high-altitude | Use light, transparent strokes. |
| Nimbostratus | Thick, dark, rain-bearing | Use dark grays and blues. |
| Cumulonimbus | Tall, dense, storm clouds | Layer whites with grays for drama. |
FAQ
What medium is best for painting clouds?
Acrylics are popular due to their quick drying time and versatility, but oils and watercolors can also produce stunning results.
How can I make my clouds look more realistic?
Focus on color variation, use different techniques to create texture, and study real cloud formations.
Can I paint clouds without a reference?
While it’s possible, using references can help you capture the nuances and variations in cloud formations more accurately.
How do I fix mistakes in my cloud painting?
If you make a mistake, you can either paint over it once it’s dry or use a damp brush to lift some paint while it’s wet.
Conclusion
Painting clouds can be a delightful and fulfilling endeavor for artists of all skill levels. By understanding the different types of clouds, mastering various painting techniques, and practicing regularly, you can create stunning cloudscapes that capture the beauty of the sky. Remember to have fun with the process, and don’t be afraid to experiment with colors and styles. Happy painting!