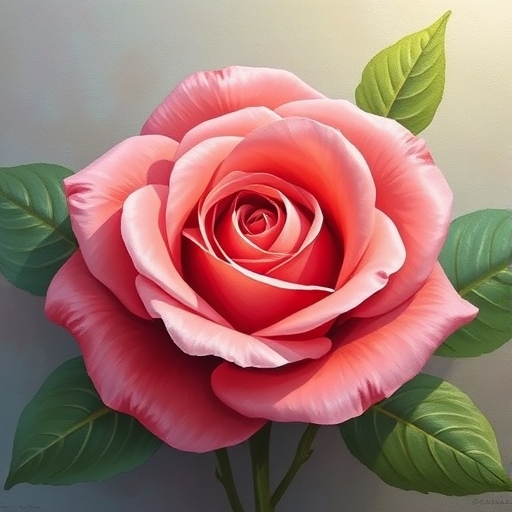
How to Paint a Rose: A Comprehensive Guide
Painting a rose can be a rewarding experience, whether you are a beginner or a seasoned artist. With its intricate details and vibrant colors, a rose provides a beautiful subject for any painting project. In this article, we will explore the step-by-step process of painting a rose, the materials you will need, techniques to enhance your painting, and answers to some frequently asked questions.
Table of Contents
- [Materials Needed](#materials-needed)
- [Step-by-Step Guide to Painting a Rose](#step-by-step-guide-to-painting-a-rose)
- [Step 1: Sketching the Outline](#step-1-sketching-the-outline)
- [Step 2: Base Layer](#step-2-base-layer)
- [Step 3: Adding Depth and Shadows](#step-3-adding-depth-and-shadows)
- [Step 4: Detailing the Petals](#step-4-detailing-the-petals)
- [Step 5: Painting the Leaves and Background](#step-5-painting-the-leaves-and-background)
- [Step 6: Final Touches](#step-6-final-touches)
- [Techniques for Painting a Rose](#techniques-for-painting-a-rose)
- [Common Mistakes to Avoid](#common-mistakes-to-avoid)
- [Comparison of Painting Mediums](#comparison-of-painting-mediums)
- [Frequently Asked Questions](#frequently-asked-questions)
- [Conclusion](#conclusion)
- Canvas or Paper: Choose a surface suitable for your medium (canvas for acrylic/oil, watercolor paper for watercolor).
- Pencils: For sketching the outline.
- Eraser: To correct any mistakes.
- Paintbrushes: Various sizes (flat, round, detail).
- Palette: For mixing colors.
- Water Container: If using water-based paints.
- Paper Towels: For cleaning brushes and hands.
- Acrylic Paints: Fast-drying, versatile, and easy to use.
- Oil Paints: Rich in color and texture, but take longer to dry.
- Watercolors: Great for soft, translucent effects.
- Palette Knife: For mixing and applying paint.
- Varnish: To protect your finished painting.
- Color Wheel: To help with color selection.
- Wet-on-Wet: This technique involves applying wet paint onto wet paint for a soft, blended look.
- Dry Brush: Use a dry brush to create texture and highlights by brushing lightly over dry paint.
- Glazing: Apply a thin, transparent layer of paint over a dry layer to modify the color without losing the underlying detail.
- Scumbling: Lightly brushing a thin layer of lighter color over a dry layer to create a textured effect.
- Overworking the Paint: Avoid excessive blending that can muddy your colors.
- Ignoring Light Source: Always consider where the light is coming from to create accurate highlights and shadows.
- Skipping the Sketch: A good outline helps guide your painting and keeps proportions accurate.
- Using Too Much Water: If using acrylics or oils, too much water can dilute the paint and affect its vibrancy.
Materials Needed
Before you begin painting, gather the following materials:
Basic Supplies
Paints
Optional Supplies
Step-by-Step Guide to Painting a Rose
Step 1: Sketching the Outline
1. Choose Your Reference: Find a clear image of a rose or use a real rose as your reference.
2. Lightly Sketch: With a pencil, lightly sketch the outline of the rose on your canvas. Focus on the shape of the petals and the general layout.
3. Add Details: Sketch the center of the rose and the leaves. Keep your lines light so they won’t show through the paint.
Step 2: Base Layer
1. Mix Your Colors: For a standard red rose, mix red with a little white for lighter areas and a touch of black or dark red for shadows.
2. Apply the Base Color: Use a larger brush to apply the base color to the petals. Cover the entire area, leaving the highlights lighter.
3. Let it Dry: Allow the base layer to dry completely before proceeding.
Step 3: Adding Depth and Shadows
1. Mix Shadow Colors: Darken your base color slightly to create a shadow mix.
2. Apply Shadows: Use a smaller brush to apply shadows in the folds of the petals. Pay attention to where the light hits the rose.
3. Blend Carefully: Blend the shadow color into the base layer using a dry brush technique or a clean brush.
Step 4: Detailing the Petals
1. Highlighting: Mix a lighter shade of your base color and apply it to the areas where the light hits the petals.
2. Petal Details: Use a fine brush to add details like veins and texture to the petals.
3. Layering: Continue to layer colors until you achieve the desired depth and realism.
Step 5: Painting the Leaves and Background
1. Paint the Leaves: Use a green mix for the leaves, applying darker shades for shadows and lighter shades for highlights.
2. Background: Choose a background color that complements the rose. Soft blues or greens can help the rose stand out.
3. Blend Background: If using acrylics or oils, blend the background colors to create a smooth transition.
Step 6: Final Touches
1. Review Your Work: Step back and look at your painting from a distance. Make any necessary adjustments.
2. Add Details: Add any final details to the rose and leaves, such as additional highlights or shadows.
3. Varnish: Once dry, apply a coat of varnish to protect your painting.
Techniques for Painting a Rose
Common Mistakes to Avoid
Comparison of Painting Mediums
| Medium | Pros | Cons |
|---|---|---|
| Acrylic | Fast drying, easy to clean | Can dry quickly on palette |
| Oil | Rich colors, blendable | Long drying time, requires solvents |
| Watercolor | Transparent effects, easy to layer | Can be unpredictable, less control |
Frequently Asked Questions
What is the best medium for painting a rose?
Acrylic paints are often recommended for beginners due to their fast drying time and ease of use. However, oil paints can provide richer textures and colors if you are more experienced.
How long does it take to paint a rose?
The time it takes to paint a rose can vary depending on your skill level and the complexity of the painting. A simple rose might take a couple of hours, while a more detailed piece could take several days.
Can I use a photo as a reference?
Yes! Using a photo as a reference can help you capture details and colors accurately. Just ensure you have permission to use the photo if it’s not your own.
Is it necessary to use a varnish?
Varnish is not necessary, but it can protect your painting from dust, UV light, and moisture, extending its lifespan.
Conclusion
Painting a rose can be a delightful and fulfilling creative project. With the right materials, techniques, and a bit of practice, you can create a stunning piece of art that captures the beauty of this classic flower. Remember to take your time, enjoy the process, and don’t be afraid to make mistakes along the way. Happy painting!