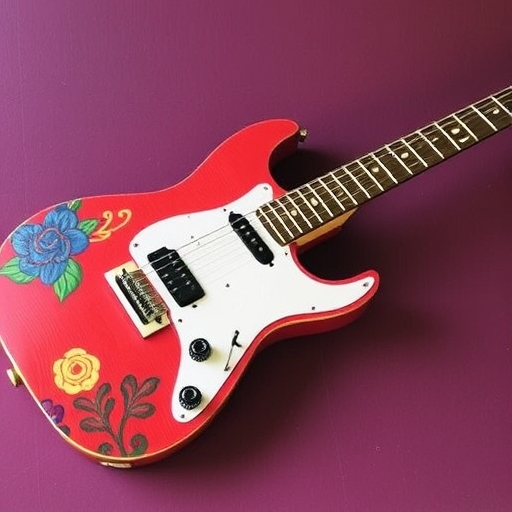
How to Paint a Guitar: A Step-by-Step Guide
Painting a guitar can be a rewarding project that allows you to customize your instrument and express your personal style. Whether you’re looking to refresh an old guitar or create a unique piece of art, this guide will walk you through the process of painting a guitar from start to finish.
Table of Contents
1. [Understanding Your Guitar](#understanding-your-guitar)
2. [Materials Needed](#materials-needed)
3. [Preparation Steps](#preparation-steps)
4. [Painting Techniques](#painting-techniques)
- [Spray Painting](#spray-painting)
- [Brushing](#brushing)
- [Airbrushing](#airbrushing)
- Solid Wood: Offers a natural look and feel; requires careful handling.
- Laminated Wood: More durable and less expensive; easier to paint.
- Plastic: Common in budget models; can be painted but may require specific types of paint.
- Sandpaper (various grits: 120, 220, 400)
- Masking Tape
- Paint Primer (suitable for wood or plastic)
- Paint (spray paint, acrylic, or enamel)
- Clear Coat (polyurethane or nitrocellulose)
- Brushes (if using acrylic paint)
- Dust Mask and Gloves
- Drop Cloth (to protect your workspace)
- Remove the strings carefully.
- Take off any hardware (pickups, knobs, etc.) to avoid paint splatters.
- Use a damp cloth to remove dust and grime.
- Ensure the surface is completely dry before proceeding.
- Start with 120-grit sandpaper to remove the old finish.
- Progress to 220-grit for a smooth surface.
- Wipe down the guitar with a clean cloth to remove dust.
- Use masking tape to cover areas you don’t want to paint, such as the fretboard, neck, and hardware.
- Lightly sand the painted surface with 400-grit sandpaper to smooth out imperfections.
- For added protection, apply one or two more coats of clear coat, sanding lightly between coats.
- Once everything is dry, carefully reattach the hardware and strings.
- Avoid Direct Sunlight: Keep the guitar out of direct sunlight to prevent fading.
- Use a Soft Cloth: Clean the surface with a soft, dry cloth after each use.
- Store Properly: Use a case or stand to protect it from damage.
5. [Finishing Touches](#finishing-touches)
6. [Caring for Your Painted Guitar](#caring-for-your-painted-guitar)
7. [Conclusion](#conclusion)
8. [FAQ](#faq)
Understanding Your Guitar
Before you begin painting, it’s essential to understand the type of guitar you’re working with. Guitars can be made from various materials, including:
Types of Guitars
| Guitar Type | Common Materials | Paint Compatibility |
|---|---|---|
| Electric | Mahogany, Alder | Most paints work well |
| Acoustic | Spruce, Mahogany | Requires prep for best results |
| Bass | Various woods | Similar to electric guitars |
| Ukulele | Various woods | Light paints recommended |
Materials Needed
Gather the necessary materials before you start painting your guitar. Here’s a list of essential items:
Tools and Supplies
Preparation Steps
Proper preparation is crucial for achieving a professional-looking finish. Follow these steps to prepare your guitar for painting:
Step 1: Disassemble the Guitar
Step 2: Clean the Surface
Step 3: Sand the Guitar
Step 4: Mask Off Areas
Painting Techniques
Now that your guitar is prepared, it’s time to paint. Here are three popular painting techniques:
Spray Painting
Spray painting is one of the most common methods for painting guitars due to its ease and ability to create a smooth finish.
Steps for Spray Painting:
1. Apply Primer: Hold the spray can 6-12 inches away and apply thin coats. Let each coat dry before applying the next (follow manufacturer instructions).
2. Paint the Guitar: Use the same technique as the primer, applying several thin layers of color. Allow adequate drying time between coats.
3. Finish with Clear Coat: Once the paint is dry, apply a clear coat to protect the finish.
Brushing
Brushing is ideal for smaller areas or detailed work.
Steps for Brushing:
1. Prepare Your Brush: Use a high-quality brush to avoid streaks.
2. Apply Paint: Use long, even strokes to apply paint. Work in small sections.
3. Allow to Dry: Like spray painting, allow each coat to dry completely before adding another.
Airbrushing
Airbrushing allows for intricate designs and gradients.
Steps for Airbrushing:
1. Set Up Your Airbrush: Follow the manufacturer’s instructions to set up your airbrush.
2. Thin Your Paint: Use a suitable thinner to ensure smooth application.
3. Practice on a Test Surface: Before painting your guitar, practice on cardboard or wood scraps.
4. Apply Paint: Use even strokes and maintain a consistent distance from the surface.
Finishing Touches
After the paint has dried, it’s time to add the finishing touches.
Step 1: Sand the Surface
Step 2: Apply Additional Clear Coat
Step 3: Reassemble the Guitar
Caring for Your Painted Guitar
To maintain the beauty of your newly painted guitar, follow these care tips:
Conclusion
Painting a guitar can seem daunting, but with the right preparation, materials, and techniques, you can create a stunning custom instrument that reflects your personality. Remember to take your time and enjoy the process!
FAQ
How long does it take to paint a guitar?
The total time can vary depending on drying times, but expect the process to take several days, including preparation, painting, and drying.
Can I paint over an existing finish?
Yes, but it’s essential to sand the existing finish to ensure proper adhesion of the new paint.
Is it better to spray paint or brush paint?
Spray painting is generally easier for larger surfaces and produces a smoother finish, while brushing allows for more detailed work.
What kind of paint should I use?
Acrylic or enamel paints are commonly used for guitars, but make sure they are suitable for the material of your guitar.
Can I use regular spray paint from a hardware store?
While you can, it’s advisable to use paints specifically designed for guitar finishes to ensure durability and a professional look.
By following this guide, you’ll be well on your way to creating a beautifully painted guitar that you can proudly show off. Happy painting!

