How to Paint a Galaxy: A Step-by-Step Guide
Creating a stunning galaxy painting can be a rewarding experience for artists of all skill levels. Whether you’re a beginner or an experienced painter, this guide will walk you through the steps necessary to create a mesmerizing galaxy scene. We’ll cover the materials needed, techniques, and tips to enhance your artwork.
Materials Needed
Before you dive into painting, gather the following materials:
| Material | Description |
|---|---|
| Canvas or Paper | Choose a size that suits your preference. |
| Acrylic or Oil Paint | A variety of colors including black, blue, purple, white, and pink. |
| Brushes | Flat brushes for blending and round brushes for stars. |
| Palette | For mixing colors. |
| Water or Solvent | For cleaning brushes (water for acrylics, solvent for oils). |
| Rags or Paper Towels | For cleaning and wiping brushes. |
| Palette Knife | For mixing paint and creating texture. |
| Spray Bottle | Filled with water for misting your painting. |
Preparing Your Workspace
Creating a comfortable and organized workspace is essential for a successful painting session. Here’s how to set up:
1. Choose a Well-Lit Area: Natural light is best, but bright artificial light works too.
2. Protect Your Surface: Use a drop cloth or old newspapers to protect your table or floor.
3. Organize Your Materials: Keep your paints, brushes, and water within easy reach.
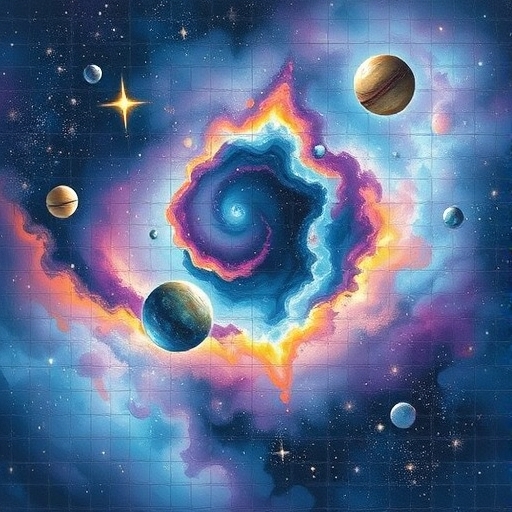
4. Have a Reference Image: Look for galaxy images online or use your imagination as a guide.
Basic Techniques for Painting a Galaxy
Before starting your galaxy painting, familiarize yourself with these basic techniques:
Blending Colors
-
- Wet-on-Wet Technique: Apply wet paint over wet paint for smooth blending.
- Dry Brush Technique: Use a dry brush to lightly blend colors for a softer look.
- Layering: Build up layers of color gradually to create depth.
Creating Stars
-
- Splatter Technique: Dip a stiff brush into white paint and flick it onto your canvas for a starry effect.
- Dot Technique: Use a small round brush to create individual stars by dabbing white paint.
Adding Nebulae
-
- Soft Brush Technique: Use a soft brush to create wispy clouds of color.
- Glazing: Apply a thin layer of paint over dried layers to add depth and luminosity.
Step-by-Step Painting Process
Follow these steps to create your galaxy painting:
Step 1: Base Layer
1. Prepare Your Canvas: Use a black or dark blue base coat to represent the night sky.
2. Apply Base Layer: Use a large flat brush to cover the entire canvas with your chosen base color. Allow it to dry.
Step 2: Create the Galaxy Background
1. Blend Colors: Using a range of colors (blue, purple, pink), apply them in a circular motion around the canvas to create the illusion of depth.
2. Layering: Continue to layer colors, blending them softly into one another.
Step 3: Add Nebulae
1. Select Colors: Choose lighter shades (light blue, pink, or lavender).
2. Apply Nebulae: Use a soft brush to create wispy shapes, focusing on areas where you want the nebulae to stand out. Blend edges into the background.
Step 4: Create Stars
1. Splatter Stars: Dip a stiff brush in white paint and flick it onto the canvas to create a starry sky.
2. Dot Individual Stars: Use a small round brush to add larger stars by dabbing white paint in various sizes.
Step 5: Final Touches
1. Add Details: Use a fine brush to add details to your nebulae or create star clusters.
2. Glazing: If desired, apply a thin glaze of color over certain areas to enhance luminosity.
Step 6: Let it Dry
Allow your painting to dry completely before displaying it or adding any varnish.
Tips for a Successful Galaxy Painting
-
- Experiment: Don’t be afraid to try different techniques and color combinations.
- Use Reference Images: They can provide inspiration and help you understand color relationships.
- Practice: The more you paint galaxies, the better you will become at blending and creating textures.
- Be Patient: Allow layers to dry before adding more paint to avoid muddiness.
Comparison of Painting Mediums
Different painting mediums can yield varying results in galaxy paintings. Here’s a quick comparison:
| Medium | Pros | Cons |
|---|---|---|
| Acrylic | Fast-drying, easy to clean, vibrant colors | Can dry quickly, limiting blending time |
| Oil | Rich colors, excellent blending capabilities | Longer drying time, requires solvents |
| Watercolor | Transparent layers, great for soft effects | Less control over opacity, can be unpredictable |
| Digital | Undo function, endless color options | Requires technology and software |
Frequently Asked Questions
What colors should I use for a galaxy painting?
-
- Use a mix of dark colors (like black and navy) for the background and vibrant colors (like purple, blue, pink, and white) for stars and nebulae.
How can I make my stars look more realistic?
-
- Vary the size and brightness of your stars. Use different techniques like splattering and dabbing for diversity.
Can I paint a galaxy on different surfaces?
-
- Yes! You can paint on canvas, wood, or even paper. Just ensure the surface is prepared correctly for the medium you choose.
How long does it take for a galaxy painting to dry?
-
- Acrylic paintings dry relatively fast (within a few hours), while oil paintings may take days to weeks depending on thickness.
What should I do if I make a mistake?
- Acrylic paint can be easily painted over once dry, while oil paint requires more time. Always have a plan to cover mistakes, whether through layering or blending.
Conclusion
Painting a galaxy can be a fun and fulfilling endeavor, allowing artists to express their creativity and imagination. By following the steps outlined in this guide and experimenting with different techniques and colors, you’ll be able to create your own stunning celestial artwork. Remember to enjoy the process, embrace mistakes, and let your creativity flow. Happy painting!