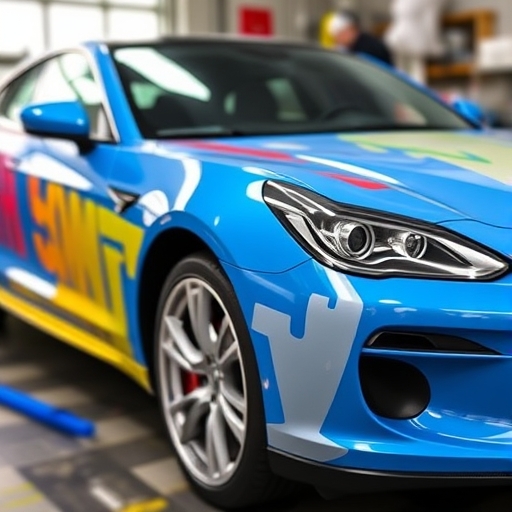
How to Paint a Car Yourself
Painting your car can be a rewarding project that not only enhances the vehicle’s appearance but also protects it from rust and wear. While it may seem daunting, with the right tools, techniques, and a little patience, you can achieve professional-looking results in your garage or driveway. This guide will walk you through the entire process of painting a car yourself, from preparation to finishing touches.
Tools and Materials Needed
Before you begin, gather the necessary tools and materials. Here’s a comprehensive list:
Tools
-
- Sandpaper (various grits: 80, 220, 400)
- Paint sprayer or spray cans
- Masking tape
- Drop cloths or plastic sheeting
- Paint mixing cups
- Paint stirrer
- Respirator mask
- Safety goggles
- Paintbrushes (for touch-ups)
Materials
-
- Automotive primer
- Automotive paint (base coat)
- Clear coat
- Body filler (if needed)
- Wax and grease remover
Comparison Table: Spray Gun vs. Spray Cans
| Feature | Spray Gun | Spray Cans |
|---|---|---|
| Cost | More expensive upfront | Less expensive |
| Finish Quality | Superior, smoother finish | May leave a textured finish |
| Ease of Use | Requires practice and setup | Easy to use, no setup required |
| Material Waste | Less waste with proper technique | More overspray and waste |
| Control | Better control over application | Limited control |
Preparation Steps
Preparation is key to achieving a successful paint job. Take your time with each step to ensure the best results.
Cleaning the Car
1. Wash the Car Thoroughly: Use soap and water to remove dirt, grease, and old wax. Rinse well and let it dry completely.
2. Use Wax and Grease Remover: Wipe down the surface with a wax and grease remover to eliminate any remaining contaminants.
Sanding the Surface
1. Choose the Right Grit Sandpaper: Start with 80-grit sandpaper to remove the old paint or clear coat.
2. Sand the Entire Surface: Sand until you see a uniform surface and the old paint is dull.
3. Progress to Finer Grits: Move to 220-grit sandpaper to smooth out any rough patches, and finish with 400-grit for a smooth surface.
Repairing Imperfections
1. Inspect for Dents and Scratches: Fill any dents or scratches with body filler.
2. Sand the Filler: Once dry, sand the filled areas until they are flush with the surrounding surface.
Choosing the Right Paint
Choosing the correct paint is crucial for durability and aesthetics.
Types of Car Paint
-
- Acrylic Enamel: Affordable, easy to use, and provides a decent finish. However, it may require a clear coat for durability.
- Acrylic Urethane: Offers a more durable finish and better resistance to UV rays. Requires a clear coat for maximum protection.
- Base Coat/Clear Coat System: Consists of a base color and a clear protective layer. This method provides a high-gloss finish and excellent durability.
Color Selection
-
- Consider Your Vehicle’s Style: Choose a color that complements the design of your car.
- Research Local Regulations: Some areas have restrictions on certain colors for safety reasons.
- Test Samples: Purchase small quantities of paint to test on a hidden area or a separate piece of metal.
The Painting Process
Once your car is prepped and you’ve selected your paint, it’s time to start painting.
Priming
1. Choose a Suitable Primer: Use an automotive primer that matches your paint type.
2. Apply Primer: Using a spray gun or spray can, apply an even coat of primer. Allow it to dry according to the manufacturer’s instructions.
3. Sand the Primer: Once dry, lightly sand the primer with 400-grit sandpaper to create a smooth surface for the paint.
Applying Base Coat
1. Mix the Paint: Follow the manufacturer’s instructions for mixing the paint, if applicable.
2. Start Painting: Using a spray gun or spray can, apply the base coat in even, overlapping strokes.
3. Apply Multiple Coats: Allow each coat to dry before applying the next. Typically, 2-3 coats will be sufficient.
Applying Clear Coat
1. Mix the Clear Coat: Prepare the clear coat according to the instructions.
2. Apply Clear Coat: Similar to the base coat, apply the clear coat evenly. This layer provides protection and enhances the gloss.
3. Final Coats: Usually, 2-3 coats of clear coat are recommended for optimum protection.
Finishing Touches
1. Let It Cure: Allow the paint to cure fully. This can take several days, depending on the paint type and environmental conditions.
2. Wet Sanding: If necessary, perform wet sanding with 1500-grit sandpaper to smooth out any imperfections.
3. Polishing: Use a polishing compound to bring out the shine and protect the finish.
Safety Precautions
- Wear Protective Gear: Always use a respirator mask, safety goggles, and gloves to protect yourself from fumes and chemicals.
- Work in a Well-Ventilated Area: Ensure good airflow to minimize exposure to harmful vapors.
- Follow Manufacturer’s Instructions: Adhere to safety guidelines provided by paint manufacturers.
Frequently Asked Questions (FAQ)
Q: How long does it take to paint a car?
A: The entire process can take anywhere from a few days to a week, depending on the extent of the preparation and drying times.
Q: Can I paint a car without a spray gun?
A: Yes, you can use spray cans, but a spray gun typically provides a more professional finish.
Q: What if I make a mistake while painting?
A: You can sand down the mistake and reapply the paint. It’s essential to fix errors promptly.
Q: How much does it cost to paint a car yourself?
A: Costs can vary widely based on materials and equipment but can range from $200 to $1,000.
Conclusion
Painting your car yourself can be a fulfilling project that saves you money and allows for creative expression. By following this guide, you can achieve a professional-looking finish while learning valuable skills. Remember to take your time during preparation and painting, and always prioritize safety. With patience and practice, you’ll be proud of the transformation you’ve made to your vehicle. Happy painting!