How to Paint a Bathroom: A Comprehensive Guide
Painting a bathroom can be a rewarding DIY project that transforms the space from dull to delightful. Whether you’re looking to refresh your existing decor or completely overhaul your bathroom’s style, a fresh coat of paint can make a significant difference. This guide will walk you through the entire process of painting a bathroom, from preparation to finishing touches.
Table of Contents
1. [Why Paint Your Bathroom?](#why-paint-your-bathroom)
2. [Choosing the Right Paint](#choosing-the-right-paint)
- [Types of Paint](#types-of-paint)
- [Finish Options](#finish-options)
- [Gathering Tools and Materials](#gathering-tools-and-materials)
- [Cleaning the Surface](#cleaning-the-surface)
- [Repairing Damaged Areas](#repairing-damaged-areas)
- [Choosing a Color Scheme](#choosing-a-color-scheme)
- [Step-by-Step Instructions](#step-by-step-instructions)
- Aesthetic Appeal: A fresh color can brighten the space and enhance its overall appearance.
- Increased Value: A well-painted bathroom can increase your home’s market value.
- Personalization: You can express your style and preferences through color choices.
- Protection: Quality paint can protect walls from moisture and mildew.
- Paint (latex or mildew-resistant)
- Primer (if necessary)
- Paintbrushes (angled and flat)
- Rollers and roller trays
- Painter’s tape
- Drop cloths or plastic sheeting
- Sandpaper (fine-grit)
- Caulk and caulking gun
- Ladder or step stool
- Paint stirrer
- Cleaning supplies (sponge, bucket, detergent)
- Fill Holes and Cracks: Use spackle or joint compound to fill in any holes or cracks in the walls.
- Sand Smooth: Once dry, sand the repaired areas until smooth.
- Caulk Gaps: Apply caulk to gaps around sinks, tubs, and trim to ensure a seamless finish.
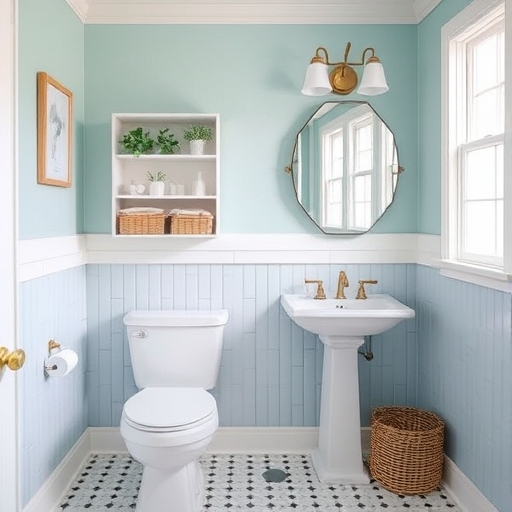
- Consider the size of your bathroom; lighter colors can make small spaces feel larger.
- Think about the existing decor and fixtures; choose colors that complement them.
- Use color swatches to test how different shades look in various lighting.
- Reinstall Fixtures: Put back towel bars, light switch covers, and any other hardware.
- Add Accessories: Consider adding new towels, a shower curtain, or decorative items to enhance the new look.
- Touch Up: Inspect the painted surfaces for any missed spots or areas that need touch-ups.
- Regular Cleaning: Clean walls with a damp cloth to prevent the buildup of mildew and soap scum.
- Check for Damage: Regularly inspect for any signs of peeling or mildew and address them promptly.
- Humidity Control: Use exhaust fans or open windows during and after showers to reduce humidity levels.
3. [Preparing Your Bathroom for Painting](#preparing-your-bathroom-for-painting)
4. [Painting Your Bathroom](#painting-your-bathroom)
5. [Finishing Touches](#finishing-touches)
6. [Maintenance Tips](#maintenance-tips)
7. [Frequently Asked Questions (FAQ)](#frequently-asked-questions-faq)
8. [Conclusion](#conclusion)
Why Paint Your Bathroom?
Painting your bathroom can provide numerous benefits:
Choosing the Right Paint
Choosing the right paint for your bathroom is crucial for achieving a long-lasting and beautiful finish. Here are some considerations:
Types of Paint
When selecting paint, consider the following types:
| Type of Paint | Description |
|---|---|
| Latex Paint | Water-based, easy to clean, and dries quickly. Ideal for most bathroom walls. |
| Oil-Based Paint | Durable and moisture-resistant but takes longer to dry and requires solvents for cleanup. Best for trim and cabinets. |
| Mildew-Resistant Paint | Specially formulated to resist mold and mildew, perfect for high-humidity areas like bathrooms. |
Finish Options
The finish of the paint will also affect the look and durability:
| Finish Type | Description |
|---|---|
| Flat/Matte | No shine, hides imperfections but is less durable and harder to clean. |
| Eggshell | Slightly glossy, easy to clean, and good for low-traffic areas. |
| Satin | More sheen than eggshell, durable, and ideal for bathrooms. |
| Semi-Gloss | Reflective finish, highly durable, and easy to clean; great for trim and moldings. |
| Gloss | Very shiny and durable; best for areas that need frequent cleaning. |
Preparing Your Bathroom for Painting
Preparation is key to achieving a professional-looking paint job. Follow these steps to ensure a successful project.
Gathering Tools and Materials
Before you begin, gather the following tools and materials:
Cleaning the Surface
1. Remove Fixtures: Take off any fixtures such as towel bars, light switch covers, and outlet covers.
2. Dust and Clean: Use a damp sponge to wipe down walls, removing dust, grime, and soap scum.
3. Mold and Mildew Removal: If you see mold or mildew, use a mixture of water and vinegar or a commercial mildew cleaner.
Repairing Damaged Areas
Choosing a Color Scheme
Painting Your Bathroom
Once you’re prepared, it’s time to start painting! Follow these step-by-step instructions:
Step-by-Step Instructions
1. Tape Off Areas: Use painter’s tape to protect edges, trim, and any areas you don’t want to paint.
2. Prime the Walls (if necessary): If you’re painting over a dark color or raw drywall, apply a coat of primer and let it dry completely.
3. Cut In: Using a brush, paint the edges of the walls, around windows, and doors. This technique is known as “cutting in.”
4. Roll the Walls: Use a roller to apply paint to the larger wall areas. Start at the top and work your way down for even coverage.
5. Apply Additional Coats: Depending on the color and type of paint, you may need a second or third coat. Allow adequate drying time between coats.
6. Remove Painter’s Tape: Once the final coat is dry to the touch, carefully remove the painter’s tape for clean edges.
Finishing Touches
After the paint has dried, it’s time to reattach fixtures and add some finishing touches:
Maintenance Tips
To keep your bathroom looking fresh, follow these maintenance tips:
Frequently Asked Questions (FAQ)
What type of paint is best for a bathroom?
Mildew-resistant latex paint is often recommended for bathrooms due to its moisture resistance and ease of cleaning.
How long does it take to paint a bathroom?
Depending on the size of the bathroom and the number of coats needed, it can take anywhere from a few hours to a couple of days.
Do I need to use primer before painting?
Using primer is recommended when painting over dark colors or raw drywall to ensure even coverage and better adhesion.
Can I paint over old paint?
Yes, as long as the old paint is in good condition. If it’s peeling or damaged, it’s best to scrape and sand those areas before applying new paint.
How can I choose the right color for my bathroom?
Consider the size, existing fixtures, and your personal style. Testing color swatches in different lighting can help you make the best choice.
Conclusion
Painting a bathroom can be a straightforward and fulfilling project that enhances your home’s aesthetic and value. By carefully selecting the right paint, preparing the space properly, and following the outlined steps, you can achieve a professional-looking finish that reflects your style. With regular maintenance, your newly painted bathroom can look fresh and vibrant for years to come. Happy painting!