How to Fix Paint Scratches on Your Car
Scratches on your car’s paint can be an eyesore and may even lead to rust if left untreated. Fortunately, fixing paint scratches isn’t as daunting as it may seem. In this comprehensive guide, we will explore various methods to repair scratches on your car’s paint, the tools you need, and some essential tips to prevent future damage.
Understanding Car Paint Scratches
Before diving into the repair methods, it’s crucial to understand the different types of scratches that can occur on your car’s surface. Identifying the type of scratch can help determine the best course of action for repair.
Types of Car Paint Scratches
1. Clear Coat Scratches: These are the most common type of scratches that only affect the clear coat layer of paint. They are usually shallow and can be easily fixed with a polishing compound.
2. Base Coat Scratches: These scratches penetrate the clear coat and reach the base color layer. They require more effort to repair and may need touch-up paint.
3. Primer Scratches: These are deeper scratches that expose the primer layer beneath the base coat. Repairing these may involve sanding and applying primer before painting.
4. Metal Scratches: These are the most severe and expose the metal beneath the paint. They require immediate attention to prevent rust and may need professional repair.
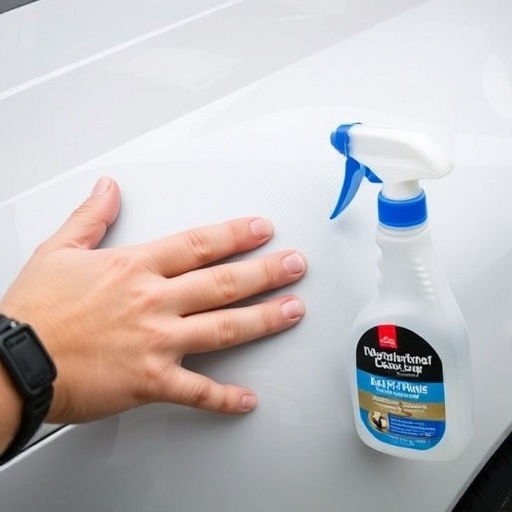
Tools and Materials Needed
Before you start fixing scratches, gather the following tools and materials:
- Microfiber cloths
- Polishing compound
- Touch-up paint
- Clear coat spray
- Sandpaper (various grits)
- Masking tape
- Primer (for deeper scratches)
- Paint applicator (brush or pen)
- Car wax
- Squeeze a small amount of polishing compound onto a microfiber cloth.
- Gently rub the compound over the scratch in a circular motion.
- Wipe away excess compound with a clean cloth.
- After polishing, apply a coat of car wax to protect the repaired area.
- Shake the touch-up paint well before use.
- Use a paint applicator to apply the touch-up paint to the scratch, filling it in completely.
- Allow it to dry as per the manufacturer’s instructions.
- Once the touch-up paint is dry, apply a clear coat over the area to protect it and match the shine.
- Use fine-grit sandpaper (2000-3000 grit) to gently sand the scratched area. Be careful not to sand too deep.
- After sanding, clean the area again and apply primer to the scratched surface. Let it dry completely.
- Use touch-up paint followed by clear coat as previously described.
- Clean the scratched area and sand it down to create a smooth surface for painting.
- If the metal is exposed, apply a rust inhibitor to prevent corrosion.
- Apply primer, then touch-up paint, and finish with clear coat.
- Choose the Right Weather: Avoid repairing scratches in direct sunlight or extreme temperatures, as this can affect the paint’s adhesion and drying time.
- Follow Instructions: Always read and follow the manufacturer’s instructions for any products you use.
- Test First: If you’re unsure about a product, test it on a small, inconspicuous area first.
- Use Quality Products: Invest in high-quality touch-up paint and polishing compounds for the best results.
- Be Patient: Take your time during each step to ensure a smooth and flawless finish.
- Park away from other vehicles.
- Use car covers when parked outdoors.
- Regularly wash and wax your car to maintain a protective layer.
Step-by-Step Guide to Fixing Paint Scratches
Step 1: Assess the Damage
Inspect the scratch closely to determine its depth and type. This will dictate the repair method you should use.
Step 2: Clean the Area
Before starting any repair, clean the scratched area to remove dirt, grime, and wax. Use a mild car soap and warm water, then dry the area with a microfiber cloth.
Step 3: Repairing Clear Coat Scratches
1. Apply Polishing Compound:
2. Wax the Area:
Step 4: Repairing Base Coat Scratches
1. Touch-Up Paint:
2. Apply Clear Coat:
Step 5: Repairing Primer Scratches
1. Sand the Area:
2. Apply Primer:
3. Follow with Base and Clear Coat:
Step 6: Repairing Metal Scratches
1. Clean and Sand the Area:
2. Apply Rust Inhibitor:
3. Follow with Primer, Base, and Clear Coat:
Comparison of Scratch Repair Methods
| Scratch Type | Repair Method | Difficulty Level | Time Required |
|---|---|---|---|
| Clear Coat Scratches | Polishing Compound | Easy | 30 minutes |
| Base Coat Scratches | Touch-Up Paint + Clear Coat | Moderate | 1-2 hours |
| Primer Scratches | Sanding + Primer + Paint | Hard | 2-3 hours |
| Metal Scratches | Rust Inhibitor + Primer + Paint | Hard | 3-4 hours |
Tips for Successful Scratch Repair
Frequently Asked Questions (FAQ)
How do I know if a scratch can be repaired at home?
If the scratch is only on the clear coat and is not too deep, it can typically be repaired at home using polishing compounds. Deeper scratches may require professional help.
What is the best touch-up paint for my car?
The best touch-up paint matches your car’s original paint code. You can find this code in your car’s manual or on a sticker inside the driver’s door.
Can I fix scratches without professional help?
Yes, many scratches can be repaired at home with the right tools and materials. However, for severe scratches or damage, it may be best to consult a professional.
How can I prevent future scratches?
To prevent future scratches, consider the following tips:
Is it worth fixing minor scratches?
Yes, fixing minor scratches not only improves your car’s appearance but also helps maintain its value over time.
Conclusion
Fixing paint scratches on your car can be a straightforward task if you approach it with the right knowledge and tools. By following the steps outlined in this guide, you can restore your car’s paint and keep it looking its best. Remember, regular maintenance and care will go a long way in preventing scratches and ensuring your vehicle remains in excellent condition for years to come.