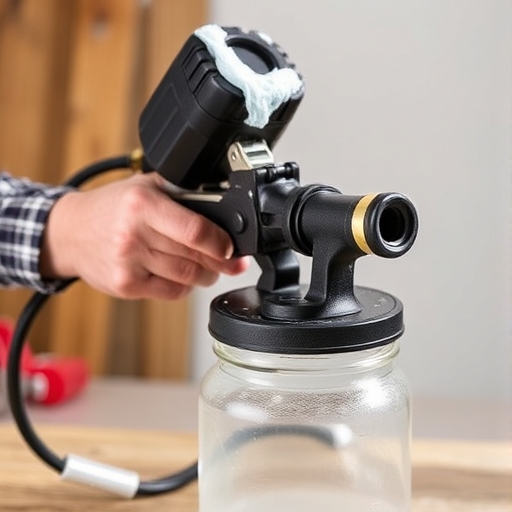
How to Clean a Paint Sprayer: A Comprehensive Guide
Cleaning a paint sprayer is crucial to maintaining its performance and longevity. Whether you’re a professional painter or a DIY enthusiast, knowing how to properly clean your paint sprayer can save you time and money in the long run. This guide will walk you through the steps of cleaning various types of paint sprayers, provide tips for maintenance, and answer some frequently asked questions.
Why Cleaning Your Paint Sprayer is Important
Before diving into the cleaning process, it’s essential to understand why it’s necessary:
- Prevents Clogs: Paint sprayers can easily become clogged if not cleaned properly, leading to poor performance.
- Maintains Quality: Residual paint can affect the quality of your finish in future projects.
- Extends Lifespan: Regular cleaning helps prolong the life of your sprayer, saving you from costly repairs or replacements.
- Health and Safety: Proper cleaning reduces the risk of toxic fumes and maintains a safe working environment.
- Clean water or a suitable solvent (for oil-based paints)
- A bucket or container
- A cleaning brush or toothbrush
- A soft cloth or paper towels
- A wrench or screwdriver (if needed)
- A mask and gloves for safety
- Clean After Every Use: The best practice is to clean your sprayer immediately after use to prevent dried paint buildup.
- Use Proper Cleaning Solutions: Always use the appropriate cleaning solution for the type of paint you’ve used.
- Inspect Regularly: Regularly check for wear and tear on hoses and other components.
- Keep It Covered: When not in use, keep your sprayer covered to prevent dust accumulation.
Types of Paint Sprayers
Before we discuss the cleaning process, it’s important to know the different types of paint sprayers, as the cleaning method may vary slightly.
| Type of Sprayer | Description | Cleaning Difficulty |
|---|---|---|
| Airless Sprayer | Uses high pressure to atomize paint | Moderate |
| HVLP (High Volume Low Pressure) Sprayer | Requires less pressure and is ideal for detailed work | Easy |
| Compressed Air Sprayer | Uses compressed air to spray paint | Moderate |
| Electric Paint Sprayer | Uses an electric motor to draw and spray paint | Easy |
Step-by-Step Guide to Cleaning a Paint Sprayer
Step 1: Gather Your Supplies
Before you start cleaning, gather the necessary materials:
Step 2: Disassemble the Sprayer
1. Turn Off and Unplug: Ensure the sprayer is turned off and unplugged from any power source.
2. Remove the Paint Container: Detach the paint container from the sprayer.
3. Disassemble Components: If your sprayer has removable parts (like the nozzle or filter), take them off carefully.
Step 3: Flush the Sprayer
For Water-Based Paints
1. Fill the Container with Water: Pour clean water into the paint container.
2. Spray Water: Turn the sprayer on and spray the water into a bucket until it runs clear.
3. Repeat: If necessary, refill the container with clean water and repeat until no paint residue is visible.
For Oil-Based Paints
1. Use a Suitable Solvent: Fill the container with a solvent appropriate for oil-based paints (like mineral spirits).
2. Spray the Solvent: Similar to the water flushing method, spray the solvent into a bucket until it runs clear.
3. Repeat if Needed: If residue remains, refill and repeat the process.
Step 4: Clean Removable Parts
1. Soak Components: Soak the nozzle, filters, and any other removable parts in the cleaning solution for a few minutes.
2. Scrub: Use a cleaning brush or toothbrush to scrub away any paint residue.
3. Rinse: Rinse the parts thoroughly with clean water or solvent, depending on the type of paint used.
Step 5: Clean the Exterior
1. Wipe Down the Sprayer: Use a soft cloth or paper towels to wipe down the exterior of the sprayer.
2. Check for Paint Buildup: Ensure there’s no paint buildup on any of the external components.
Step 6: Reassemble the Sprayer
1. Dry All Parts: Ensure all components are completely dry before reassembling.
2. Reattach Components: Carefully reattach the nozzle, filters, and paint container.
3. Store Properly: Store the sprayer in a dry place, away from extreme temperatures.
Tips for Maintaining Your Paint Sprayer
Common Issues and Troubleshooting
| Issue | Possible Causes | Solutions |
|---|---|---|
| Clogging | Dried paint in the nozzle or filter | Clean the nozzle and filter thoroughly |
| Uneven Spray | Incorrect pressure settings or clogged nozzle | Adjust pressure and clean the nozzle |
| Paint Leaking | Worn seals or faulty components | Inspect seals and replace if necessary |
| Poor Finish Quality | Residual paint or incorrect technique | Clean thoroughly and practice spraying |
Frequently Asked Questions (FAQ)
How often should I clean my paint sprayer?
It’s recommended to clean your paint sprayer immediately after each use to avoid paint buildup and clogs.
Can I use regular water to clean oil-based paint?
No, you should use a suitable solvent like mineral spirits to clean oil-based paints.
What should I do if my sprayer is clogged?
If your sprayer is clogged, disassemble it, clean the nozzle and filter, and flush it with the appropriate cleaning solution.
Is it necessary to wear protective gear while cleaning?
Yes, always wear gloves and a mask when cleaning your sprayer, especially when using solvents or paint thinners.
Can I store my paint sprayer with paint in it?
No, you should never store your paint sprayer with paint in it. Always clean it thoroughly and store it dry.
Conclusion
Cleaning a paint sprayer may seem like a daunting task, but with the right steps and tools, it can be a straightforward process. Regular maintenance not only ensures that your sprayer operates efficiently but also guarantees that your painting projects yield high-quality results. By following the steps outlined in this guide, you can extend the life of your paint sprayer and enjoy a hassle-free painting experience. Happy painting!

