Can You Paint Over Stained Wood? A Comprehensive Guide
When it comes to home improvement projects, one question often arises—can you paint over stained wood? Whether you’re considering a DIY project to refresh your space or simply want to change the color of your wooden furniture, understanding how to work with stained wood is crucial. This article will explore the ins and outs of painting over stained wood, including preparation, techniques, and tips to ensure a successful finish.
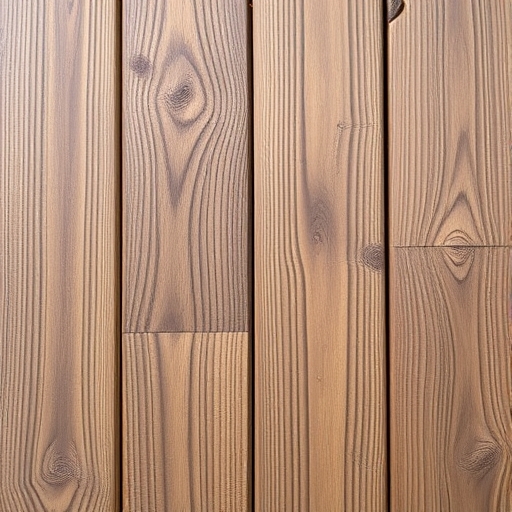
Understanding Stained Wood
Before diving into the painting process, it’s essential to understand what stained wood is. Stains are typically used to enhance the natural beauty of wood by adding color while allowing the grain to show through. Stains can be oil-based or water-based, and each type affects the wood differently.
Types of Stains
1. Oil-Based Stains
- Provide a rich, deep color
- Take longer to dry
- Require mineral spirits for cleanup
- Dry quickly
- Easy to clean up with soap and water
- Generally less odor than oil-based stains
- Adhesion Issues: The finish on stained wood can prevent paint from adhering properly.
- Color Bleed: If not prepared correctly, the stain can bleed through the paint, affecting the final color.
- Surface Texture: Stained wood may have a glossy finish that needs to be addressed for a smooth paint application.
- Materials Needed:
- Warm water
- Mild dish soap
- Soft cloth or sponge
- Sanding Tips:
- Sand in the direction of the grain to avoid scratches.
- Ensure the surface is even and free of imperfections.
- Types of Primers:
- Oil-Based Primer: Ideal for oil-based stains; provides excellent adhesion.
- Water-Based Primer: Suitable for water-based stains; dries quickly and is easy to clean.
- Latex Paint: Easy to work with and clean; offers flexibility.
- Oil-Based Paint: Durable and provides a smooth finish; takes longer to dry.
- Brush: Ideal for detailed work and corners. Use a high-quality synthetic brush for latex paints and a natural bristle brush for oil-based paints.
- Roller: Best for large, flat surfaces. Choose a roller cover with a nap appropriate for your surface texture.
- Thin Coats: Apply thin coats to avoid drips and ensure even coverage.
- Drying Time: Allow sufficient drying time between coats as per the manufacturer’s instructions.
- Cleaning: Use a damp cloth for regular cleaning; avoid harsh chemicals.
- Touch-Ups: Keep extra paint for touch-ups to address any chips or scratches promptly.
- Avoid Excessive Moisture: Protect painted wood from excessive moisture, which can lead to peeling or bubbling.
2. Water-Based Stains
Challenges of Painting Over Stained Wood
Painting over stained wood can be challenging due to the following factors:
Preparing Stained Wood for Painting
Proper preparation is the key to successfully painting over stained wood. Here’s a step-by-step guide to ensure your project goes smoothly.
Step 1: Clean the Surface
Before you begin painting, it’s crucial to clean the stained wood thoroughly. Use a mixture of warm water and mild soap to remove dirt, grease, and oils.
Step 2: Sand the Wood
Sanding is essential for creating a surface that paint can adhere to. Begin with a medium-grit sandpaper (around 120-grit) and finish with a fine-grit sandpaper (around 220-grit) for a smooth finish.
Step 3: Remove Dust
After sanding, use a vacuum or a tack cloth to remove any dust particles. This step is crucial to ensure a smooth application of paint.
Step 4: Apply a Primer
Using a primer specifically designed for stained wood can significantly improve the adhesion of the paint and prevent color bleed.
Step 5: Choose the Right Paint
Selecting the right type of paint is critical. You can choose between:
Painting Techniques
Once you’ve prepared the stained wood, it’s time to paint. Here are some techniques to consider:
Brush vs. Roller
Application Tips
Comparison Table: Oil-Based vs. Water-Based Products
| Feature | Oil-Based Products | Water-Based Products |
|---|---|---|
| Drying Time | Longer (6-8 hours) | Shorter (1-2 hours) |
| Cleanup | Requires solvents | Soap and water |
| Odor | Stronger | Less intense |
| Finish | Glossy, durable | Matte to satin, flexible |
| Color Retention | Better for deep colors | May require more coats |
Common Mistakes to Avoid
When painting over stained wood, there are several common pitfalls to watch out for:
1. Skipping the Primer: Failing to apply primer can lead to poor adhesion and color bleed.
2. Using the Wrong Paint: Ensure that the paint you select is compatible with the primer and the stained wood.
3. Not Sanding Properly: Inadequate sanding can result in an uneven finish.
4. Rushing the Process: Allow adequate drying time for both primer and paint to avoid smudging or peeling.
Maintenance and Care
Once you’ve painted over stained wood, maintaining the finish is essential for longevity. Here are some tips:
FAQ
Can I paint over stained wood without sanding?
While it is technically possible to paint without sanding, it is not recommended. Sanding helps the paint adhere better and ensures a smoother finish.
How long should I wait before applying a second coat of paint?
Generally, you should wait at least 2-4 hours before applying a second coat of paint, depending on the type of paint and environmental conditions. Always refer to the manufacturer’s instructions.
Will the stain bleed through the paint?
If not properly primed, there is a risk that the stain may bleed through the paint. Using a high-quality primer designed for stained surfaces can help prevent this issue.
Can I use chalk paint over stained wood?
Yes, chalk paint can be used over stained wood, but proper preparation is still necessary. A primer may not be required, but sanding and cleaning are essential for the best results.
What if I want to return to stained wood later?
If you decide to repaint the stained wood again in the future, you will need to strip the paint first, which can be a challenging process. Always consider the long-term implications of your choices.
Conclusion
Painting over stained wood can breathe new life into your furniture and enhance your home’s aesthetic. By carefully preparing the surface, choosing the right products, and applying the paint correctly, you can achieve a beautiful, durable finish. Remember to take your time, follow the steps outlined in this guide, and enjoy the transformation of your stained wood surfaces. Happy painting!