How to Paint Wheels: A Comprehensive Guide
Painting your wheels can dramatically enhance the look of your vehicle, giving it a fresh, customized appearance. Whether you’re looking to refresh old wheels or give a new set a unique flair, this guide will walk you through the entire process, from preparation to finishing touches.
Table of Contents
1. [Why Paint Your Wheels?](#why-paint-your-wheels)
2. [Materials Needed](#materials-needed)
3. [Preparation Steps](#preparation-steps)
- [Removing the Wheels](#removing-the-wheels)
- [Cleaning the Wheels](#cleaning-the-wheels)
- [Sanding and Priming](#sanding-and-priming)
- [Choosing the Right Paint](#choosing-the-right-paint)
- [Application Techniques](#application-techniques)
- Aesthetic Appeal: Fresh paint can make your vehicle look new and stylish.
- Customization: Create a unique look that reflects your personality.
- Protection: Paint can help protect against rust, corrosion, and other environmental damage.
- Cost-Effective: A DIY paint job can save you money compared to purchasing new wheels.
- Type: Use high-temperature spray paint specifically designed for wheels or automotive applications.
- Finish: Decide between matte, gloss, or satin finishes based on your desired look.
- Color: Choose a color that complements your vehicle and personal style.
- Hold the spray can about 6-12 inches away from the wheel.
- Apply thin, even coats, moving back and forth to avoid drips.
- Allow each coat to dry according to the paint instructions (generally 10-15 minutes).
- Apply 2-4 coats for optimal coverage.
- Avoid Harsh Chemicals: Use mild soap and water for cleaning.
- Regular Cleaning: Wash your wheels regularly to prevent build-up of dirt and grime.
- Inspect for Damage: Check for chips or scratches and touch up as necessary.
- Avoid Road Salt: If you live in an area with heavy road salt use, consider washing your wheels more frequently to prevent corrosion.
4. [Painting Process](#painting-process)
5. [Finishing Touches](#finishing-touches)
6. [Caring for Your Newly Painted Wheels](#caring-for-your-newly-painted-wheels)
7. [FAQs](#faqs)
8. [Conclusion](#conclusion)
Why Paint Your Wheels?
Painting your wheels offers several benefits, including:
Materials Needed
Before you start painting your wheels, gather the following materials:
| Material | Purpose |
|---|---|
| Wheel cleaner | To remove dirt and grime |
| Sandpaper (various grits) | To smooth the surface |
| Masking tape | To protect areas from overspray |
| Primer | To prepare the surface for paint |
| Wheel paint (high-temp) | To apply color to the wheels |
| Clear coat | To protect the paint and add shine |
| Gloves | To protect your hands |
| Safety goggles | To protect your eyes |
| Drop cloths or newspapers | To cover the work area |
Preparation Steps
Removing the Wheels
1. Safety First: Park your vehicle on a flat surface and engage the parking brake.
2. Loosen the Lug Nuts: Use a lug wrench to loosen the lug nuts but do not remove them completely yet.
3. Lift the Vehicle: Use a jack to lift the vehicle and secure it with jack stands.
4. Remove the Wheels: Finish removing the lug nuts and take the wheels off the vehicle.
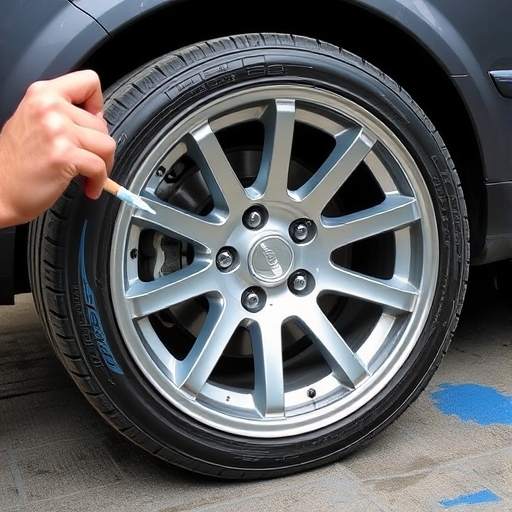
Cleaning the Wheels
1. Use Wheel Cleaner: Spray a dedicated wheel cleaner on the wheels and let it sit for a few minutes.
2. Scrub the Wheels: Use a brush or sponge to scrub away dirt, brake dust, and grease.
3. Rinse Thoroughly: Rinse the wheels with water and let them dry completely.
Sanding and Priming
1. Sand the Surface: Use sandpaper (start with 120-grit and finish with 400-grit) to sand the surface of the wheels. This helps the paint adhere better.
2. Clean Again: Wipe down the wheels with a clean cloth to remove dust from sanding.
3. Mask Areas: Use masking tape to cover any areas you don’t want to paint (like the tire and valve stem).
4. Apply Primer: Spray a light coat of primer on the wheels, following the manufacturer’s instructions. Allow it to dry completely.
Painting Process
Choosing the Right Paint
When selecting paint for your wheels, consider the following:
Application Techniques
1. Shake the Can: Shake the paint can thoroughly for about 2-3 minutes to ensure even mixing.
2. Test Spray: Test the spray on a piece of cardboard to get a feel for the application.
3. Apply Paint:
Comparison of Paint Types
| Paint Type | Pros | Cons |
|---|---|---|
| High-Temperature Spray | Resistant to heat and chipping | Can be more expensive |
| Regular Spray Paint | Affordable and easy to find | May not withstand extreme conditions |
| Powder Coating | Durable and long-lasting | Requires professional application |
Finishing Touches
1. Apply Clear Coat: Once the paint is dry, apply a clear coat to protect the paint and enhance the finish. Follow the same application method as the paint.
2. Remove Masking Tape: Carefully peel off the masking tape while the clear coat is still slightly tacky to avoid peeling.
3. Reinstall the Wheels: Once everything is dry, reattach the wheels to your vehicle. Make sure to tighten the lug nuts securely.
Caring for Your Newly Painted Wheels
To maintain the look of your painted wheels, follow these tips:
FAQs
How long does it take to paint wheels?
The entire process can take anywhere from a few hours to a couple of days, depending on drying times between coats.
Can I paint wheels without removing them?
While it’s possible, removing the wheels allows for a more thorough job and prevents overspray on your tires.
What should I do if the paint starts to chip?
If you notice chipping, sand the affected area lightly and apply touch-up paint followed by a clear coat.
Is it necessary to use primer?
Using primer is recommended as it helps the paint adhere better and provides a more even finish.
Can I use regular spray paint?
Regular spray paint may not withstand the heat and harsh conditions that wheels are exposed to. It is best to use high-temperature wheel paint.
Conclusion
Painting your wheels can be a rewarding DIY project that enhances the overall appearance of your vehicle. With the right materials, preparation, and techniques, you can achieve a professional-looking finish that stands out on the road. Remember to take your time during each step, and don’t hesitate to seek help if needed. Happy painting!