How to Clean a Paint Sprayer: A Comprehensive Guide
Cleaning a paint sprayer is an essential task for any DIY enthusiast or professional painter. Proper maintenance not only extends the life of your equipment but also ensures that your paint jobs are smooth and free from defects. This guide will walk you through the steps of cleaning different types of paint sprayers, the tools you’ll need, and some helpful tips to make the process easier.
Why Clean Your Paint Sprayer?
Before diving into the cleaning process, let’s discuss the importance of keeping your paint sprayer clean:
- Prevent Clogs: Dried paint can clog the nozzle and hose, leading to poor spray patterns and uneven finishes.
- Extend Equipment Life: Regular maintenance can prevent wear and tear, prolonging the life of your sprayer.
- Improve Quality of Work: A clean sprayer delivers a consistent spray pattern, ensuring a professional-looking finish.
- Avoid Contamination: Residual paint from previous jobs can contaminate new paint, causing color inconsistencies.
- Clean Water or Solvent: Depending on the type of paint used.
- Bucket: For rinsing and soaking parts.
- Brushes: Small brushes for scrubbing nozzles and filters.
- Cloth or Rags: For wiping down surfaces.
- Screwdriver: To disassemble parts if necessary.
- Gloves: To protect your hands from chemicals and paint.
- Set up in a well-ventilated area and cover the surrounding surfaces to protect from paint splatters.
- Fill a bucket with clean water (or the appropriate solvent for oil-based paints).
- Place the siphon hose into the bucket.
- Turn on the sprayer and let it run until the paint is completely flushed out.
- Turn off the sprayer and unplug it.
- Remove the spray tip and guard.
- Use a brush to clean the tip and guard, soaking them in a solvent if necessary.
- Remove the inlet filter and any additional filters.
- Rinse them under clean water and scrub gently with a brush.
- Use a cloth to wipe down the exterior of the sprayer, removing any paint residue.
- Reassemble all parts and store the sprayer in a dry place.
- Disconnect the spray gun from the air compressor.
- Remove the paint cup and dispose of any remaining paint.
- Fill the paint cup with clean water or solvent.
- Reconnect the gun and spray until the fluid runs clear.
- Remove the nozzle and air cap from the spray gun.
- Soak them in solvent and scrub with a brush to remove any dried paint.
- Rinse the paint cup thoroughly under running water.
- Wipe the exterior of the sprayer with a cloth to remove any paint residue.
- Reassemble the gun and store it properly.
- Dispose of any leftover paint from the cup.
- Fill the cup with clean water or solvent.
- Spray until the fluid runs clear.
- Disassemble the nozzle and needle.
- Soak in solvent and scrub with a brush.
- Rinse the paint cup thoroughly.
- Wipe the exterior with a cloth.
- Reassemble and store the sprayer.
- Unplug the sprayer and remove the paint container.
- Fill the container with clean water or solvent.
- Run the sprayer until the fluid runs clear.
- Remove the nozzle and soak it in solvent.
- Use a brush to clean it thoroughly.
- Wipe the sprayer body with a damp cloth.
- Reassemble all parts and store it in a dry place.
- Act Quickly: Clean your sprayer immediately after use to prevent paint from drying and hardening.
- Use the Right Solvent: Always use the appropriate solvent for the type of paint you used (water for latex, mineral spirits for oil-based paints).
- Follow Manufacturer Instructions: Always refer to the user manual for specific cleaning and maintenance instructions.
Types of Paint Sprayers
Before you start cleaning, it’s important to understand the type of paint sprayer you are using, as the cleaning process may vary. Here are the most common types:
| Type of Sprayer | Description |
|---|---|
| Airless Sprayer | Uses high pressure to atomize paint; commonly used for thick materials. |
| HVLP Sprayer | High Volume Low Pressure; ideal for fine finishes and detail work. |
| Compressed Air Sprayer | Uses compressed air to spray paint; great for small jobs and touch-ups. |
| Electric Paint Sprayer | Uses electric power for ease of use; suitable for various types of paints. |
Tools and Materials Needed
Before you begin the cleaning process, gather the following tools and materials:
Step-by-Step Cleaning Process
Cleaning an Airless Paint Sprayer
1. Prepare the Area:
2. Flush the System:
3. Disassemble the Sprayer:
4. Clean the Filters:
5. Wipe Down the Exterior:
6. Reassemble and Store:
Cleaning an HVLP Paint Sprayer
1. Prepare the Sprayer:
2. Flush the Paint System:
3. Clean the Nozzle and Air Cap:
4. Rinse the Cup:
5. Wipe Down the Exterior:
6. Reassemble and Store:
Cleaning a Compressed Air Paint Sprayer
1. Empty the Paint Cup:
2. Flush the System:
3. Clean the Nozzle and Needle:
4. Rinse the Cup:
5. Wipe Down the Exterior:
6. Reassemble and Store:
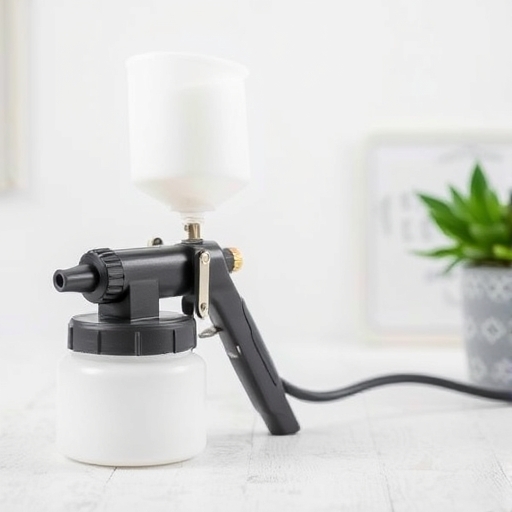
Cleaning an Electric Paint Sprayer
1. Disconnect:
2. Flush the System:
3. Clean the Nozzle:
4. Wipe Down the Body:
5. Reassemble and Store:
Tips for Effective Cleaning
FAQs
How often should I clean my paint sprayer?
You should clean your paint sprayer after each use to prevent clogs and maintain performance.
Can I use water to clean oil-based paint?
No, you should use a solvent like mineral spirits or paint thinner for cleaning oil-based paints.
Is it necessary to disassemble the sprayer for cleaning?
While it is not always necessary, disassembling the sprayer allows for a more thorough cleaning, especially of the nozzle and filters.
What happens if I don’t clean my paint sprayer?
Failing to clean your paint sprayer can lead to clogs, inconsistent spray patterns, and potentially damage the equipment.
Can I use a pressure washer to clean my paint sprayer?
It is not recommended to use a pressure washer as it may damage the internal components of the sprayer.
Conclusion
Cleaning your paint sprayer may seem like a tedious task, but it is crucial for maintaining the quality of your work and the longevity of your equipment. By following the steps outlined in this guide, you can ensure that your paint sprayer is always in top condition, ready for your next project. Regular maintenance will not only save you time and money in the long run but also enhance the quality of your paint jobs, giving you the professional finish you desire.