Can You Paint a Refrigerator? A Comprehensive Guide
Refrigerators are essential appliances in our kitchens, but they can sometimes lack personality or show signs of wear and tear. If you’re considering a kitchen makeover or simply want to refresh the look of your fridge, you might be wondering: can you paint a refrigerator? The answer is yes, and in this guide, we’ll explore everything you need to know about painting your refrigerator, including the materials needed, step-by-step instructions, and tips for a successful project.
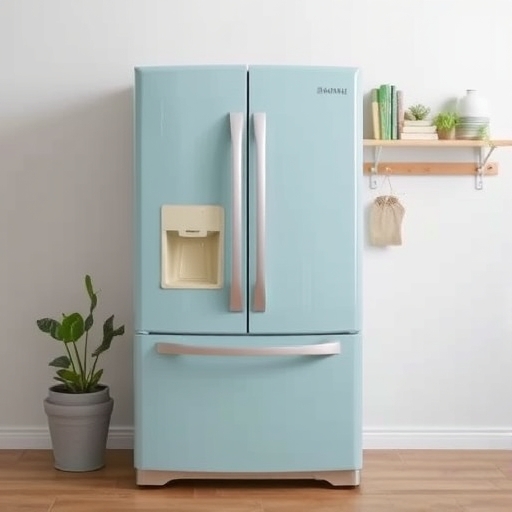
Why Paint a Refrigerator?
Painting your refrigerator can be a cost-effective way to enhance your kitchen’s aesthetic without the need for a complete appliance replacement. Here are some compelling reasons to consider painting your fridge:
- Cost-Effective Upgrade: Buying a new refrigerator can be expensive. Painting is a budget-friendly alternative.
- Customization: You can choose any color or design that fits your style and kitchen decor.
- Hiding Imperfections: Paint can cover scratches, dents, or discoloration, giving your fridge a fresh appearance.
- Trendy Finishes: From matte to glossy, you can achieve modern looks that match current kitchen trends.
- Paint: Use appliance-specific paint or high-quality spray paint designed for metal surfaces.
- Primer: A good primer helps the paint adhere better and provides a smooth surface.
- Sandpaper: Use fine-grit sandpaper (220-grit) for smoothing the surface.
- Cleaning Supplies: Mild detergent, water, and a sponge for cleaning the fridge.
- Drop Cloths: To protect your floors and surrounding areas from paint splatters.
- Painter’s Tape: For masking off areas you don’t want to paint.
- Paintbrushes/Roller: For applying the paint, depending on your preference.
- Respirator Mask: To protect yourself from fumes, especially if using spray paint.
- Unplug the Fridge: For safety, unplug the refrigerator before you start.
- Move the Fridge: If possible, move the fridge away from the wall to give yourself enough space to work.
- Protect Surrounding Areas: Lay down drop cloths to protect your floors and any nearby furniture or appliances.
- Wash with Soap and Water: Use a mild detergent mixed with water to thoroughly clean the surface of the refrigerator. This removes grease and grime that could interfere with paint adhesion.
- Rinse and Dry: Rinse off any soap residue and dry the surface completely with a soft cloth.
- Lightly Sand: Use fine-grit sandpaper to lightly sand the entire surface of the fridge. This helps the primer and paint adhere better.
- Wipe Down: After sanding, wipe the surface with a damp cloth to remove any dust.
- Choose the Right Primer: Use a primer that is compatible with the paint you selected (check the manufacturer’s instructions).
- Apply Evenly: Use a paintbrush or roller to apply the primer in even coats. Allow it to dry completely according to the manufacturer’s guidelines.
- Choose Your Paint: Select a high-quality appliance paint or spray paint.
- Apply the First Coat: Using a brush or spray can, apply the first coat of paint. Ensure even coverage and avoid drips.
- Let It Dry: Allow the first coat to dry completely before applying a second coat.
- Repeat: Depending on the color and type of paint, you may need two to three coats for optimal coverage.
- Remove Painter’s Tape: Carefully peel off the painter’s tape while the last coat is still slightly tacky to ensure clean lines.
- Cure: Allow the paint to cure for at least 24 hours before plugging the refrigerator back in.
- Reattach Handles: If you removed the handles, now is the time to reattach them.
- Work in a Well-Ventilated Area: Ensure that you have good airflow to avoid inhaling fumes from the paint.
- Test Paint on a Small Area: Before painting the entire fridge, test the paint on a small, inconspicuous area to ensure compatibility and desired color.
- Stay Patient: Allow each coat to dry fully before applying the next to avoid smudging or drips.
- Consider a Clear Coat: For added durability, consider applying a clear coat after the paint has dried.
- Adhesion Issues: If the surface isn’t properly cleaned or primed, the paint may chip or peel over time.
- Color Mismatch: Ensure you choose a paint that matches your kitchen decor and personal style.
- Time-Consuming: The process can take several days due to drying times between coats.
Materials Needed
Before you start painting your refrigerator, gather the necessary materials. Here’s a list of what you will need:
Essential Materials
Step-by-Step Guide to Painting Your Refrigerator
Now that you have your materials ready, it’s time to start the painting process. Follow these steps for a successful refrigerator makeover.
Step 1: Prepare the Area
Step 2: Clean the Refrigerator
Step 3: Sand the Surface
Step 4: Apply Primer
Step 5: Paint the Refrigerator
Step 6: Finishing Touches
Tips for a Successful Project
Potential Challenges
While painting a refrigerator can be a fulfilling DIY project, there are some challenges to keep in mind:
Comparison Table: Types of Paint for Refrigerators
| Type of Paint | Pros | Cons |
|---|---|---|
| Appliance-Specific Paint | Designed for metal, adheres well | Limited color options |
| Spray Paint | Quick application, smooth finish | Can be uneven if not applied correctly |
| Chalk Paint | Matte finish, great for vintage look | May require a topcoat for durability |
| Acrylic Paint | Wide range of colors, easy to apply | May not adhere as well without primer |
Frequently Asked Questions (FAQ)
Can I paint a stainless steel refrigerator?
Yes, you can paint a stainless steel refrigerator, but it requires additional preparation, such as using a special primer designed for metal surfaces to ensure the paint adheres properly.
How long does the paint last on a refrigerator?
With proper preparation and application, paint can last several years. However, it may begin to show wear in high-traffic areas or where it is frequently touched.
Is it safe to paint the inside of a refrigerator?
It is not recommended to paint the inside of a refrigerator, as food safety and exposure to chemicals can be a concern. Focus on the exterior for painting projects.
What should I do if the paint starts to chip?
If the paint begins to chip, you can sand the affected area, clean it, and apply a touch-up coat of paint to restore the finish.
Can I use regular house paint on a refrigerator?
Regular house paint is not recommended for refrigerators as it may not adhere well and could chip or peel. It’s best to use paint specifically designed for appliances.
Conclusion
Painting a refrigerator can be a rewarding DIY project that breathes new life into your kitchen. With the right materials, preparation, and technique, you can achieve a professional-looking finish that reflects your personal style. Whether you’re covering up unsightly scratches or simply want to change the color, painting your fridge is a feasible and budget-friendly solution. Follow the steps outlined in this guide, and enjoy your newly refreshed appliance for years to come!