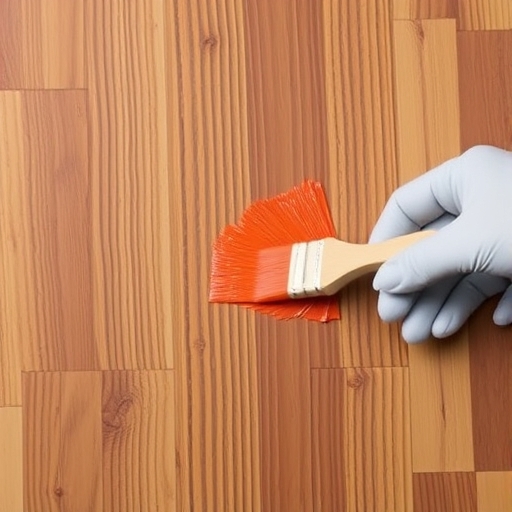
How to Remove Acrylic Paint From Wood
Acrylic paint is a versatile and popular medium for artists and DIY enthusiasts alike. However, it can sometimes end up on surfaces where it doesn’t belong, especially on wood. Whether you’ve accidentally splattered paint on your wooden furniture or you’re looking to restore an old piece, knowing how to effectively remove acrylic paint is essential. In this article, we’ll explore various methods for removing acrylic paint from wood, along with tips for preservation and maintenance.
Understanding Acrylic Paint
Before we dive into removal methods, it’s important to understand what acrylic paint is. Unlike oil-based paints, acrylics are water-soluble and dry quickly. This property can make them easier to clean up when wet, but once dry, they can become quite stubborn.
Properties of Acrylic Paint
- Water-Based: Easily thinned and cleaned with water when wet.
- Quick Drying: Dries within minutes, making it challenging to remove once dried.
- Flexible Finish: Forms a durable, flexible layer on surfaces.
- Non-Toxic: Generally considered safe, though some pigments may contain harmful materials.
- Plastic Scraper or Putty Knife: For gently scraping off the paint.
- Sponge or Cloth: For applying cleaning solutions.
- Mild Soap: A gentle dish soap to help with cleaning.
- Water: For rinsing and diluting solutions.
- Acetone or Rubbing Alcohol: For tougher paint spots.
- Paint Remover: If the paint is particularly stubborn.
- Fine Sandpaper: For smoothing the wood after paint removal.
- Protective Gear: Gloves and a mask, especially when using chemicals.
- Use Coasters and Mats: Protect surfaces from spills and scratches.
- Regular Cleaning: Dust and clean wooden surfaces regularly with a soft cloth.
- Apply a Finish: Consider applying a wood polish or finish to protect the surface.
- Avoid Harsh Chemicals: Use mild, non-abrasive cleaners to maintain the wood’s integrity.
Preparing for Paint Removal
Before you begin the paint removal process, it’s crucial to gather the necessary tools and materials. Here’s a checklist to help you get started:
Tools and Materials Needed
Methods for Removing Acrylic Paint from Wood
There are several methods for removing acrylic paint from wood, ranging from simple household solutions to more aggressive chemical removers. Here’s a detailed look at each method.
Method 1: Soap and Water
This is the simplest and least damaging method, best used for fresh paint spills.
1. Act Quickly: The sooner you address the spill, the easier it will be to clean.
2. Dampen a Cloth: Soak a cloth in warm, soapy water.
3. Wipe the Area: Gently wipe the paint with the damp cloth, being careful not to damage the wood.
4. Rinse and Dry: Rinse the area with clean water and dry it thoroughly.
Method 2: Rubbing Alcohol or Acetone
For dried paint, rubbing alcohol or acetone can be effective.
1. Test First: Apply a small amount of rubbing alcohol or acetone to an inconspicuous area to ensure it doesn’t damage the finish.
2. Soak a Cloth: Dampen a cloth with rubbing alcohol or acetone.
3. Apply to Paint: Place the cloth over the dried paint and let it sit for a few minutes to soften the paint.
4. Scrape Gently: Use a plastic scraper to gently lift the paint off.
5. Clean the Area: Wipe with a damp cloth to remove any residue.
Method 3: Commercial Paint Remover
If the paint is particularly stubborn, a commercial paint remover may be necessary.
1. Choose the Right Product: Look for a paint remover that is safe for wood surfaces.
2. Follow Instructions: Apply the remover according to the manufacturer’s instructions.
3. Scrape and Wipe: After the paint has softened, use a scraper to remove it, then clean the area with a damp cloth.
4. Ventilation is Key: Ensure you are working in a well-ventilated area when using chemical removers.
Method 4: Sanding
As a last resort, sanding can be used to remove paint, especially if other methods fail.
1. Choose Fine Sandpaper: Use 220-grit sandpaper to avoid damaging the wood.
2. Sand Gently: Lightly sand the area with the dried paint, taking care not to sand too deeply.
3. Clean the Dust: Wipe away the dust with a damp cloth.
4. Finish the Surface: If necessary, apply a wood finish to restore the surface after sanding.
Preservation Tips for Wooden Surfaces
After successfully removing acrylic paint, it’s essential to take steps to preserve the wood. Here are some tips:
Comparison Table: Methods for Removing Acrylic Paint
| Method | Effectiveness | Surface Damage | Ease of Use | Cost |
|---|---|---|---|---|
| Soap and Water | Low | Low | Easy | Low |
| Rubbing Alcohol | Medium | Low | Moderate | Moderate |
| Commercial Paint Remover | High | Moderate | Moderate | High |
| Sanding | High | High | Difficult | Low |
Frequently Asked Questions (FAQ)
How long does acrylic paint take to dry on wood?
Acrylic paint typically dries to the touch within 15-30 minutes, but it may take several hours to cure completely.
Can I use a heat gun to remove acrylic paint?
Yes, a heat gun can soften acrylic paint, making it easier to scrape off. However, be cautious to avoid overheating the wood, which can cause damage.
Will removing paint damage the wood?
If done carefully and with the right methods, paint removal should not damage the wood. However, aggressive techniques like sanding can lead to surface damage.
What should I do if the paint won’t come off?
If the paint remains stubborn after trying various methods, consider seeking professional help or using a more potent paint remover designed for tough jobs.
Is there a way to prevent acrylic paint spills?
To avoid spills, always cover your work area with a drop cloth, and use painter’s tape to protect edges and surfaces that you don’t want to paint.
Conclusion
Removing acrylic paint from wood doesn’t have to be a daunting task. With the right tools and methods, you can effectively restore your wooden surfaces to their original state. Remember to act quickly on fresh spills, and consider the preservation tips to keep your wood looking beautiful. Whether you choose to use simple soap and water or a more aggressive commercial remover, always prioritize care and caution to maintain the integrity of your wooden surfaces. Happy restoring!