How to Paint Pumpkins: A Comprehensive Guide
Painting pumpkins is a fun and creative activity that transcends age. Whether you’re preparing for Halloween, Thanksgiving, or simply want to bring some fall decor into your home, painted pumpkins are a fantastic way to express your artistic side. In this guide, we’ll cover everything you need to know about painting pumpkins, including techniques, materials, and tips for achieving beautiful results.
Table of Contents
- [Why Paint Pumpkins?](#why-paint-pumpkins)
- [Materials Needed](#materials-needed)
- [Choosing the Right Pumpkins](#choosing-the-right-pumpkins)
- [Preparation Steps](#preparation-steps)
- [Painting Techniques](#painting-techniques)
- [Basic Painting Techniques](#basic-painting-techniques)
- [Advanced Techniques](#advanced-techniques)
- [Finishing Touches](#finishing-touches)
- [Displaying Your Painted Pumpkins](#displaying-your-painted-pumpkins)
- [Tips for Success](#tips-for-success)
- [Frequently Asked Questions](#frequently-asked-questions)
- [Comparison of Painting Techniques](#comparison-of-painting-techniques)
- Longevity: Painted pumpkins last longer than carved ones, which can rot quickly.
- Safety: No sharp tools are required, making it safer for children.
- Creativity: You can create intricate designs without the constraints of carving.
- Versatility: Painted pumpkins can be used for various occasions, from Halloween to Thanksgiving.
- Pumpkins: Choose fresh, unblemished pumpkins.
- Acrylic Paints: These are the most common paints used for pumpkin painting.
- Paintbrushes:
- Flat brushes for large areas
- Detail brushes for intricate designs
- Palette: For mixing colors.
- Water Cup: For rinsing brushes.
- Paper Towels: For cleaning and drying.
- Sealant (optional): To protect your finished design.
- Pencil or Chalk: For sketching designs.
- Stencils (optional): If you want to use pre-made designs.
- Glitter or Decorative Elements (optional): To add some flair.
- Size: Choose a size that fits your design. Smaller pumpkins are great for intricate work, while larger ones allow for broader designs.
- Shape: Look for pumpkins with a smooth surface and a shape that matches your idea.
- Color: While orange is the classic choice, white and green pumpkins offer unique canvases for creativity.
- Use a flat brush to cover the pumpkin entirely with a single color.
- Allow it to dry before applying a second coat if needed.
- Use a sponge to dab paint onto the surface for a textured look.
- This technique works well with multiple colors to create a gradient effect.
- Place a stencil on the pumpkin and use a sponge or brush to fill it in.
- This technique is great for intricate designs and patterns.
- Mix acrylic paint with water to create a translucent effect.
- Layer colors to achieve depth and complexity.
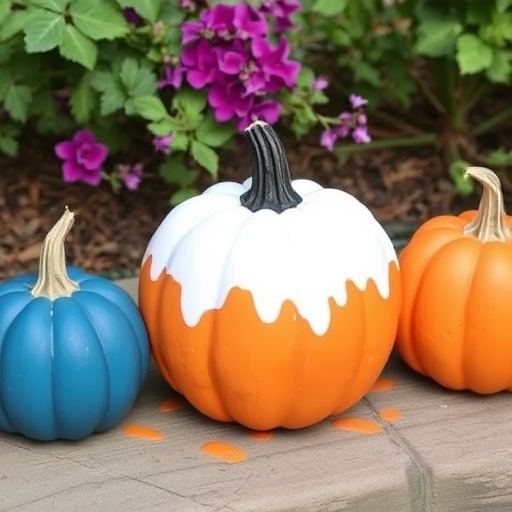
- Use a squeeze bottle to drip paint down the sides of the pumpkin.
- This creates a fun and whimsical look.
- Adhere decorative paper or fabric with mod podge for a unique design.
- Seal with a layer of mod podge on top once dry.
- Glitter: Sprinkle glitter on wet paint for a sparkling effect.
- Sealing: Apply a clear acrylic sealant to protect your design from the elements, especially if displaying outdoors.
- Accessories: Add bows, ribbons, or other decorative elements to enhance your pumpkin’s appearance.
- Porch Display: Arrange your painted pumpkins on your porch or steps for a festive look.
- Table Centerpiece: Use them as a centerpiece for your dining table.
- Indoor Decor: Place them on shelves, mantels, or side tables to add a seasonal touch.
- Work in a Well-Lit Area: Good lighting will help you see details better.
- Be Patient: Allow each layer of paint to dry completely before adding more.
- Experiment: Don’t be afraid to try new techniques or colors.
Why Paint Pumpkins?
Painting pumpkins offers several advantages over traditional carving:
Materials Needed
Before you start painting, gather the necessary materials. Here’s a list of what you’ll need:
Choosing the Right Pumpkins
Selecting the right pumpkin is crucial for a successful painting project. Here are some tips:
Preparation Steps
Before you start painting, you need to prepare your pumpkin:
1. Clean the Surface: Wipe the pumpkin with a damp cloth to remove dirt and debris.
2. Sketch Your Design: Use a pencil or chalk to lightly outline your design on the pumpkin. This will serve as a guide while painting.
3. Optional – Prime the Surface: If you’re using lighter colors, consider applying a white acrylic base coat to make the colors pop.
Painting Techniques
Basic Painting Techniques
1. Solid Color Painting:
2. Sponging:
3. Stenciling:
Advanced Techniques
1. Watercolor Effect:
2. Drip Painting:
3. Decoupage:
Finishing Touches
Once your painting is complete, consider adding some finishing touches:
Displaying Your Painted Pumpkins
After your pumpkins are painted and dried, it’s time to display them! Here are some ideas:
Tips for Success
To ensure your pumpkin painting experience goes smoothly, keep these tips in mind:
Frequently Asked Questions
How long do painted pumpkins last?
Painted pumpkins can last several weeks, especially if kept in a cool, dry place. Using a sealant can extend their lifespan.
Can I paint pumpkins with kids?
Absolutely! Painting is safer than carving and allows for creativity. Just supervise young children and ensure they use non-toxic paints.
What type of paint is best for pumpkins?
Acrylic paint is the best choice for pumpkins due to its vibrant colors and quick drying time.
Can I use spray paint on pumpkins?
Yes, spray paint can give a smooth finish, but it’s essential to do this in a well-ventilated area and follow safety instructions.
Should I carve the pumpkin before painting?
No, it’s best to paint the pumpkin without carving to ensure it lasts longer.
Comparison of Painting Techniques
| Technique | Difficulty Level | Best For | Time Required |
|---|---|---|---|
| Solid Color | Easy | Beginners | 30 minutes |
| Sponging | Medium | Textured designs | 1 hour |
| Stenciling | Medium | Intricate patterns | 1-2 hours |
| Watercolor Effect | Hard | Advanced artists | 2+ hours |
| Drip Painting | Medium | Fun, whimsical looks | 1 hour |
| Decoupage | Hard | Unique designs | 2+ hours |
Conclusion
Painting pumpkins is a delightful and creative way to celebrate the fall season. Whether you’re a novice or an experienced artist, there are techniques and styles to suit everyone. By following the steps outlined in this guide, you’ll be well on your way to creating stunning painted pumpkins that will be the highlight of your seasonal decor. So gather your materials, unleash your creativity, and enjoy the wonderful world of pumpkin painting!