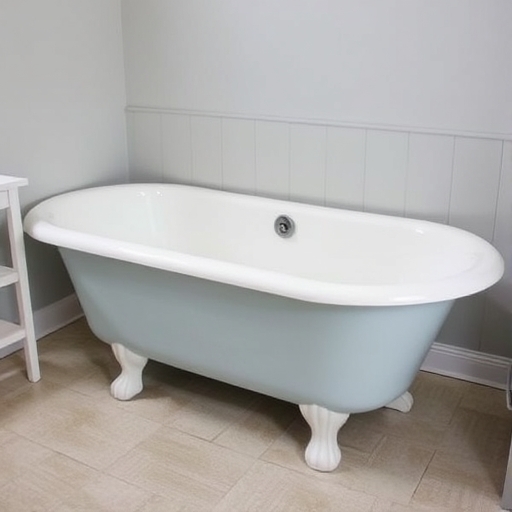
How to Paint a Bathtub: A Comprehensive Guide
Painting a bathtub can be an excellent way to refresh your bathroom without the expense of a complete remodel. Whether you’re looking to change the color, cover up stains, or simply give your tub a new lease on life, this guide will walk you through the entire process of painting a bathtub.
Table of Contents
1. [Why Paint a Bathtub?](#why-paint-a-bathtub)
2. [Materials You Will Need](#materials-you-will-need)
3. [Preparing Your Bathtub for Painting](#preparing-your-bathtub-for-painting)
4. [Choosing the Right Paint](#choosing-the-right-paint)
5. [Step-by-Step Guide to Painting a Bathtub](#step-by-step-guide-to-painting-a-bathtub)
6. [Curing and Maintenance](#curing-and-maintenance)
7. [Common Mistakes to Avoid](#common-mistakes-to-avoid)
8. [Frequently Asked Questions (FAQ)](#frequently-asked-questions-faq)
9. [Conclusion](#conclusion)
Why Paint a Bathtub?
Painting a bathtub can offer several advantages:
- Cost-effective: Instead of replacing the entire tub, painting is a much cheaper alternative.
- Aesthetic upgrade: Change the color or finish to match your bathroom decor.
- Stain removal: Cover up old stains and scratches for a fresh look.
- Durability: A good-quality paint can last several years with proper maintenance.
- Epoxy Paint: Highly durable and resistant to water, making it a popular choice for bathtubs.
- Acrylic Paint: Easier to apply, but may not last as long as epoxy.
- Specialty Tub and Tile Paint: Formulated specifically for bathtubs, these paints often come in various colors and finishes.
- Durability: Look for paints that are resistant to chipping and peeling.
- Drying Time: Consider how long the paint takes to dry; quicker drying times can speed up your project.
- Finish: Decide between a glossy or matte finish based on your aesthetic preference.
- If using a brush, start at the edges and corners of the tub.
- Use a roller for larger flat areas to ensure an even coat.
- Avoid abrasive cleaners that can scratch the surface.
- Use a gentle cleaner to maintain the finish.
- Avoid placing heavy objects in the tub for at least a week to prevent damage.
- Skipping Preparation: Proper cleaning and sanding are essential for paint adhesion.
- Using the Wrong Paint: Always choose paint specifically designed for bathtubs or tiles.
- Neglecting Ventilation: Fumes can be harmful; always work in a well-ventilated area.
- Rushing the Process: Allow sufficient drying and curing time between coats.
Materials You Will Need
Before starting the project, gather the following materials:
| Item | Purpose |
|---|---|
| Bathtub paint | Specially formulated for bathtubs |
| Sandpaper (120-grit) | For surface preparation |
| Cleaning supplies | To clean the tub (detergent, vinegar, etc.) |
| Painter's tape | To mask areas you don’t want to paint |
| Paintbrush or roller | For applying the paint |
| Respirator mask | For protection from fumes |
| Drop cloths | To protect the surrounding area |
| Paint thinner | For cleanup |
Preparing Your Bathtub for Painting
Preparation is key to a successful painting job. Follow these steps:
1. Clean the Bathtub: Use a non-abrasive cleaner to remove soap scum, dirt, and grime. For tough stains, consider using a mixture of vinegar and baking soda.
2. Sand the Surface: Lightly sand the surface of the bathtub to create a rough texture that helps the paint adhere better. Focus on areas with scratches or chips.
3. Rinse and Dry: Rinse the tub thoroughly to remove any dust or debris from sanding. Allow it to dry completely.
4. Tape Off Areas: Use painter’s tape to mask off areas around the tub that you do not want to paint, such as faucets and trim.
Choosing the Right Paint
Selecting the right paint is crucial for the longevity of your newly painted bathtub. Consider the following options:
Types of Paint
Factors to Consider
Step-by-Step Guide to Painting a Bathtub
Follow these steps for a successful bathtub painting project:
Step 1: Prepare the Area
Ensure the bathroom is well-ventilated. Open windows and use fans to circulate air, reducing the buildup of fumes.
Step 2: Apply the Paint
1. Stir the Paint: Mix the paint thoroughly according to the manufacturer’s instructions.
2. Start Painting:
3. Apply Multiple Coats: Depending on the paint type, you may need to apply 2-3 coats. Allow each coat to dry completely before applying the next.
Step 3: Remove the Tape
Once the final coat is dry to the touch, carefully remove the painter’s tape. Be cautious not to peel off any paint.
Step 4: Clean Up
Use paint thinner to clean brushes and rollers. Dispose of any waste materials properly.
Curing and Maintenance
After painting, the bathtub will need time to cure:
1. Curing Time: Allow the paint to cure for at least 24-48 hours before using the tub. Refer to the paint manufacturer’s recommendations for specific curing times.
2. Maintenance:
Common Mistakes to Avoid
To ensure a successful project, avoid these common pitfalls:
Frequently Asked Questions (FAQ)
Q1: Can I paint a fiberglass bathtub?
A: Yes, fiberglass bathtubs can be painted, but make sure to use a paint specifically designed for fiberglass surfaces.
Q2: How long does painted bathtub last?
A: With proper care and maintenance, a painted bathtub can last anywhere from 5 to 10 years.
Q3: Can I use regular paint to paint my bathtub?
A: No, regular paint is not suitable for bathtubs. Always use paints specifically designed for this purpose.
Q4: How do I remove paint from my bathtub?
A: Use a paint stripper designed for bathtubs or consult a professional for removal.
Q5: Is it safe to paint a bathtub myself?
A: Yes, as long as you follow safety precautions, including using a respirator mask and working in a well-ventilated area.
Conclusion
Painting a bathtub is a viable home improvement project that can breathe new life into your bathroom. By following the steps outlined in this guide, you can achieve a professional-looking finish that enhances the aesthetic of your space while saving money. Remember, preparation is crucial, and selecting the right materials will ensure a durable and beautiful result. Happy painting!