How to Fix Peeling Paint: A Comprehensive Guide
Peeling paint is a common problem faced by homeowners and renters alike. Whether it’s on the interior walls of your home or the exterior siding, peeling paint can be unsightly and may indicate more significant issues, such as moisture problems or improper surface preparation. This guide will walk you through the steps to effectively fix peeling paint, ensuring a long-lasting and aesthetically pleasing finish.
Understanding the Causes of Peeling Paint
Before diving into the repair process, it’s essential to understand why paint peels. Here are some of the most common causes:
- Moisture: Excess moisture can lead to peeling paint. This can occur due to high humidity, leaks, or inadequate ventilation.
- Poor Surface Preparation: If the surface was not cleaned or primed properly before painting, it can lead to adhesion failure.
- Old Paint: Old paint can lose its adhesion over time, particularly if it’s oil-based paint that has not been applied correctly.
- Temperature Fluctuations: Rapid changes in temperature can cause the paint to expand and contract, leading to peeling.
- Improper Application: Applying paint too thickly or not allowing sufficient drying time between coats can also cause issues.
- Paint scraper or putty knife
- Sandpaper (various grits)
- Wire brush
- Paint roller and tray
- Paintbrush (for touch-ups)
- Drop cloths or plastic sheeting
- Ladder (if working on exterior surfaces)
- Primer (if necessary)
- Paint (matching the existing color)
- Caulk (for filling gaps)
- Wood filler (for wood surfaces)
- Paint thinner or solvent (for cleaning)
- Wash the Surface: Use a mixture of soap and water to wash the area. For exterior surfaces, a power washer can be effective.
- Remove Dust and Debris: Use a damp cloth or sponge to wipe down the area and remove any dust or debris.
- Use Coarse Sandpaper: Start with a coarse grit (around 80-100) to remove any rough edges.
- Finish with Fine Sandpaper: Switch to a finer grit (around 220) for a smooth finish.
- Fill Holes and Cracks: Use wood filler for wooden surfaces and caulk for gaps in trim or between walls.
- Let It Dry: Allow any repairs to dry completely before proceeding.
- Choose the Right Primer: Use a stain-blocking primer for areas with stains or moisture issues.
- Apply Evenly: Use a brush or roller to apply a thin, even coat of primer. Allow it to dry as per the manufacturer’s instructions.
- Wash Brushes and Rollers: Clean them with soap and water or the appropriate solvent.
- Remove Drop Cloths: Carefully remove drop cloths and clean any spills that may have occurred.
- Regular Inspections: Check for signs of moisture or damage regularly, especially after heavy rains or storms.
- Proper Ventilation: Ensure rooms are well-ventilated to prevent moisture buildup.
- Use Quality Paint: Invest in high-quality paint and primers that are designed for your specific surface.
- Follow Application Guidelines: Always follow the manufacturer’s instructions for drying times and application techniques.
Tools and Materials Needed
Before you start fixing peeling paint, gather the following tools and materials:
Tools
Materials
Steps to Fix Peeling Paint
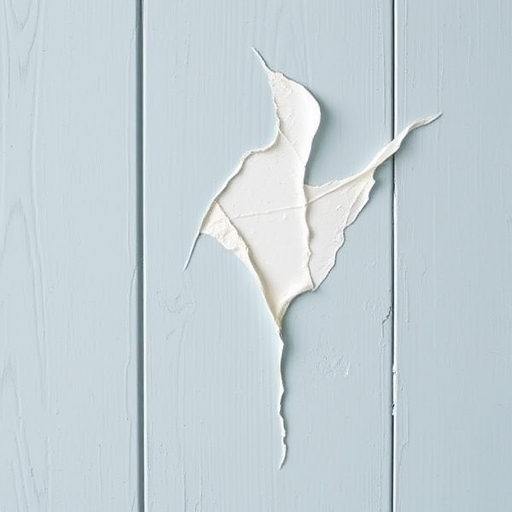
Step 1: Assess the Problem Area
Before you begin, take a close look at the affected areas. Determine the extent of the peeling and check for underlying issues such as moisture damage or mold. If you find moisture, you’ll need to address that before proceeding with paint repairs.
Step 2: Prepare the Area
1. Clear the Space: Move furniture and cover the floor with drop cloths or plastic sheeting to protect it from paint splatters.
2. Remove Loose Paint: Use a paint scraper or putty knife to carefully scrape away any peeling or flaking paint. Be gentle to avoid damaging the underlying surface.
Step 3: Clean the Surface
Once you’ve removed the loose paint, clean the area to ensure the new paint adheres properly.
Step 4: Sand the Surface
After cleaning, sand the edges of the remaining paint to create a smooth transition between the old and new paint.
Step 5: Repair Any Damage
Check for any damage to the surface that may need repair before painting.
Step 6: Prime the Surface (if necessary)
If the peeling paint has exposed bare wood or drywall, applying a primer is essential for proper adhesion.
Step 7: Paint the Area
Now it’s time to apply the new paint.
1. Choose the Right Paint: Make sure to match the new paint with the existing color and finish (matte, satin, gloss).
2. Apply the First Coat: Use a roller for larger areas and a brush for edges and corners. Apply thin, even coats to avoid drips.
3. Let It Dry: Allow the first coat to dry completely before applying a second coat, if necessary.
Step 8: Clean Up
Once you’ve completed painting, clean your tools and dispose of any materials properly.
Maintenance Tips to Prevent Peeling Paint
To keep your paint job looking fresh and prevent future peeling, consider the following maintenance tips:
Comparison of Paint Types
When it comes to choosing paint, understanding the differences can help prevent issues like peeling. Here’s a simple comparison of common paint types:
| Paint Type | Best Use | Pros | Cons |
|---|---|---|---|
| Latex Paint | Interior and Exterior | Fast-drying, easy cleanup | Less durable than oil-based |
| Oil-Based Paint | High-traffic areas | Durable, smooth finish | Longer drying time, strong odor |
| Acrylic Paint | Flexible surfaces | Good adhesion, water-resistant | Can peel if not applied correctly |
| Chalk Paint | Furniture and decor | Matte finish, easy to distress | Requires sealing for durability |
Frequently Asked Questions
How can I stop paint from peeling in the future?
To prevent future peeling, ensure proper surface preparation, use high-quality paints, and address any moisture issues before painting.
Is it necessary to prime before painting?
Priming is highly recommended, especially for bare surfaces or areas previously affected by peeling paint, as it helps with adhesion and provides a uniform base.
Can I paint over peeling paint without scraping?
It is not advisable to paint over peeling paint without proper preparation, as this will likely lead to more peeling in the future.
How long does it take for paint to dry?
Drying times vary by paint type and environmental conditions, but generally, latex paints can dry to the touch in 1-2 hours, while oil-based paints can take 6-8 hours.
When should I call a professional?
If the peeling paint is extensive, or if you suspect underlying issues such as mold or structural damage, it’s best to consult a professional for help.
Conclusion
Fixing peeling paint may seem daunting, but by following the steps outlined in this guide, you can restore your walls and surfaces to their former glory. Remember to address the root causes of peeling, such as moisture and poor preparation, and take proactive steps to maintain your paint job in the future. With the right tools and techniques, you can achieve a beautiful and long-lasting finish that enhances the beauty of your home.