What Paint to Use on Pumpkins: A Comprehensive Guide
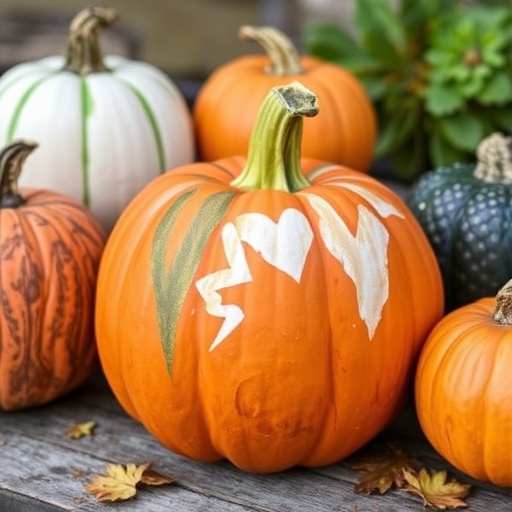
As Halloween approaches, pumpkins become the centerpiece of fall decorations. While traditional carving is a popular method to create jack-o’-lanterns, painting pumpkins has gained popularity due to its versatility and ease. This article explores the best paints to use on pumpkins, providing you with the information needed to create stunning designs that will last throughout the season.
Why Choose Paint Over Carving?
Painting pumpkins offers numerous advantages compared to carving:
- Longevity: Painted pumpkins can last longer than carved ones, which can start to rot within days.
- Creative Freedom: Painting allows for intricate designs and patterns that may be difficult to achieve through carving.
- Safety: For families with young children, painting is a safer option than using sharp carving tools.
- Variety of Styles: Paint can create a wide range of styles, from classic to modern and whimsical to elegant.
- Pros:
- Quick-drying and easy to work with.
- Available in a wide range of colors.
- Water-based, making clean-up easy.
- Offers good coverage and opacity.
- Cons:
- May not adhere well to slick pumpkin surfaces without proper preparation.
- Can be less durable outdoors if exposed to rain or moisture.
- Pros:
- Fast application and drying time.
- Creates a uniform surface without brush strokes.
- Available in a variety of finishes (glossy, matte, metallic).
- Cons:
- Requires proper ventilation when applying.
- Overspray can be an issue if not careful.
- May not be suitable for detailed designs.
- Pros:
- Non-toxic and easy to clean.
- Good for indoor decorations and temporary designs.
- Comes in vibrant colors.
- Cons:
- Not as durable as acrylic or spray paint.
- Can wash off easily with water exposure.
- Pros:
- Provides a vintage, rustic look.
- Adheres well to pumpkin surfaces.
- Can be used for both indoor and outdoor decorations.
- Cons:
- May require multiple coats for full coverage.
- Typically more expensive than other paint types.
- Pros:
- Flexible and durable once dried.
- Great for adding dimensional designs.
- Available in various finishes.
- Cons:
- Requires careful application.
- Longer drying time compared to acrylic or spray paint.
- Keep Indoors: If possible, keep your painted pumpkin indoors to protect it from the elements.
- Avoid Moisture: Keep painted pumpkins away from direct rain or excessive moisture, as this can cause the paint to run or peel.
- Use a Sealant: If your pumpkin will be displayed outdoors, consider applying a clear sealant to protect the paint.
Types of Paints Suitable for Pumpkins
When it comes to selecting paint for pumpkins, several options are available, each with its own characteristics. Below is a breakdown of the most popular types of paint suitable for pumpkin decoration.
1. Acrylic Paint
Acrylic paint is a versatile and widely used option for painting pumpkins.
2. Spray Paint
Spray paint can provide a smooth and even finish, making it ideal for large coverage areas.
3. Tempera Paint
Tempera paint is another water-based option that is safe for children.
4. Chalk Paint
Chalk paint has gained popularity in recent years for its matte finish and unique texture.
5. Fabric Paint
For those looking to add texture or unique designs, fabric paint can be a creative choice.
Preparing Your Pumpkin for Painting
Before diving into the painting process, it’s essential to prepare your pumpkin. This ensures better paint adhesion and a more polished final product.
Steps for Preparation
1. Choose a Fresh Pumpkin: Select a pumpkin that is firm and free of blemishes.
2. Clean the Surface: Wash the pumpkin with warm, soapy water to remove dirt and residue. Dry thoroughly with a towel.
3. Sand the Surface: For better paint adhesion, lightly sand the area you plan to paint. This step is particularly useful for glossy pumpkins.
4. Apply a Primer (Optional): If using acrylic or spray paint, applying a coat of primer can enhance paint adhesion and color vibrancy.
Painting Techniques for Pumpkins
Once your pumpkin is prepped and ready, you can start painting. Here are some popular techniques to consider:
1. Solid Color
For a classic look, simply paint the entire pumpkin a solid color. This is an excellent base for additional designs or stencils.
2. Stenciling
Use stencils to create intricate patterns or designs. Simply place the stencil on the pumpkin and paint over it. Remove the stencil to reveal the design.
3. Sponging
For a textured effect, use a sponge to dab paint onto the pumpkin. This technique works well for creating a layered look or ombre effect.
4. Splatter Painting
For a fun and modern design, use a brush to splatter paint across the pumpkin. This technique can create a whimsical and artistic appearance.
5. Layering
Combine different colors and techniques by layering. Start with a base color, let it dry, and then add additional designs or colors on top.
Caring for Your Painted Pumpkin
To ensure your painted pumpkin lasts throughout the season, follow these care tips:
Comparison Table of Paint Options
| Paint Type | Pros | Cons | Best For |
|---|---|---|---|
| Acrylic Paint | Quick-drying, vibrant colors | Less durable outdoors | Detailed designs |
| Spray Paint | Fast application, smooth finish | Requires ventilation, overspray risk | Large coverage areas |
| Tempera Paint | Non-toxic, easy to clean | Not durable, washes off with water | Kids' projects |
| Chalk Paint | Rustic look, good adhesion | May require multiple coats | Vintage styles |
| Fabric Paint | Flexible, durable once dried | Careful application needed | Textured designs |
Frequently Asked Questions (FAQ)
Can I use regular paint on pumpkins?
While you can use regular paint, it’s best to use paints specifically designed for crafts, as they adhere better and are safer for handling.
How do I remove paint from a pumpkin?
To remove paint, you can use rubbing alcohol or nail polish remover on a cloth. Be gentle to avoid damaging the pumpkin’s surface.
Will painted pumpkins rot?
Painted pumpkins can last longer than carved ones, but they can still rot. Keeping them indoors and away from moisture can extend their life.
Can I use paint markers on pumpkins?
Yes, paint markers are an excellent option for adding detailed designs and can provide precision for intricate work.
How can I store my painted pumpkin after Halloween?
If you want to keep your painted pumpkin, store it in a cool, dry place. Wrap it in bubble wrap or a soft cloth to protect it from damage.
Conclusion
Painting pumpkins is a fun and creative way to celebrate the fall season. With various paint options available, you can choose the best type for your needs and style. Whether you opt for classic acrylic or playful fabric paint, the possibilities are endless. By following the preparation steps and painting techniques outlined in this guide, you’ll create beautiful, long-lasting decorations that will delight your family and friends. Happy painting!