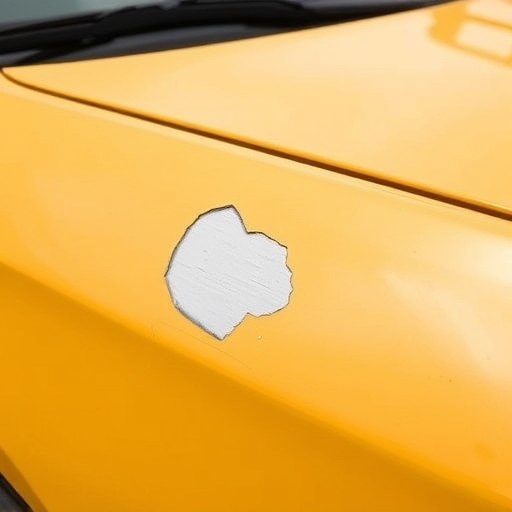
How to Fix Chipped Paint on Car
Chipped paint on a car can be an eyesore and may lead to more significant problems if not addressed promptly. Whether it’s a small scratch or a larger chip, repairing chipped paint is essential for maintaining the aesthetic appeal and value of your vehicle. In this comprehensive guide, we will explore various methods to fix chipped paint on your car, including tools, techniques, and tips to ensure a professional finish.
Understanding Chipped Paint
Before diving into the repair process, it’s essential to understand the common causes of chipped paint:
- Road Debris: Rocks, gravel, and other debris can hit the car while driving, causing chips.
- Weather Conditions: Extreme weather, such as hail or heavy rain, can damage the paint.
- Poor Maintenance: Neglecting regular maintenance can lead to paint degradation.
- Corrosion: Rust can eat away at the paint, leading to chips and cracks.
- Sandpaper: 2000-grit for smoothing the area
- Paintbrush or Applicator: For applying touch-up paint
- Masking Tape: To protect surrounding areas
- Cleaner: Wax and grease remover
- Clear Coat Spray: For a glossy finish
- Touch-Up Paint: Match the color of your car (use the color code found on the manufacturer’s label)
- Primer: If the chip is deep and exposes metal
- Polishing Compound: To blend the repair with the surrounding paint
- Small Chips: These can usually be fixed with touch-up paint.
- Larger Chips/Deep Scratches: May require sanding and priming.
- Use a cleaner to remove dirt, wax, and grease from the chipped area.
- Dry the area thoroughly with a microfiber cloth.
- Lightly sand the chipped area using 2000-grit sandpaper.
- Be careful not to sand the surrounding paint. The goal is to create a smooth surface for the touch-up paint to adhere to.
- If the chip is deep and exposes bare metal, apply a primer.
- Use a small brush or applicator to apply a thin layer of primer.
- Allow it to dry completely (check the manufacturer’s instructions for drying time).
- Shake the touch-up paint bottle well before use.
- Using a small brush or applicator, carefully apply the touch-up paint to the chipped area.
- Apply the paint in thin layers, allowing each layer to dry before applying the next.
- Be patient; multiple thin layers will yield a better result than one thick layer.
- Once the touch-up paint is dry, apply a clear coat to protect the paint and give it a glossy finish.
- Spray or brush the clear coat over the repaired area.
- Allow it to dry completely.
- Once the clear coat is dry, use a polishing compound to blend the repaired area with the surrounding paint.
- Apply a small amount of polishing compound to a microfiber cloth and buff the area gently.
- Color Matching: Always ensure your touch-up paint matches your car’s color. You can find the color code on the driver’s side door jamb or in the owner’s manual.
- Temperature and Humidity: Perform repairs in a controlled environment. Ideal conditions are around 70°F with low humidity.
- Patience is Key: Allow ample drying time between steps for the best results.
- Skipping the Cleaning Step: Dirt can prevent paint from adhering properly.
- Applying Thick Layers: This can lead to drips and an uneven finish.
- Neglecting to Sand: Failing to smooth the area can cause a noticeable bump in the paint.
Tools and Materials Needed
Before you start fixing chipped paint, gather the necessary tools and materials:
Tools
Materials
Step-by-Step Guide to Fixing Chipped Paint
Step 1: Assess the Damage
Before beginning repairs, assess the extent of the damage:
Step 2: Clean the Area
Step 3: Sand the Damaged Area
Step 4: Apply Primer (if necessary)
Step 5: Apply Touch-Up Paint
Step 6: Apply Clear Coat
Step 7: Polish the Area
Tips for a Successful Repair
Comparison of Repair Methods
| Repair Method | Best For | Pros | Cons |
|---|---|---|---|
| Touch-Up Paint | Small chips | Quick and easy | Limited to small areas |
| Professional Repair | Larger damage | High-quality finish | More expensive |
| DIY Full Respray | Extensive damage | Restores entire panel | Time-consuming and requires skill |
| Vinyl Wrap | Surface protection | Protects from further damage | May not match paint perfectly |
Common Mistakes to Avoid
Frequently Asked Questions (FAQ)
Q: How long does touch-up paint last?
A: If applied correctly and maintained, touch-up paint can last several years. Regular waxing and care can help extend its life.
Q: Can I use regular paint for touch-ups?
A: It’s recommended to use automotive touch-up paint specifically formulated for cars to ensure proper adhesion and durability.
Q: What if the chip is too big for touch-up paint?
A: For larger chips, consider seeking professional help or using a DIY full respray method to ensure a seamless finish.
Q: Will fixing chipped paint improve my car’s value?
A: Yes, maintaining the car’s paint condition can help preserve its resale value.
Q: How can I prevent future chips and scratches?
A: Regularly wash and wax your car, avoid driving in areas with loose gravel, and consider using a paint protection film.
Conclusion
Fixing chipped paint on your car is a manageable task that can save you money and enhance your vehicle’s appearance. By following the steps outlined in this guide and taking the necessary precautions, you can achieve professional-looking results. Remember, regular maintenance is key to preventing future damage, so keep your car clean and protected to enjoy its beauty for years to come.