How to Spray Paint: A Comprehensive Guide
Spray painting is a versatile and efficient way to apply paint to various surfaces. Whether you’re looking to refresh old furniture, add color to your home decor, or tackle a DIY project, mastering the art of spray painting can yield impressive results. In this guide, we’ll cover everything you need to know about spray painting, from preparation to technique, and even maintenance.
What You Need to Get Started
Before you begin your spray painting project, gather the necessary materials and tools. Here’s a checklist to help you prepare:
Essential Materials
-
- Spray Paint: Choose the right type for your project (e.g., acrylic, enamel).
- Primer: For better adhesion and a smoother finish.
- Clear Coat: To protect your paint job after it dries.
Tools and Accessories
-
- Masking Tape: To protect areas you don’t want to paint.
- Drop Cloths or Newspaper: To cover surfaces and catch overspray.
- Sandpaper: For surface preparation.
- Paint Sprayer (optional): For larger projects.
- Respirator Mask: To protect yourself from fumes.
- Gloves: To keep your hands clean.
Preparing Your Workspace
A well-prepared workspace is crucial for achieving professional-looking results. Follow these steps to set up your area:
1. Choose the Right Location: Ideally, spray paint in a well-ventilated area, preferably outdoors. If indoors, open windows and use fans to circulate air.
2. Protect Your Surroundings: Lay down drop cloths or newspapers to protect floors and furniture from overspray.
3. Organize Your Tools: Keep all your materials within reach to minimize movement while painting.
4. Wear Protective Gear: Ensure you wear a respirator mask, gloves, and goggles to protect yourself from fumes and paint splatters.
Choosing the Right Spray Paint
Selecting the right type of spray paint is essential for the success of your project. Consider the following factors:
Types of Spray Paint
| Type | Best For | Finish Options |
|---|---|---|
| Acrylic | Indoor & outdoor use | Matte, Satin, Gloss |
| Enamel | Metal & wood surfaces | Glossy, Semi-gloss |
| Specialty | Specific materials (e.g., chalkboard, fabric) | Various |
| High-Heat | Grills, engines, and other high-temperature items | Matte, Gloss |
Key Features to Consider
-
- Drying Time: Fast-drying paints are ideal for quick projects.
- Finish: Choose between matte, satin, and glossy finishes based on your desired look.
- Color Selection: Ensure the color fits your project’s aesthetic.
Surface Preparation
Proper surface preparation is vital for achieving a smooth and long-lasting finish. Here’s how to prepare your surfaces:
Step-by-Step Guide
1. Clean the Surface: Remove dust, dirt, and grease using soap and water. For tougher stains, consider using a degreaser.
2. Sand the Surface: Lightly sand the area to create a rough texture, which helps the paint adhere better. Use 220-grit sandpaper for wood and metal surfaces.
3. Repair Any Damage: Fill in cracks or holes with wood filler or putty. Allow it to dry and sand it smooth.
4. Apply Primer: If necessary, apply a coat of primer suitable for your surface. This step is particularly important for porous materials or when changing colors.
Spray Painting Techniques
Now that you’re prepared, it’s time to learn the techniques for spraying paint effectively.
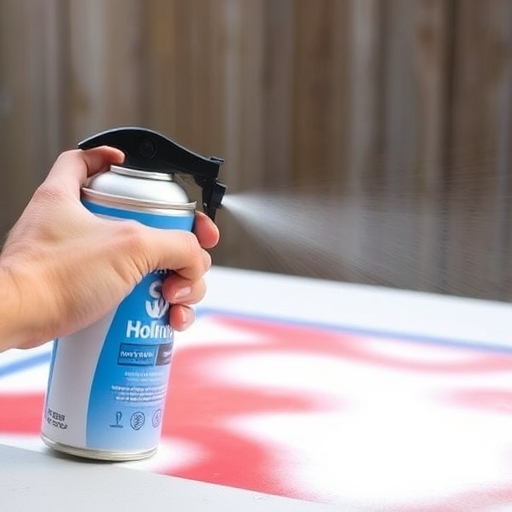
Basic Technique
1. Shake the Can: Shake the spray paint can for about 2-3 minutes to mix the paint thoroughly.
2. Test Spray: Spray a small amount on a scrap surface to get a feel for the spray pattern.
3. Hold the Can Properly: Keep the can about 6-12 inches away from the surface. Angle it slightly to avoid drips.
4. Use Even Strokes: Move the can in a smooth, sweeping motion from side to side, overlapping each pass slightly. Avoid staying in one spot to prevent drips.
5. Apply Multiple Thin Coats: It’s better to apply several thin coats than one thick coat. Allow each coat to dry according to the manufacturer’s instructions before applying the next.
Advanced Techniques
-
- Crosshatching: For better coverage, use a crosshatch pattern by spraying horizontally and then vertically.
- Spraying Corners and Edges: Use a smaller spray can or angle the can to reach tight spaces effectively.
- Avoiding Drips: If you notice drips, stop spraying immediately and let it dry. Sand the area lightly and continue.
Post-Painting Care and Maintenance
Once your project is complete, follow these steps to ensure the longevity of your spray paint job:
1. Clean Your Tools: If you used a paint sprayer, clean it thoroughly according to the manufacturer’s instructions. Dispose of any leftover paint responsibly.
2. Allow Proper Drying Time: Let the paint cure fully before using or touching the painted item. This could take anywhere from a few hours to several days.
3. Apply a Clear Coat: For added protection, apply a clear coat once the paint is dry. This will help resist scratches and fading.
4. Store Properly: Keep your spray paint cans in a cool, dry place away from direct sunlight to extend their shelf life.
Common Mistakes to Avoid
Even experienced DIYers can make mistakes when spray painting. Here are some common pitfalls to avoid:
- Skipping Surface Preparation: Failing to clean or sand the surface can lead to poor adhesion and an uneven finish.
- Not Testing the Spray: Always test on a scrap piece first to avoid surprises on your actual project.
- Spraying Too Close: Holding the can too close can cause drips and uneven coverage.
- Ignoring Weather Conditions: Wind, humidity, and temperature can affect drying times and paint adhesion. Aim for calm, dry conditions when spraying outdoors.
- Rushing the Process: Take your time with each coat. Rushing can lead to mistakes and a subpar finish.
Frequently Asked Questions
Q1: How long does spray paint take to dry?
A1: Generally, spray paint dries to the touch in 15-30 minutes, but full curing can take several hours to a few days, depending on the paint type and environmental conditions.
Q2: Can I spray paint indoors?
A2: Yes, but ensure proper ventilation. Open windows and use fans to circulate air, and always wear a respirator mask.
Q3: How do I fix mistakes when spray painting?
A3: If you get drips or runs, let the paint dry completely, then lightly sand the area and repaint. If you make a mistake with the color, you may need to strip the paint and start over.
Q4: How can I make my spray paint job last longer?
A4: Apply a primer before painting, choose high-quality spray paint, and finish with a clear coat for protection.
Q5: Is it possible to spray paint plastic?
A5: Yes, but you need to use paint specifically designed for plastic surfaces. Be sure to prepare the surface properly for the best results.
Conclusion
Spray painting can be a fun and rewarding way to add color and life to your projects. By following the steps outlined in this guide, you can achieve professional-looking results with minimal effort. Remember to prepare your workspace, choose the right materials, and apply your paint using the techniques discussed. With practice and patience, you’ll become a spray painting pro in no time! Happy painting!