6 Genius Wall Painting Solutions to Paint Over Dark Colors Easily You Need Right Now
So, you’ve decided it’s time for a change. That bold, dramatic dark wall color – whether it was a deep navy, a rich forest green, a sultry charcoal, or even a vibrant crimson – felt like a fantastic idea at the time. It added depth, created a cozy atmosphere, or made a stunning statement. But now, your heart is set on something lighter, brighter, and more airy. The only problem? The daunting thought of trying to cover that intense, saturated hue with a pale pastel, a crisp white, or a subtle neutral.
Painting light over dark can feel like an uphill battle, often requiring countless coats of paint, only to have the old color stubbornly peek through, muddying your beautiful new shade. It’s a common DIY dilemma that can lead to frustration, wasted paint, and a finish that’s far from flawless.
But don’t despair! You don’t have to resign yourself to an endless cycle of painting or settle for a less-than-perfect result. We’ve uncovered 6 genius wall painting solutions that will make covering those dark colors significantly easier, saving you time, money, and a whole lot of effort. Get ready to embrace the light with these game-changing techniques that will ensure your new, lighter paint color shines true and beautiful.
The Challenge – Why Is Painting Light Over Dark So Tough?
Before we unveil the solutions, let’s briefly understand why covering a dark color with a light one is so challenging:
- Opacity & Pigment: Dark paints contain a high concentration of color pigments. Light paints, especially whites and pastels, have less pigment and more transparent bases, making it harder for them to completely hide a strong underlying color.
- Undertones Peeking Through: The dark base color can subtly alter the perception of the new light color, tinting it or making it appear duller or “off” from what you saw on the swatch.
- More Coats Needed: Without the right approach, you could end up applying three, four, or even more coats of your light paint, which is time-consuming, expensive, and can lead to a thick, uneven paint film.
- Frustration Factor: Seeing the old color still visible after multiple coats can be incredibly demoralizing.
The good news is, with strategic preparation and the right products, these challenges are entirely surmountable.
6 Genius Solutions for Conquering Dark Walls with Light Paint
Get ready to transform your dark and dramatic rooms into light and airy havens with these proven strategies:
1. The “Prime with Purpose: Tinted Primer is Your Secret Weapon” Technique

The Problem: You apply your light-colored topcoat directly over the dark wall (or use a standard white primer), and the dark color keeps grinning through, requiring numerous coats of expensive paint.
The Solution: This is arguably the MOST crucial step. Don’t just prime – prime strategically with a high-quality, high-hide primer that is tinted gray or a shade similar to, but lighter than, your new light topcoat color.
- Why Gray Primer? It might seem counterintuitive to apply gray before a light color, but gray is a neutral base that does an exceptional job of “resetting” the wall and hiding the dark color underneath. It provides a neutral starting point, making it easier for your light topcoat to achieve its true hue with fewer coats. A light to medium gray primer is often ideal.
- Why Tinted Primer (to a lighter version of your topcoat)? Some paint stores can tint your primer to a lighter shade of your chosen topcoat color. This helps the topcoat cover even more effectively, as the base is already closer to the final hue. However, for very dark underlying walls, a gray primer often performs better initially to neutralize the darkness. You could even do a coat of gray primer, followed by a coat of primer tinted to your topcoat if the dark color is exceptionally stubborn.
- Choose a High-Hide Primer: Look for primers specifically labeled “high-hide,” “stain-blocking,” or “problem-solving.” These are formulated with more solids and better pigments to provide superior coverage over existing colors and stains.
- Quality Matters: Don’t skimp on the primer. A good quality primer might cost a bit more, but it will save you significantly on the number of (more expensive) topcoats needed and the labor involved. Brands like Zinsser B-I-N, Zinsser Cover Stain (oil-based, excellent for tough jobs but ensure good ventilation), or Kilz Premium (water-based, high-hide) are popular choices. Many acrylic (water-based) primers also offer excellent hiding capabilities.
Why It Works So Effectively:
A tinted (especially gray) high-hide primer acts as a powerful intermediary layer. It neutralizes the dark base color, preventing it from influencing the appearance of your light topcoat. This significantly reduces the “show-through” effect, meaning your light paint doesn’t have to work as hard to cover, and you’ll achieve your desired color with fewer coats – typically just two coats of topcoat over a well-primed surface.
Pro-Tip: When getting your primer tinted gray, ask the paint store for a shade that’s about 50% of the way between the dark wall color and your new light topcoat, or a standard light to medium gray. Ensure the primer is thoroughly mixed. Apply one, or for very intense darks, two coats of primer, allowing full drying time between coats as per the manufacturer’s instructions.
2. The “Superior Surface Preparation” Mandate: Clean, Dull, and Smooth
The Problem: You apply primer and paint, but the dark color still seems to affect the finish, or you notice adhesion issues later on. The old dark paint might have had a sheen or accumulated grime that interferes with the new layers.
The Solution: Thorough surface preparation is non-negotiable, regardless of the color change, but it’s especially critical when going from dark to light.
- Clean Thoroughly: Wash the dark walls meticulously to remove any dirt, grease, grime, or nicotine residue. Use a solution of TSP (trisodium phosphate) substitute or a good household degreasing cleaner (like Dirtex or Krud Kutter). Rinse with clean water if your cleaner requires it, and allow the walls to dry completely. Painting over a dirty surface will compromise adhesion for both primer and paint.
- De-Gloss If Necessary: If the dark paint has a glossy, semi-gloss, or even satin finish, it needs to be de-glossed to allow the primer to adhere properly. Lightly sand the entire surface with fine-grit sandpaper (120-150 grit). The goal isn’t to remove the old paint, just to dull the sheen and create a slight “tooth” for the primer to grip.
- Wipe Away Dust: After sanding, meticulously remove all sanding dust using a vacuum with a brush attachment, followed by a tack cloth or a damp microfiber cloth. Any remaining dust will create a gritty finish and interfere with adhesion.
- Repair Imperfections: Fill any nail holes, cracks, or dents with spackling compound or joint compound. Sand these patches smooth once dry and prime them before applying your overall primer coat to ensure an even finish.
Why It Works So Effectively:
A clean, dull, and smooth surface ensures maximum adhesion for your primer and subsequent paint coats. Removing grease and grime prevents them from acting as a barrier. De-glossing a shiny surface gives the primer something to “bite” into. This robust foundation prevents the new paint layers from failing due to poor adhesion, which can be exacerbated when multiple coats are needed to cover a dark color.
Pro-Tip: Don’t underestimate the importance of cleaning. Even walls that look clean can have a surprising amount of invisible residue (like oils from hands or cooking fumes) that can repel paint.
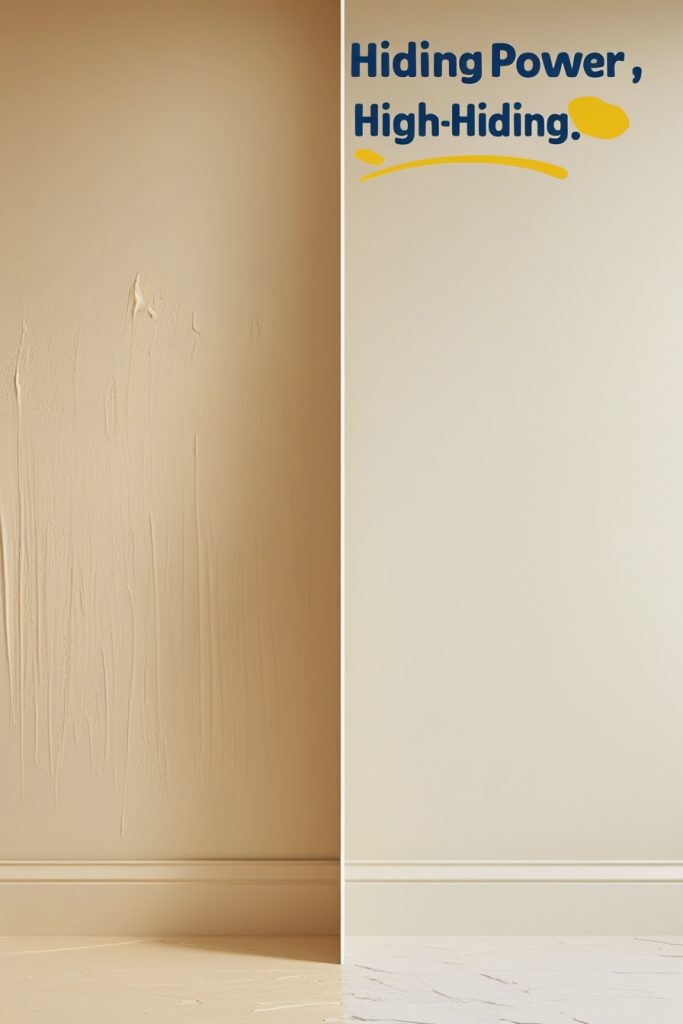
3. The “Invest in High-Quality, High-Hiding Paint” Strategy: Not All Light Paints Are Equal
The Problem: You’ve primed well, but your chosen light-colored topcoat still seems a bit translucent, requiring more coats than you anticipated.
The Solution: Just as with primer, the quality of your topcoat matters immensely when covering dark colors.
- Choose Premium Paints: Higher-quality paints generally contain more titanium dioxide (the pigment that provides whiteness and opacity) and better quality binders. This translates to superior hiding power. Look for paints labeled as “high-hiding,” “one-coat coverage” (though always be skeptical of one-coat claims over very dark colors, even with primer), or those with a good reputation for opacity.
- Consider “Paint and Primer in One” (with caution): Some high-end paints are marketed as “paint and primer in one.” While these can offer better coverage than standard paints, when going from a very dark color to a very light one, using a dedicated high-hide separate primer (as in Solution #1) first is still highly recommended for the best and most efficient results. You can then follow with a high-quality “paint and primer in one” topcoat for its excellent hiding properties.
- Avoid Bargain-Bin Paints: Cheap, low-quality light paints will have significantly less hiding power and will almost certainly require many frustrating coats, ultimately costing you more in paint and labor.
Why It Works So Effectively:
A topcoat with excellent opacity will cover the primed surface (even if it’s gray or a tinted primer) more effectively and achieve the true desired light color in fewer applications. Better pigments and binders create a more robust and opaque paint film.
Pro-Tip: Read paint reviews online and ask for recommendations at reputable paint stores. Explain that you’re covering a dark color. Sometimes, specific lines within a brand offer better coverage than others. Don’t be afraid to spend a little more on your paint; the results will be worth it.
4. The “Apply Thin, Even Coats & Allow Proper Curing” Technique: Patience for Perfection

The Problem: In an attempt to cover the dark color quickly, you apply thick coats of primer or paint. This can lead to runs, drips, an uneven orange-peel texture, slow drying, and, surprisingly, can even hinder overall coverage and adhesion.
The Solution: Resist the urge to apply heavy coats. Instead, focus on multiple thin, even coats, allowing for adequate drying and curing time between each.
- Thin Coats of Primer: Apply your primer in one or two thin, even coats. Don’t try to achieve full obliteration of the dark color with just the primer (though a good one will do a lot of the heavy lifting). The goal is to create a uniform, well-adhered base.
- Thin Coats of Topcoat: Apply your light-colored topcoat in two (or sometimes three, for very dramatic changes even after good priming) thin, even coats.
- Respect Drying & Recoat Times: This is crucial. Read the instructions on your primer and paint cans. Allow the recommended drying time before applying the next coat. Rushing this can re-wet the underlying layer, causing it to lift or mix, and compromising the opacity and adhesion of the subsequent coat. “Dry to the touch” is not the same as “ready for recoat.”
- Full Cure Time: Remember that paint takes time to fully cure and achieve its final hardness and color integrity (often several days to weeks). While you can usually recoat much sooner, be gentle with newly painted surfaces.
Why It Works So Effectively:
Thin coats dry more evenly and adhere better. Trying to apply paint too thickly prevents the lower portion of the film from curing properly and can trap solvents or moisture. Each thin coat builds opacity incrementally, leading to a smoother, more professional finish without the risk of drips or sags that thick coats can cause. Proper drying between coats ensures each layer bonds effectively to the one beneath it.
Pro-Tip: Use good quality rollers with the appropriate nap length for your wall texture (typically 3/8″ for smooth walls). Load the roller with paint, but don’t let it drip. Roll in a consistent “W” or “N” pattern, then fill in, maintaining a wet edge to avoid lap marks.
5. The “Strategic Use of a ‘Sacrificial’ Coat of White” Method: An Extra Barrier (If Needed)
The Problem: You’ve applied a good gray or tinted primer, but the original dark color was incredibly intense (like a true black or a deep, vibrant red), and you’re still seeing a hint of it influencing your first light topcoat, or you want extra assurance before applying your expensive final color.
The Solution: After your initial high-hide primer (gray or tinted), consider applying one coat of a good quality, basic flat white paint before moving on to your final light topcoat.
- Why Flat White? Flat white paint is generally less expensive than premium topcoats and often has decent hiding power. It acts as an additional barrier, further neutralizing any lingering undertones from the dark base and the gray primer.
- When to Use This: This is an optional step, best reserved for the most extreme dark-to-light transitions or if you’re particularly concerned about achieving the absolute purest version of your final light color.
Why It Works So Effectively:
The flat white coat provides another layer of opacity, effectively “bleaching out” the surface further after the primer has done its main job. This gives your final, more expensive light topcoat an even brighter, more neutral canvas to work on, ensuring its color integrity.
Pro-Tip: If you use this method, ensure the flat white coat is fully dry before applying your final topcoat. This adds an extra step and drying time, so weigh the benefits against the extra labor for your specific situation. For many dark-to-light transitions, a good quality tinted high-hide primer and two coats of premium topcoat are sufficient.
6. The “Color Psychology & Expectation Management” Approach: Understanding Nuances

The Problem: You’ve followed all the steps, but the new light color still doesn’t look exactly like the tiny swatch you picked out, or it seems to change in different lights.
The Solution: Understand how colors interact and manage your expectations.
- Lighting is Everything: The same paint color can look dramatically different depending on the natural and artificial light in a room, the time of day, and even the direction the walls face (north-facing rooms get cooler light, south-facing get warmer light).
- Surrounding Colors Influence Perception: The colors of your flooring, furniture, ceiling, and trim will all subtly influence how your new light wall color appears.
- Test Large Swatches: Never choose a paint color based solely on a small chip. Once you’ve primed your dark wall (ideally with gray), paint large sample swatches (at least 2×2 feet) of your potential light topcoat colors directly onto the primed wall. Observe these swatches at different times of day and under different lighting conditions before committing to painting the whole room.
- Slight Shifts Can Be Normal: Even with perfect preparation, a very subtle influence from a previously very dark wall might occur, or the large scale of the color on all four walls might just feel different than a small swatch. This is where appreciating the overall new brightened feel of the room comes in.
- Don’t Chase Absolute Perfection to the Detriment of Progress: If after good priming and two coats of quality light paint, the result is 99% there and looks beautiful and bright, it might be time to declare victory rather than applying a fourth or fifth coat chasing an imperceptible difference.
Why It Works So Effectively (for your sanity and satisfaction):
This approach helps you make more informed color choices and understand the variables that affect final paint appearance. Testing large swatches on the actually primed wall gives you the most accurate preview. It prevents disappointment by setting realistic expectations for how a light color will perform and look in your specific environment after covering a dark base.
Pro-Tip: When painting your large test swatches, label them clearly. If you’re testing multiple light shades, apply them a few feet apart so they don’t visually “contaminate” each other too much until you’re ready to compare.
Your Bright New Walls Await – No More Dark Color Dominance!
Painting over dark colors with lighter shades doesn’t have to be the Herculean task it’s often made out to be. By arming yourself with these six genius solutions from the game-changing power of tinted high hide primer to meticulous surface preparation and the choice of quality materials you can conquer even the most stubborn dark walls and achieve a beautifully light, airy, and evenly colored finish.
Remember that patience is key; allow adequate drying time between coats and don’t rush the prep work. The little extra effort you put in at the beginning will pay off immensely in the final result, saving you from unnecessary coats, frustration, and the disappointment of a less-than-perfect finish. So, embrace the change, pick your favorite light hue, and get ready to transform your space with confidence!
Frequently Asked Questions
- Q: How many coats of light paint does it typically take to cover a dark color?
A: If you properly prepare the surface and use a high-quality, tinted (ideally gray) high-hide primer, you can usually achieve excellent coverage with two coats of your light-colored topcoat. Without a good primer, it could take four, five, or even more coats, and the result may still be unsatisfactory. - Q: Is gray primer really better than white primer for covering dark paint?
A: Yes, in most cases, a light to medium gray primer is more effective than a standard white primer for covering very dark or vibrant colors. Gray provides a more neutral base that helps to “hide” or neutralize the dark undertones more efficiently, allowing your light topcoat to appear truer to its color with fewer coats. (Solution #1) - Q: Can I just use a “paint and primer in one” product to paint light over dark and skip the separate primer?
A: While high-quality “paint and primer in one” products offer better coverage than standard paints, for a dramatic color change from very dark to very light, using a separate, dedicated high-hide primer (tinted gray or to your topcoat) first is still highly recommended for the best, most efficient, and most economical results in terms of paint usage and labor. - Q: Do I need to sand the old dark paint before priming and painting?
A: If the old dark paint has any sheen (gloss, semi-gloss, or even satin), then yes, you should lightly sand it to de-gloss the surface and create a “tooth” for the primer to adhere to properly. If the dark paint is completely flat (matte) and in good condition, a thorough cleaning might be sufficient, but light sanding is rarely a bad idea to ensure optimal adhesion. - Q: What’s the biggest mistake people make when trying to paint a light color over a dark one?
A: The single biggest mistake is skipping or skimping on primer, or using the wrong kind of primer. A high-quality, high-hide primer, ideally tinted gray, is the most critical factor for success. The second biggest mistake is often inadequate surface cleaning. - Q: Will the old dark color eventually bleed through my new light paint job over time?
A: If you’ve properly prepared the surface, used a quality stain-blocking/high-hide primer, and applied sufficient coats of quality topcoat, the old dark color should not bleed through. The primer’s job is to create a permanent barrier. Bleed-through typically happens due to inadequate priming or if stains (like nicotine or water stains) were present on the dark wall and not properly sealed. - Q: Is it more expensive to paint a light color over a dark color?
A: It can be slightly more expensive primarily due to the non-negotiable need for a high-quality primer and potentially an extra coat of primer or topcoat compared to painting light over light. However, by using the solutions outlined (especially strategic priming), you can minimize the number of expensive topcoats needed, making it much more manageable and preventing the excessive cost of applying many, many coats of paint. - Q: What kind of roller nap should I use when painting light over dark?
A: The roller nap length depends more on your wall’s texture than the color change. For smooth drywall walls, a 3/8-inch nap is generally recommended for both primer and paint. If your walls have a light texture, a 1/2-inch nap might be better. Using the correct nap ensures even application and helps with coverage. - Q: How long should I wait for the primer to dry before applying my first coat of light paint?
A: Always follow the manufacturer’s instructions on the primer can for recoat times. This can range from 1 hour for some fast-drying primers to 4-6 hours or even longer for others, depending on the type (water-based vs. oil-based) and environmental conditions (temperature and humidity). “Dry to the touch” is not the same as “ready for recoat.” Allowing proper drying/curing time is essential for good adhesion. (Solution #4)
Leave a Reply