20 Trending Wall Painting Techniques You Need to Know in 2025
As we settle further into 2025, the desire to personalize our living spaces and transform them into unique, expressive havens continues to grow. While choosing the right paint color is fundamental, it’s the technique of application that truly elevates a simple paint job into a work of art. This year, wall painting is moving far beyond basic rolling and brushing, embracing methods that introduce texture, depth, intricate patterns, and bespoke finishes. If you’re ready to push your creative boundaries and give your walls a standout look that reflects the latest in interior design, mastering these trending techniques is key.
Forget flat, uninspired surfaces. The paint application methods making waves in 2025 are all about adding character, tactility, and a touch of artisanal flair to your home. From the soft, cloud-like allure of limewash to the precision of intricate stenciling and the immersive drama of color drenching, there’s a technique to suit every style and skill level. Whether you’re a seasoned DIY pro looking for new challenges or a curious beginner eager to make a statement, these 20 trending wall painting techniques will provide the inspiration and know-how you need for your next incredible home transformation.
Why Explore New Wall Painting Techniques in 2025?
Venturing beyond standard painting methods offers a multitude of benefits:
- Achieve Unique, Custom Finishes: Techniques allow you to create looks that can’t be bought off a shelf.
- Add Depth and Character: Textured or layered finishes bring a richness and complexity to your walls.
- Express Your Personal Style: Different techniques lend themselves to various aesthetics, from rustic charm to modern sophistication.
- Create Stunning Focal Points: A wall treated with a special technique can become the centerpiece of a room.
- Stay Current with Design Trends: Many trending styles are defined by the specific techniques used to create them.
- Boost Your DIY Skills: Learning new techniques is rewarding and expands your creative capabilities.
Let’s delve into the painting techniques that are capturing the imagination of designers and DIYers in 2025.
20 Trending Wall Painting Techniques for a Stunning 2025 Interior:
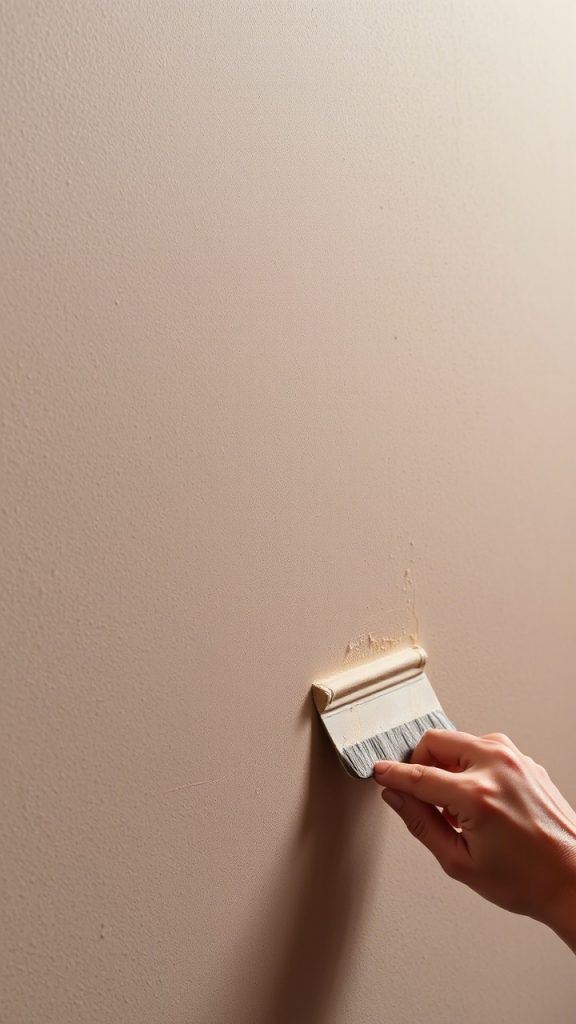
1. Limewashing: For Ethereal, Chalky Depth
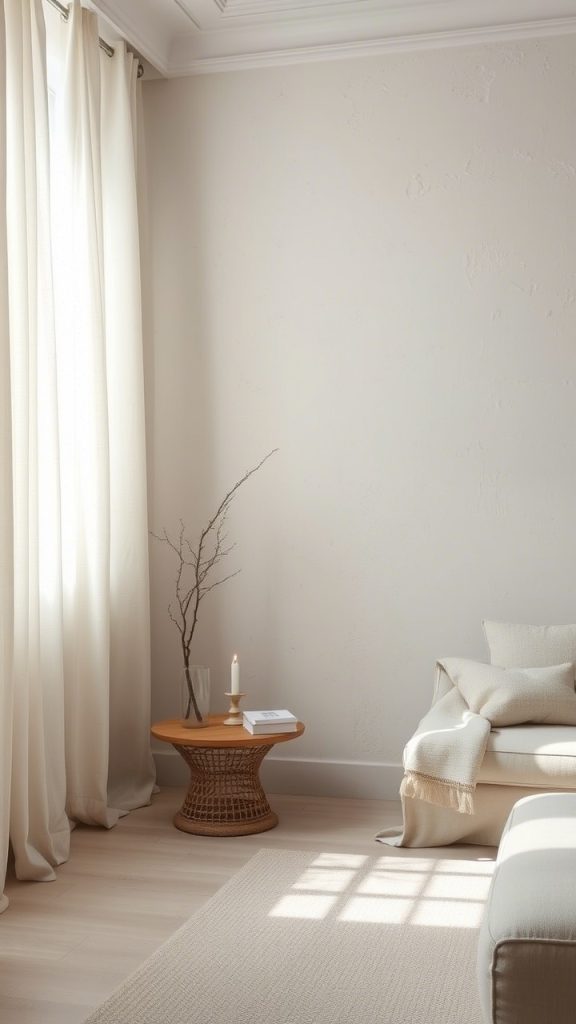
The Technique: Limewash
Limewash is a traditional, eco-friendly paint made from slaked lime combined with natural pigments. The application involves using a specialized block brush to gently apply the thin, watery paint in soft, overlapping strokes — often in X-shaped or fan-like motions. This technique produces a uniquely matte, slightly chalky finish with subtle tonal variations, creating a soft, cloud-like texture on the wall.
Why It’s Trending in 2025
Limewash is gaining popularity due to its natural, breathable qualities and earthy aesthetic. It perfectly fits the growing demand for organic, calming interiors and sustainable materials. This finish brings incredible depth and character, evoking a serene, almost ancient ambiance that resonates with contemporary design sensibilities.
Key Steps / How-To
- Prepare the walls: Clean thoroughly and prime if necessary, especially on porous surfaces.
- Mix the limewash: Whether using powder form (mixed with water) or pre-mixed products, ensure thorough blending.
- Dampen the wall: Lightly moisten the surface before application to improve absorption.
- Apply the limewash: Use a limewash block brush to paint in soft, sweeping, overlapping strokes. Work in manageable sections.
- Coating: Apply two to three thin coats. Each coat looks darker when wet and lightens as it dries. The subtle variations emerge as the paint cures.
Tools & Materials Needed
- Limewash paint (powder or pre-mixed)
- Specialized limewash block brush
- Protective gear (gloves, safety glasses, and mask) due to the caustic nature of limewash
Best Applications
Ideal for living rooms, bedrooms, dining areas, and hallways, limewash perfectly complements organic, rustic, Mediterranean, or Wabi-Sabi interior styles, adding warmth and timeless character.
2. Roman Clay / Faux Plaster Application: Smooth, Mottled Elegance
The Technique: Roman Clay / Faux Plaster
This technique replicates the smooth, subtly mottled, and dimensional look of traditional Venetian plaster or aged clay walls using specialized (often acrylic or plaster-based) products. The application typically involves using a flexible joint knife or trowel to apply thin, overlapping layers in sweeping, multi-directional strokes.
Why It’s Trending in 2025
Roman Clay offers a sophisticated, luxurious, and tactile finish that feels both ancient and modern. The subtle movement and depth create a serene, high-end appearance that aligns perfectly with the “quiet luxury” and organic modern interior styles.
Key Steps / How-To
- Ensure the wall is very smooth and primed; a Level 5 drywall finish is ideal.
- Apply a thin skim coat of the Roman clay or plaster-like product using a flexible steel trowel or joint knife.
- Use varied, overlapping, arcing, or sweeping strokes. The direction and pressure affect the final texture and look.
- Apply multiple (2-3) thin coats, often burnishing the final coat with the trowel as it dries to enhance smoothness and sheen (if desired).
- Some products can be sealed afterward for added protection.
Tools & Materials Needed
- Roman clay or similar plaster-effect paint
- Flexible steel trowels or joint knives of various sizes
- Primer
Best Applications
Ideal for feature walls in living rooms, bedrooms, powder rooms, dining rooms, or entryways—perfect for adding a touch of understated opulence.
3. Color Drenching Application: The Monochromatic Immersion
he Technique: Color Drenching
Color drenching involves the deliberate application of a single paint color—or very closely related shades—across all surfaces within a defined space. This includes walls, trim (baseboards, window and door frames), doors, built-in shelving, and sometimes even the ceiling and radiators.
Why It’s Trending in 2025
Color drenching creates a bold, cohesive, and incredibly chic statement. It can make a room feel larger by blurring visual boundaries or intensely cozy and enveloping when using deeper hues. This technique simplifies the visual landscape, allowing textures and furnishings to stand out beautifully.
Key Steps / How-To
- Select your unifying color carefully.
- Prepare all surfaces meticulously—walls, trim, doors, and ceiling.
- Apply paint systematically to each surface. For subtle differentiation, vary the sheen—for example, matte or eggshell on walls, satin or semi-gloss on trim and doors in the exact same color.
- Ensure even coverage and clean lines between any surfaces not being drenched.
Tools & Materials Needed
- High-quality paint in the chosen color and sheens
- Brushes for trim and detailed areas
- Rollers for walls and ceilings
- Painter’s tape to protect any adjacent surfaces not being painted
Best Applications
Ideal for bedrooms to create a cocooning effect, living rooms as a sophisticated backdrop, home offices for a focused atmosphere, libraries, or hallways for a dramatic transition.
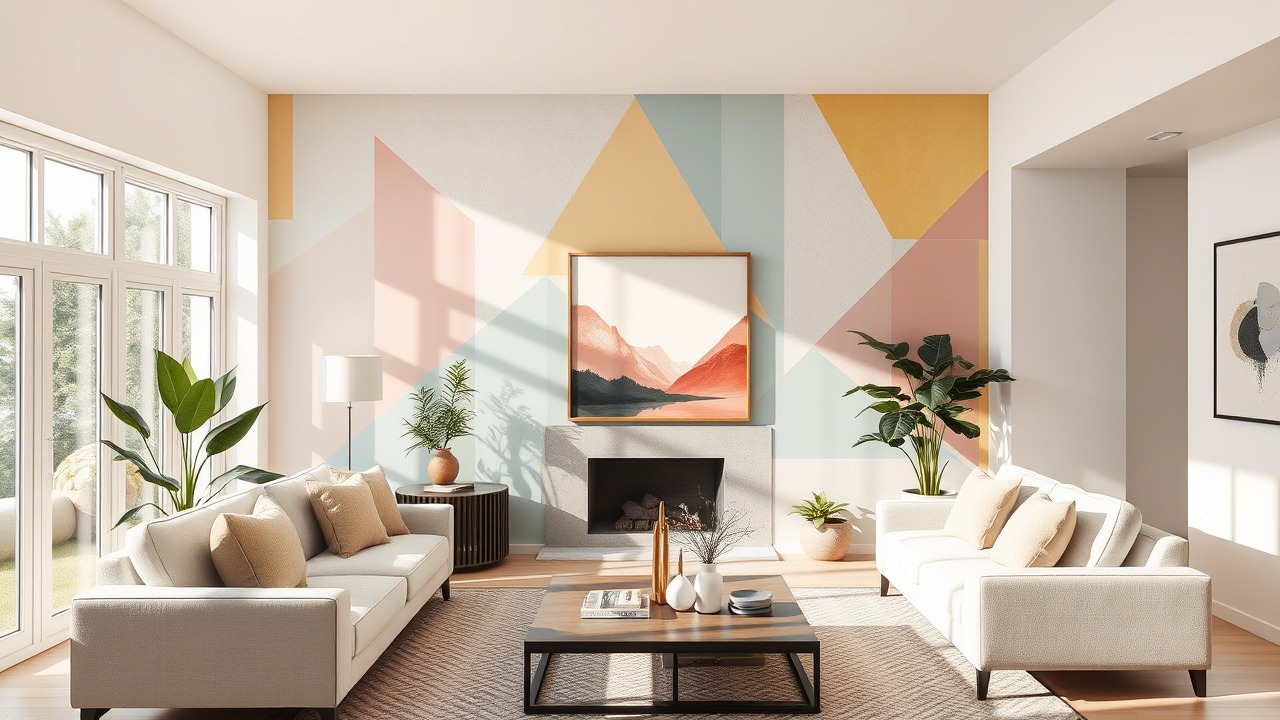
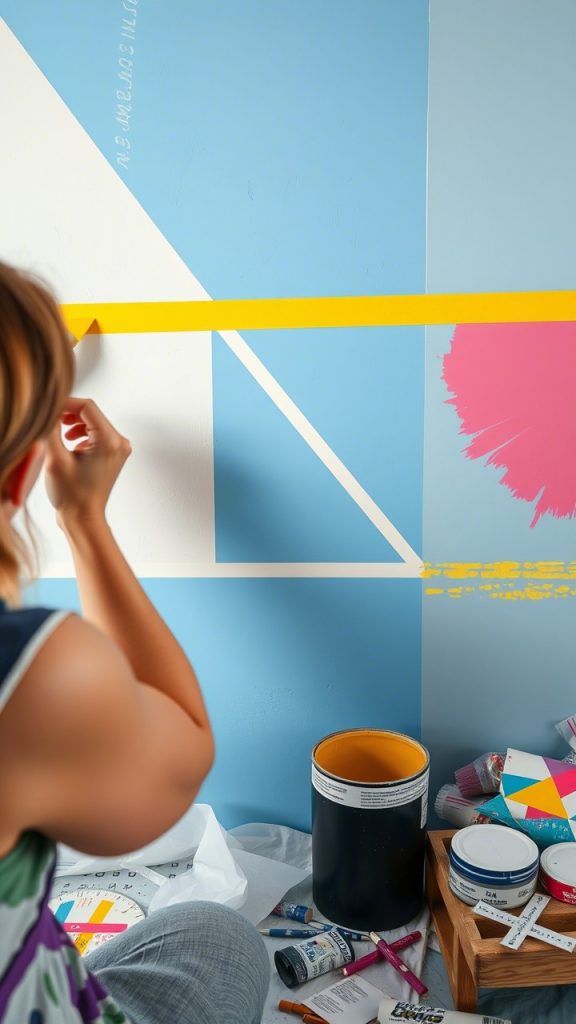
4. Precision Taping for Geometric & Color Block Designs: Sharp Line Artistry
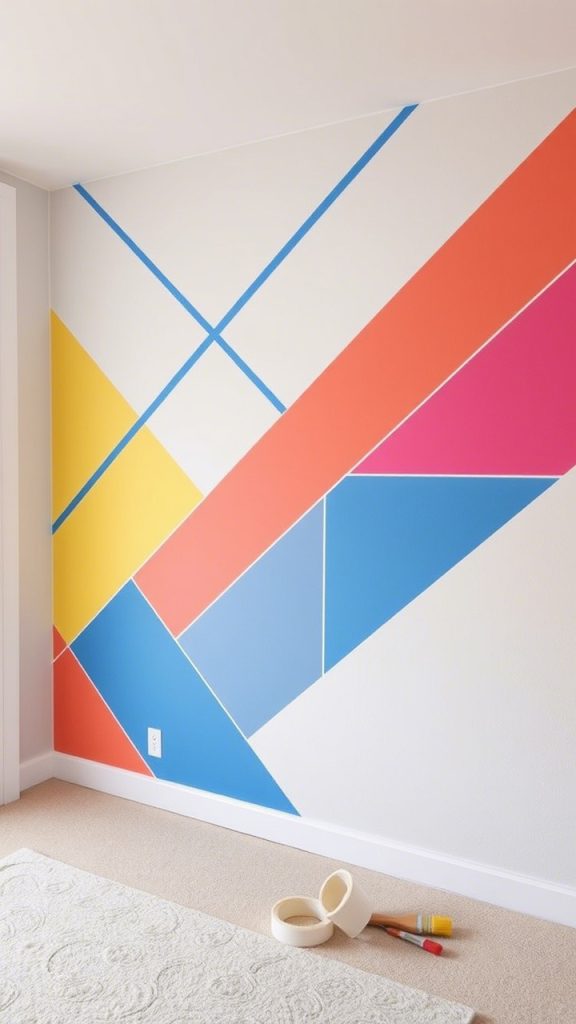
The Technique: Precision Taping for Geometric Designs
This technique involves the meticulous application of high-quality painter’s tape to create crisp, sharp lines for geometric patterns such as triangles, chevrons, diamonds, stripes, or large color-blocked sections. Success relies on careful measurement, layout, and precise tape application and removal.
Why It’s Trending in 2025
Geometric and color-blocked designs remain popular for adding modern, graphic interest to interiors. The precision offered by this technique gives DIY projects a professional and intentional look that stands out.
Key Steps / How-To
- Plan your design on paper, then transfer measurements to the wall using a pencil, level, and measuring tape.
- Apply high-quality painter’s tape (e.g., FrogTape) along the outside edges of the areas to be painted.
- Burnish (press firmly) the tape’s edge that will receive paint using a putty knife or credit card to create a tight seal.
- For ultra-sharp lines, paint a thin coat of the base wall color along the tape’s edge and let it dry—this seals any potential gaps.
- Paint your new color(s) within the taped sections, applying two thin coats.
- Remove the tape while the last coat is still slightly tacky, pulling it off slowly at a 45-degree angle.
Tools & Materials Needed
- High-quality painter’s tape
- Level
- Measuring tape
- Pencil
- Putty knife or credit card
- Paint
Best Applications
Perfect for accent walls in living rooms, bedrooms, home offices, kids’ rooms, or hallways where a dynamic visual impact is desired.
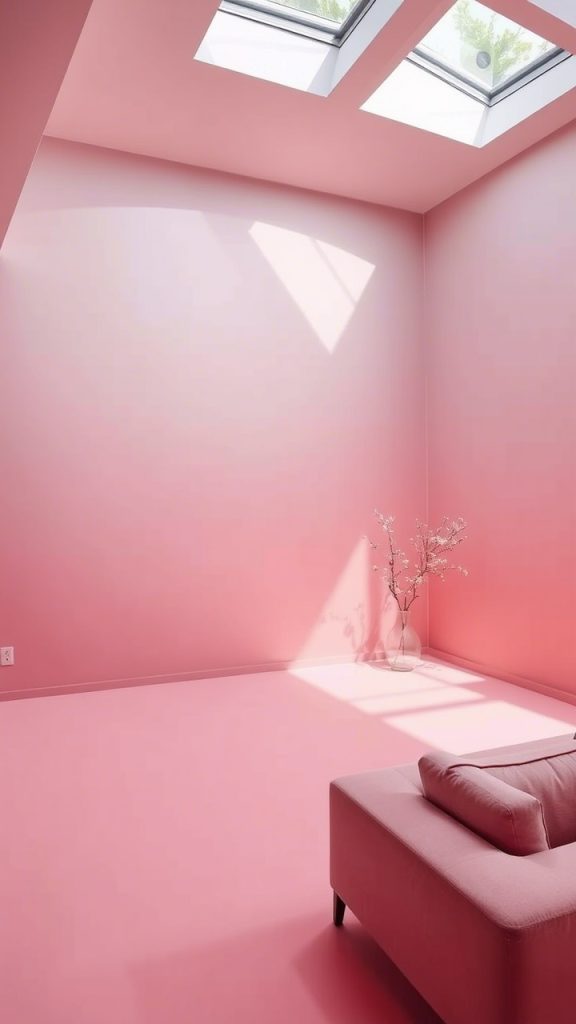
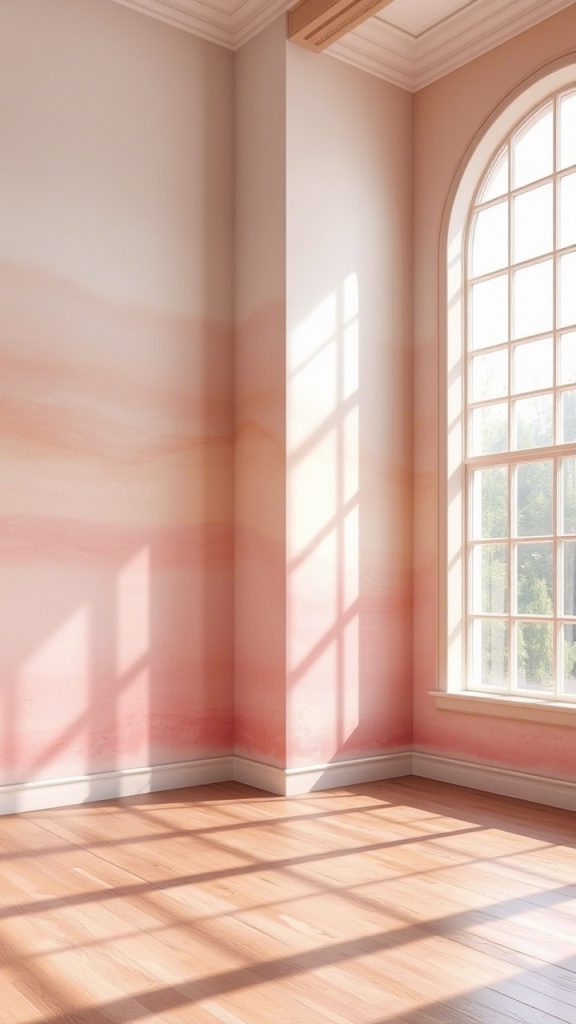
5. Ombre/Gradient Blending: Seamless Color Transitions
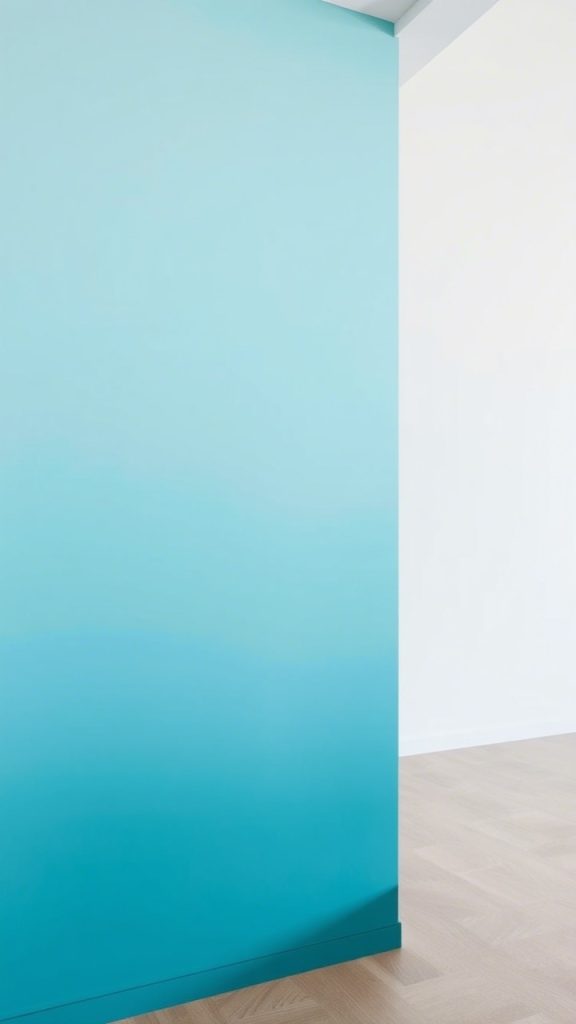
The Technique: Ombre and Gradient Painting
This technique creates a smooth, gradual transition between two or more paint colors (or shades of the same color) on a wall. It typically involves painting bands of color and then blending the wet edges together using brushes or sponges.
Why It’s Trending in 2025
Ombre and gradient effects bring an artistic, ethereal, and calming quality to interiors. Modern trends favor subtle, sophisticated gradients that focus on soft, atmospheric shifts rather than bold, dramatic transitions.
Key Steps / How-To
- Choose 2–3 (or more for complex gradients) harmonious colors.
- Divide the wall into horizontal or vertical sections and paint each with its respective color.
- While adjacent color bands are still wet, use a clean, dry brush (or multiple brushes for different transition zones) or a damp sponge to gently blend the colors where they meet, using soft, feathery, crisscross, or vertical strokes.
- Work patiently and frequently step back to assess the blend.
Tools & Materials Needed
- Multiple paint colors
- Rollers or brushes for applying base colors
- Clean, dry brushes or sponges for blending
Best Applications
Ideal for bedroom accent walls to create a serene ambiance, nurseries, bathrooms for a spa-like feel, or any space where a soft, artistic touch is desired.
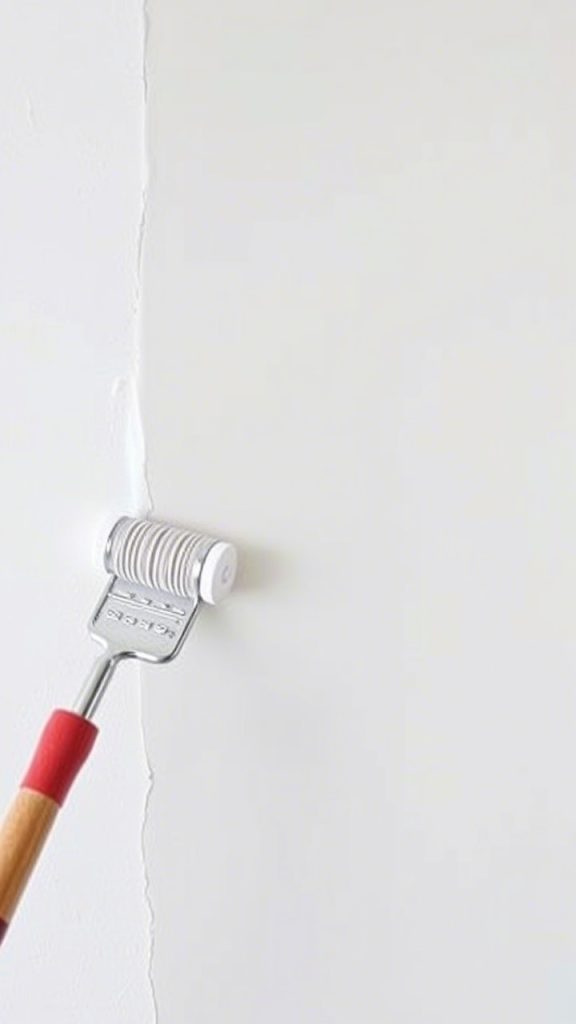
6. Dry Brushing Technique: Subtle Texture & Aged Effects
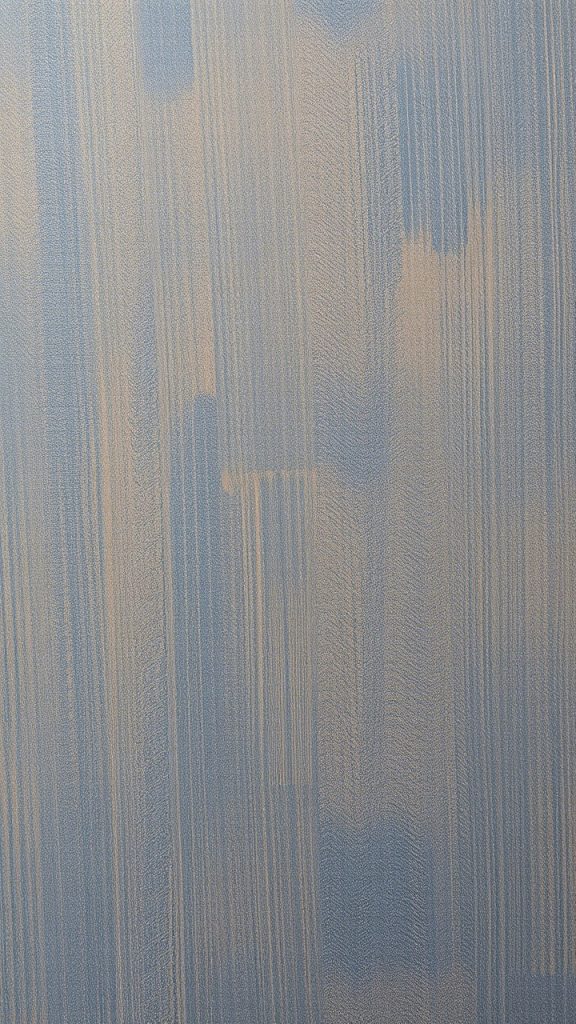
The Technique: Dry Brushing
Dry brushing involves applying a very minimal amount of paint to a brush and then lightly dragging or sweeping it over a previously painted and dried base coat. The goal is not full coverage but to leave subtle streaks or a textured haze of the new color, allowing the base color to show through.
Why It’s Trending in 2025
Dry brushing adds soft texture and depth, creating a gently aged, weathered, or linen-like effect. It’s a subtle way to add character without overwhelming a space, fitting perfectly with trends toward artisanal and understated finishes.
Key Steps / How-To
- Paint your base color and let it dry completely.
- Choose a contrasting or complementary color for the dry brush layer—often slightly lighter, darker, or even metallic for a subtle shimmer.
- Dip just the tips of an old or inexpensive brush (natural bristles often work best) into the paint.
- Wipe off almost all the paint on a piece of cardboard or newspaper until the brush is nearly dry.
- Lightly drag the brush over the wall in consistent strokes (vertical, horizontal, or crisscross). Pressure controls how much color is deposited.
Tools & Materials Needed
- Base coat paint
- Top coat paint (small amount)
- Old or stiff paintbrush
- Cardboard or newspaper for offloading paint
Best Applications
Perfect for accent walls in bedrooms or living rooms to create a cozy, slightly rustic, or shabby chic feel. Ideal for faux linen or denim effects.
7. Large-Scale Stenciling: Bold Pattern Power
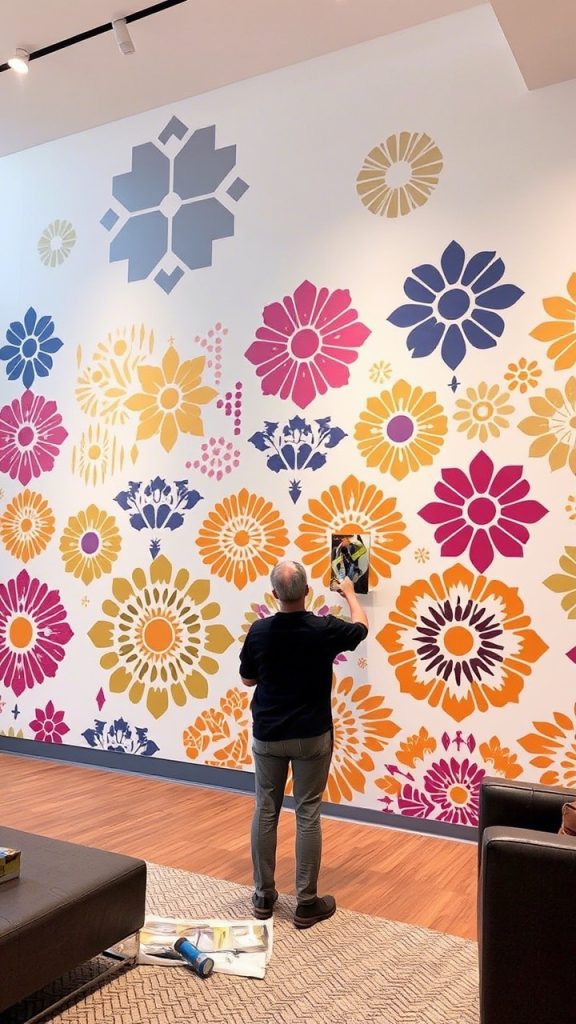
The Technique: Large-Scale Stenciling
This technique uses large, often reusable stencils to apply a repeating pattern over an entire wall or a significant portion of it. It can mimic the look of wallpaper but offers more customization in color and placement.
Why It’s Trending in 2025
Large-scale stenciling allows for intricate and bold patterns without the commitment or expense of wallpaper. Geometric, botanical, and Art Deco-inspired designs are especially popular for creating striking accent walls.
Key Steps / How-To
- Ensure a smooth, evenly painted base coat.
- Position your stencil using a level and secure it with painter’s tape or stencil adhesive spray.
- Load a stencil brush or high-density foam roller with a small amount of paint. Offload excess paint onto a paper towel to avoid “blobby” application.
- Apply paint through the stencil using a dabbing (stippling) motion or light rolling. Avoid pushing paint under stencil edges.
- Carefully remove the stencil, clean if necessary, and reposition using registration marks for seamless repeats.
Tools & Materials Needed
- Large stencil
- Stencil brush or dense foam roller
- Paint
- Painter’s tape or stencil adhesive
- Level
Best Applications
Ideal for accent walls in living rooms, dining rooms, bedrooms, powder rooms, or entryways to create a high-impact design statement.
8. Color Washing & Glazing: Translucent Layers of Depth
The Technique: Color Washing
Color washing involves applying a thin, translucent layer of diluted paint or colored glaze over a dried base coat. Tools like cheesecloth, rags, color washing brushes, or sponges are used to create a soft, mottled, or subtly textured effect that allows the base color to show through in varying degrees.
Why It’s Trending in 2025
This technique adds depth, dimension, and a soft, aged, or ethereal quality to walls. It is more subtle than many faux finishes of the past, offering a sophisticated way to introduce gentle color variation and texture.
Key Steps / How-To
- Apply a solid base coat, often a lighter color, and let it dry completely.
- Mix your top color with glazing liquid or water (for latex paints, creating a “wash”). The ratio determines the translucency.
- Apply the wash or glaze in sections using a brush, rag, or sponge. Manipulate the wet layer with ragging off, sponging off, or soft brush strokes to achieve the desired effect.
Tools & Materials Needed
- Base coat paint
- Top coat paint or universal tints
- Glazing liquid (optional)
- Brushes, rags, sea sponge, cheesecloth
Best Applications
Perfect for living rooms and dining rooms to evoke old-world or rustic charm, and bedrooms for a soft, dreamy atmosphere.
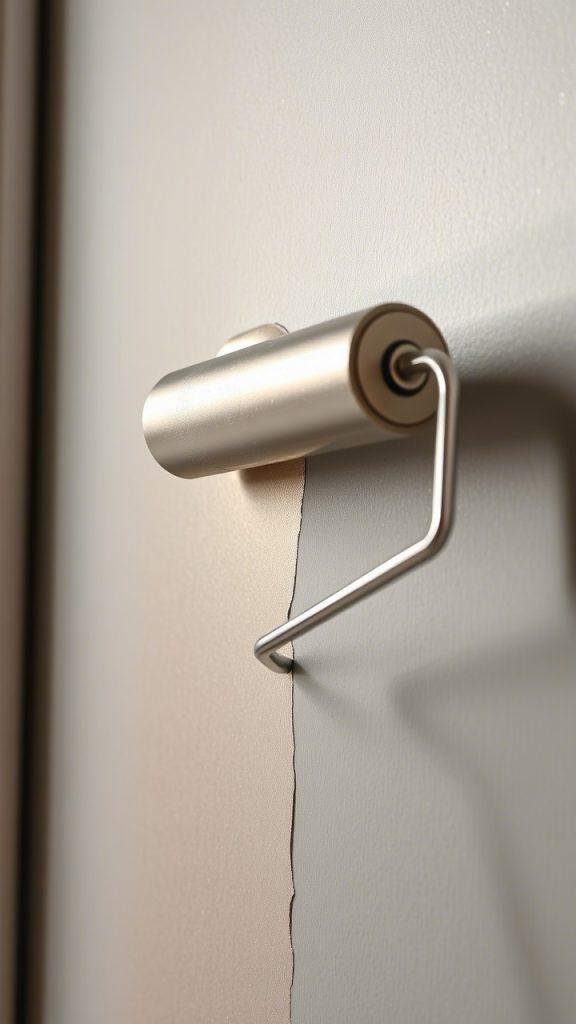
9. High-Gloss Application Technique: Achieving a Lacquered Look
The Technique: High-Gloss Application
This technique focuses on the meticulous application required to achieve a flawless, mirror-like high-gloss or lacquered finish, often used on ceilings, accent walls, or trim.
Why It’s Trending in 2025
High-gloss finishes dramatically reflect light, adding glamour, depth, and a touch of unexpected luxury. A high-gloss ceiling, especially, can make a room feel taller and more opulent.
Key Steps / How-To
- Surface perfection is essential: walls or ceilings must be perfectly smooth (Level 5 drywall finish), as high gloss highlights every flaw.
- Use a high-quality primer designed for glossy topcoats.
- Apply multiple (3–5 or more) thin, even coats of high-gloss paint.
- Lightly sand between coats with ultra-fine sandpaper (400–600 grit) after each coat dries to ensure ultimate smoothness.
- Use a fine-finish roller (such as mohair or short nap microfiber) or ideally a paint sprayer for best results, minimizing brush strokes.
Tools & Materials Needed
- High-gloss paint
- High-quality primer
- Fine-finish rollers or paint sprayer
- Ultra-fine sandpaper
- Tack cloths
Best Applications
Perfect for ceilings in dining rooms or bedrooms, accent walls in modern living rooms or home offices, and trim or doors to add chic contrast.
10. Faux Concrete Finish Technique: Industrial Chic
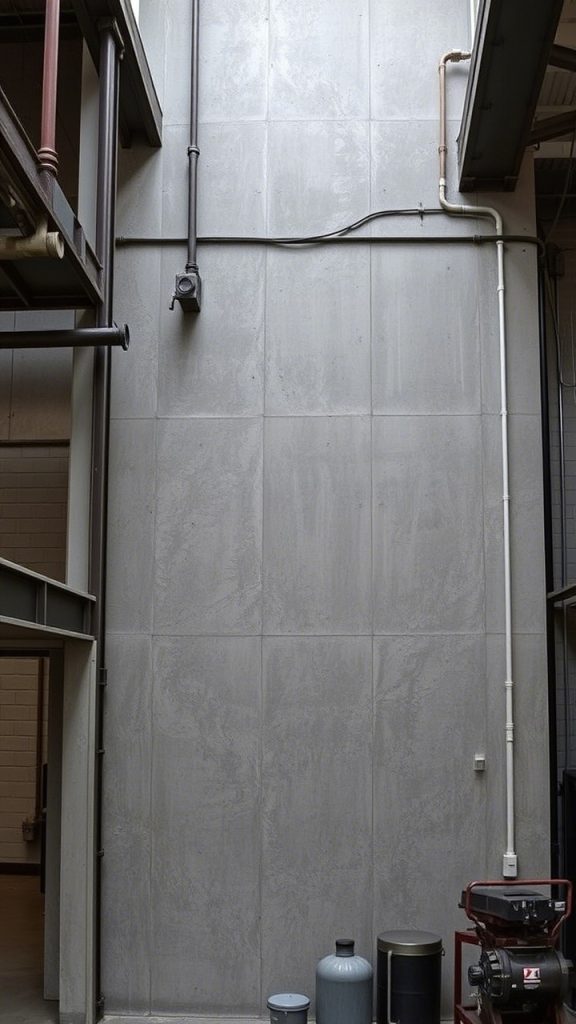
The Technique: Concrete Effect
This technique creates the look and subtle texture of poured or troweled concrete using layers of paint, joint compound, or specialized concrete-effect paints. It typically involves applying and manipulating gray-toned products in layers to mimic natural concrete variations.
Why It’s Trending in 2025
Industrial and minimalist aesthetics continue to be popular. The concrete effect adds an edgy, urban, yet sophisticated texture. It’s a more accessible and affordable way to achieve this look compared to real concrete.
Key Steps / How-To
- Start with a primed wall.
- Apply thin layers of gray-tinted joint compound or specialized concrete paint using a trowel or wide putty knife, creating subtle variations and trowel marks.
- Layer or blend multiple shades of gray to mimic the natural variations of concrete.
- Leave the surface slightly rough for texture or sand and seal it for a smoother finish.
Tools & Materials Needed
- Gray paints in various shades
- Joint compound (optional)
- Concrete effect paint
- Trowels or putty knives
Best Applications
Ideal for accent walls in modern living rooms, home offices, lofts, or commercial-inspired spaces.
11. Harlequin Pattern Painting: Classic Diamond Drama
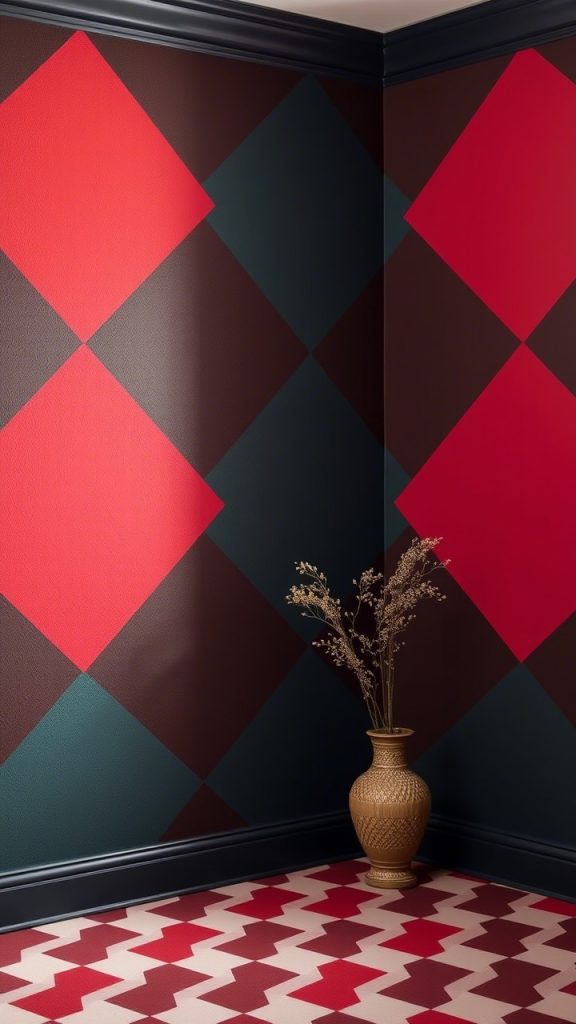
The Technique: Harlequin Pattern
This technique creates a repeating diamond pattern on a wall, often using two or more contrasting colors. It requires careful measurement, layout, and precise taping to achieve sharp lines and even shapes.
Why It’s Trending in 2025
The harlequin pattern is timeless and classic, yet playful and dramatic. It adapts well to various styles—from traditional to whimsical—depending on color choices and scale.
Key Steps / How-To
- Paint the entire wall with your lightest diamond color (or the color you want as the base/lines). Let it dry.
- Measure and mark a diamond grid carefully using a level, measuring tape, and pencil.
- Tape off alternating diamonds (or those you want to paint in a second color). Burnish tape edges to seal.
- Paint the taped-off diamonds with your contrasting color(s).
- Remove the tape while the paint is slightly tacky for crisp edges.
Tools & Materials Needed
- At least two paint colors
- Painter’s tape
- Level
- Measuring tape
- Pencil
Best Applications
Great for children’s rooms or nurseries with playful colors, accent walls in dining rooms or entryways for a bold statement, or powder rooms.
12. Using a Paint Sprayer for Ultra-Smooth Finishes: The Pro DIY Method
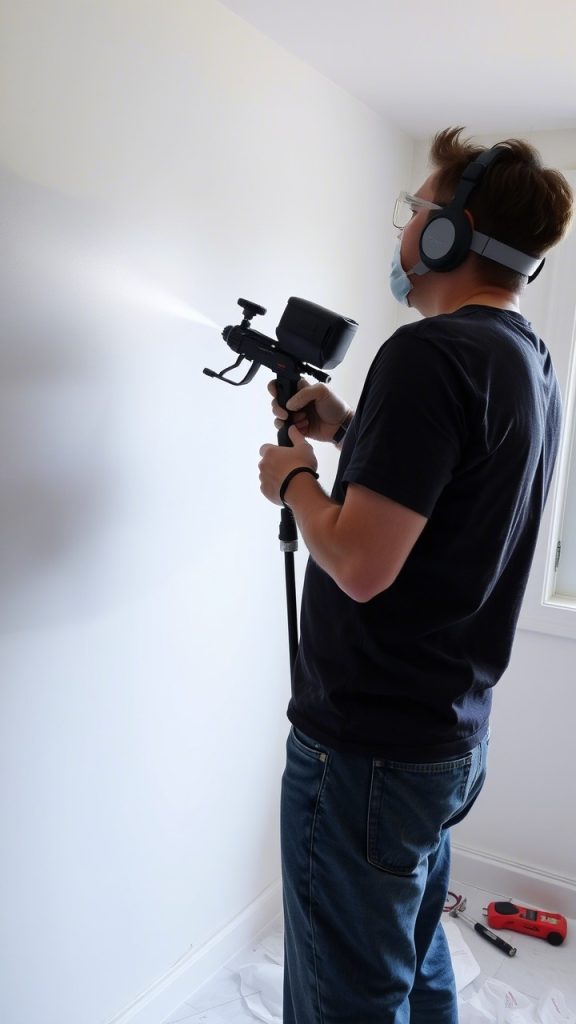
The Technique: Paint Spraying
This technique uses an airless or HVLP (High Volume Low Pressure) paint sprayer to apply paint instead of brushes or rollers. The sprayer atomizes paint into fine particles, creating a very smooth, even, and brush- or roller-mark-free finish.
Why It’s Trending in 2025
For DIYers willing to invest in or rent the equipment and learn the method, sprayers offer unmatched speed for large areas and deliver superior quality finishes—especially for modern, minimalist interiors or high-gloss paints.
Key Steps / How-To
- Mask extensively: cover everything not to be painted (floors, windows, trim, furniture, adjacent rooms) to prevent overspray.
- Thin paint according to the sprayer manufacturer’s instructions for proper flow.
- Practice on large cardboard pieces to master spray pattern, distance, and speed.
- Apply paint in even, overlapping passes, keeping the sprayer moving steadily and perpendicular to the surface.
- Use multiple thin coats rather than one thick coat for best results.
- Thoroughly clean the sprayer immediately after use to maintain it.
Tools & Materials Needed
- Airless or HVLP paint sprayer
- Paint
- Thinner (if required)
- Extensive masking supplies (painter’s tape, plastic sheeting, paper)
- Respirator mask, safety glasses, coveralls
Best Applications
Ideal for large, open wall surfaces; rooms with intricate details (like coffered ceilings or extensive trim); and achieving flawless high-gloss finishes.
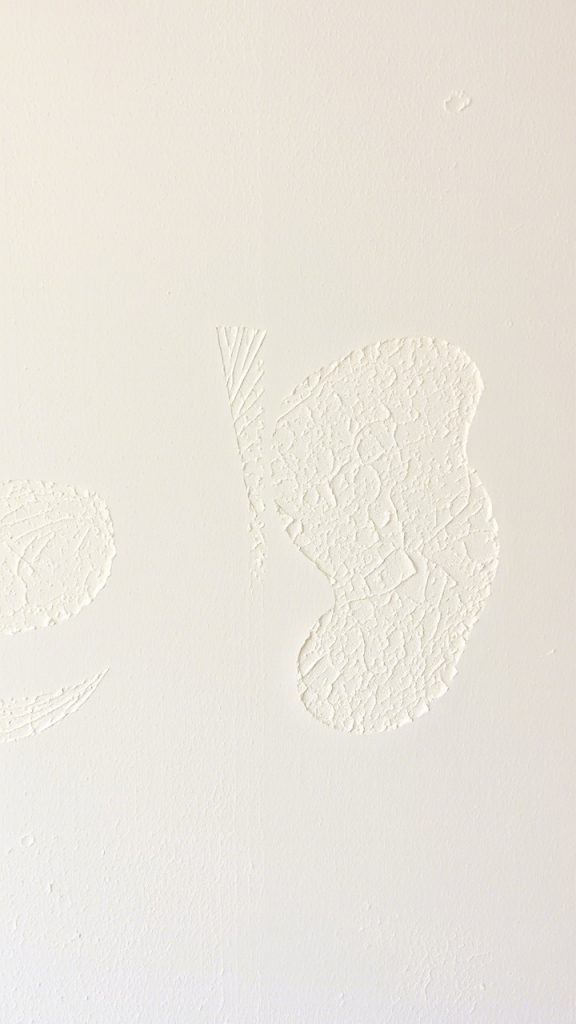
13. Creating Painted Arches & Organic Shapes: Layout & Execution Focus
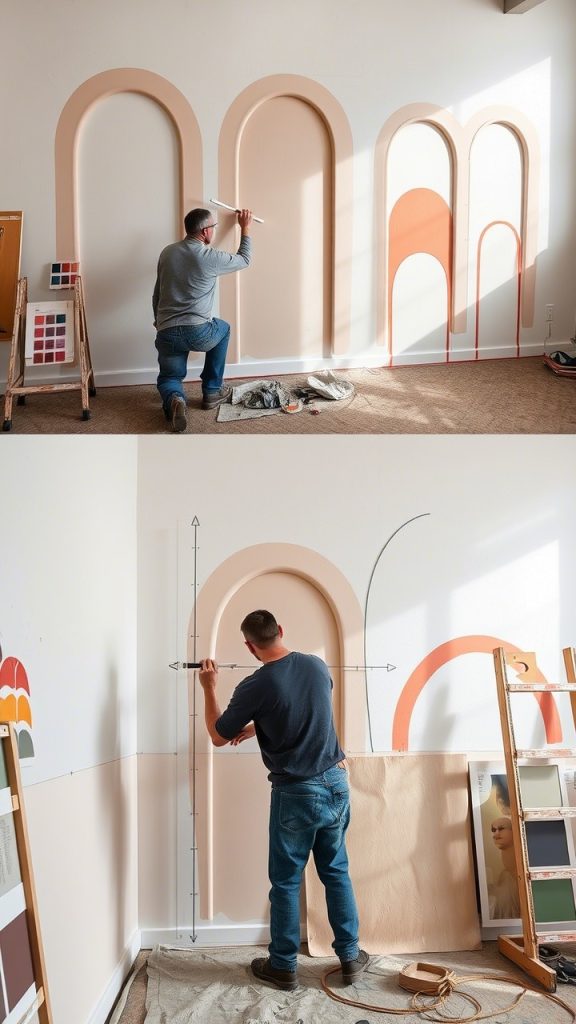
The Technique: Painted Arches & Organic Shapes
This technique focuses on accurately laying out and painting soft, curved shapes—like arches, circles, or free-form “blobs”—to define zones, frame furniture, or add artistic flair.
Why It’s Trending in 2025
These shapes offer a playful yet sophisticated alternative to purely linear designs, adding architectural interest and a bespoke feel without any structural changes.
Key Steps / How-To
- Layout: For arches, use the “string and pencil” compass method to create curved tops. For circles, trace large round objects or use the compass method. For organic shapes, lightly sketch freehand with a pencil.
- Taping straight edges: Use painter’s tape for any straight sections.
- Painting curves: Carefully freehand curves with a high-quality angled sash brush, or use flexible painter’s tape made for curves, or apply standard tape in short, slightly overlapping strips following the curve.
- Burnish tape edges well before painting inside the shape to avoid bleeding.
Tools & Materials Needed
- Pencil, string, thumbtack (for compass method)
- Level
- Painter’s tape (standard and/or flexible)
- Angled sash brush
- Paint
Best Applications
Perfect behind headboards, framing desks or vanities, creating faux nooks, decorating children’s rooms, or as graphic accents in living spaces.
14. Metallic Paint Application Technique: Achieving Even Shimmer
The Technique: Metallic Paint Application
This technique focuses on the specific method of applying metallic paints to achieve an even, streak-free, and luminous finish, as these paints can be less forgiving than standard latex.
Why It’s Trending in 2025
Metallic accents—gold, silver, bronze, copper—continue to add glamour and warmth. Mastering their application ensures a luxurious, professional look rather than a blotchy or uneven finish.
Key Steps / How-To
- Smooth Surface & Proper Base: Start with a very smooth, well-primed wall. Metallic paints often require a specific base coat color (such as a similar flat tone or a primer with tint) to enhance their richness.
- Stir Thoroughly: Mix the metallic paint well and stir frequently, as pigments tend to settle.
- Thin, Even Coats: Apply thin, even layers of paint.
- Maintain a Wet Edge: Use a consistent application direction—like all vertical strokes or X-patterns—to minimize visible overlaps and sheen differences. Some painters prefer rolling, others brushing, or even spraying for the most uniform finish.
- Avoid Overworking: Don’t over-brush or over-roll once the paint starts to set, as this can cause streaking or uneven texture.
Tools & Materials Needed
- Metallic paint
- Recommended base coat or tinted primer
- High-quality fine-finish roller (microfiber rollers work well) or soft-bristled brush
- Paint tray
Best Applications
Ideal for accent walls, stenciled patterns, geometric details, trim accents, or even furniture pieces.
15. Layering & Distressing Techniques: For Vintage & Textured Charm
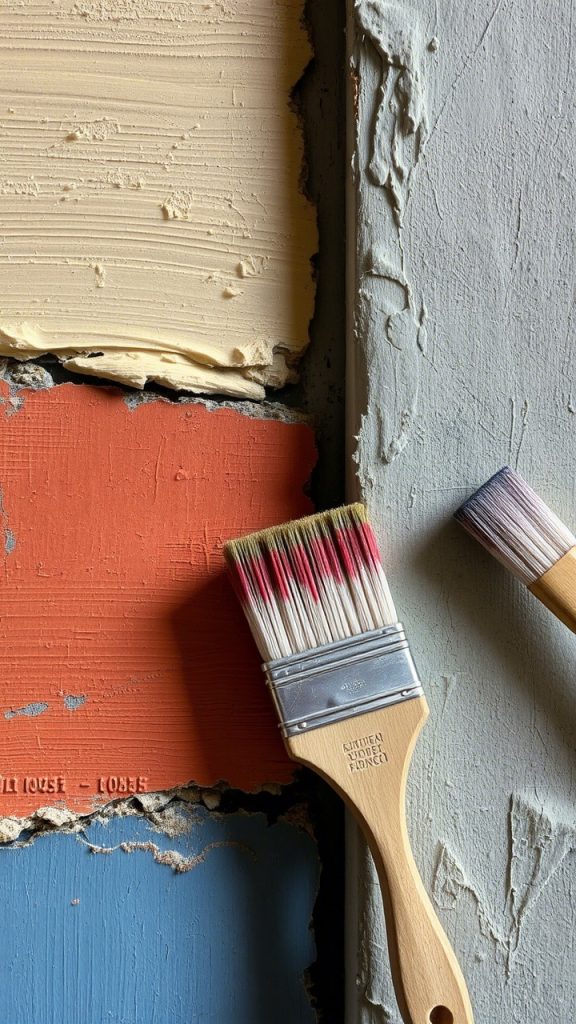
The Technique: Distressing / Paint Layer Removal
This technique involves applying multiple layers of different paint colors and then selectively removing or sanding parts of the top layer(s) to reveal the colors underneath, creating an aged, weathered, or multi-tonal textured look.
Why It’s Trending in 2025
It aligns perfectly with the desire for characterful, unique, and artisanal finishes, fitting rustic, farmhouse, shabby chic, or industrial aesthetics.
Key Steps / How-To
- Apply a base coat color (or multiple base colors in different areas) and let it dry fully.
- Apply a contrasting top coat color.
- While the top coat is still slightly wet (depending on the method) or once dry, use tools like sandpaper, putty knife, steel wool, or a damp cloth to selectively remove or “distress” areas of the top coat, revealing the underlying color(s) in spots that would naturally experience wear.
- For easier distressing, sometimes a resist layer (such as wax) is applied between coats.
Tools & Materials
- Multiple paint colors
- Sandpaper (various grits)
- Putty knife
- Rags
- Steel wool
- Wax (optional)
Best Applications
Accent walls, furniture, and architectural details to add history, texture, and a sense of time-worn character.
16. Wall Molding & Panel Illusion Technique: Architectural Detail with Paint

The Technique: Faux Panel Molding with Paint
Using paint colors and precise taping to create the illusion of raised or recessed panel molding, wainscoting, or other architectural details on a flat wall. This typically involves using a slightly darker or lighter shade of the main wall color—or a contrasting trim color—to paint the “shadows” or “highlights” that define the faux panels.
Why It’s Trending in 2025
It’s a budget-friendly way to add classic architectural character, depth, and sophistication to a room without the expense or labor of actual carpentry.
Key Steps / How-To
- Plan your panel layout meticulously using a level, measuring tape, and pencil.
- Tape off the outlines of your desired “panels” or “molding” with high-quality painter’s tape for crisp lines.
- Paint the “inside” of the panels with a slightly different shade or sheen than the main wall color, or paint thin lines along edges to mimic molding. Using a darker shade on one side can create realistic shadow effects.
Tools & Materials
- Main wall paint
- Accent paint color(s) (shades of the main color or trim color)
- High-quality painter’s tape
- Level, measuring tape, pencil
- Fine paint brushes
Best Applications
Dining rooms, living rooms, bedrooms, hallways — ideal for adding traditional elegance or Parisian chic style.
17. Subtle Freehand Patterns: Organic & Artistic
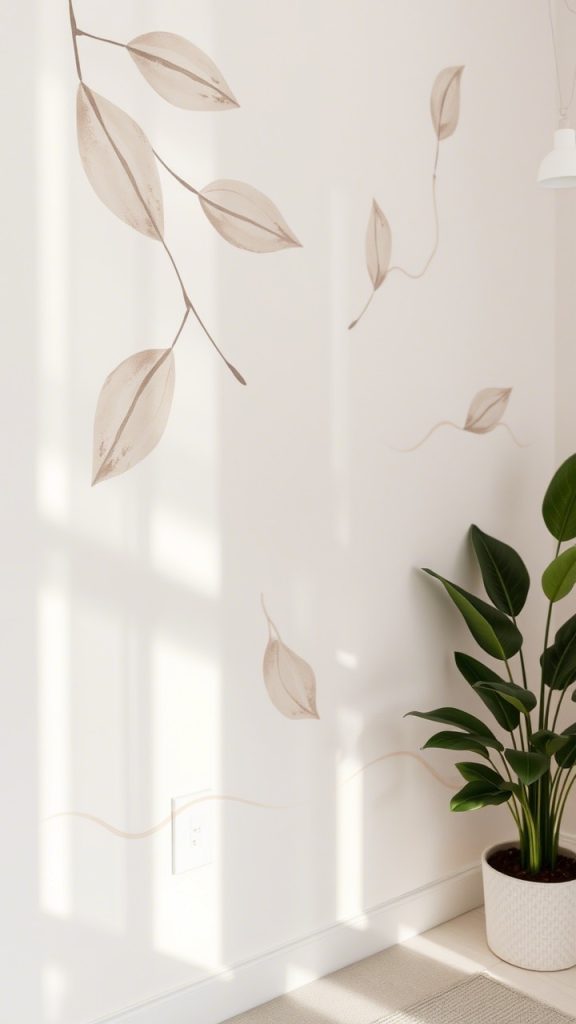
The Technique: Freehand Painted Patterns
Moving beyond rigid stencils or taping, this technique involves using small artist’s brushes to paint delicate, freehand patterns directly onto the wall. Examples include scattered botanicals, subtle dots, dashes, abstract squiggles, or minimalist line art.
Why It’s Trending in 2025
It champions a unique, handcrafted, and personal touch. The slight imperfections inherent in freehand work add charm and authenticity, making the wall feel like a bespoke piece of art.
Best For
Smaller accent areas, powder rooms, nursery walls, or as a border. Ideal for adding personality without overwhelming the space.
DIY Journey Tips
- Lightly sketch your pattern with a pencil if you’re not confident freehanding.
- Use good-quality craft acrylics or sample pots of wall paint.
- Keep the pattern simple and repetitive for easier application. Practice on paper or a board before starting on the wall.
Tools & Materials
- Various small artist’s brushes (round, liner, flat)
- Paint (craft acrylics or wall paint samples)
- Pencil
Best Applications
Delicate feature walls in bedrooms or nurseries, artistic details in powder rooms, or decorative borders.
18. Marbling or Faux Stone Technique: Luxurious Illusions
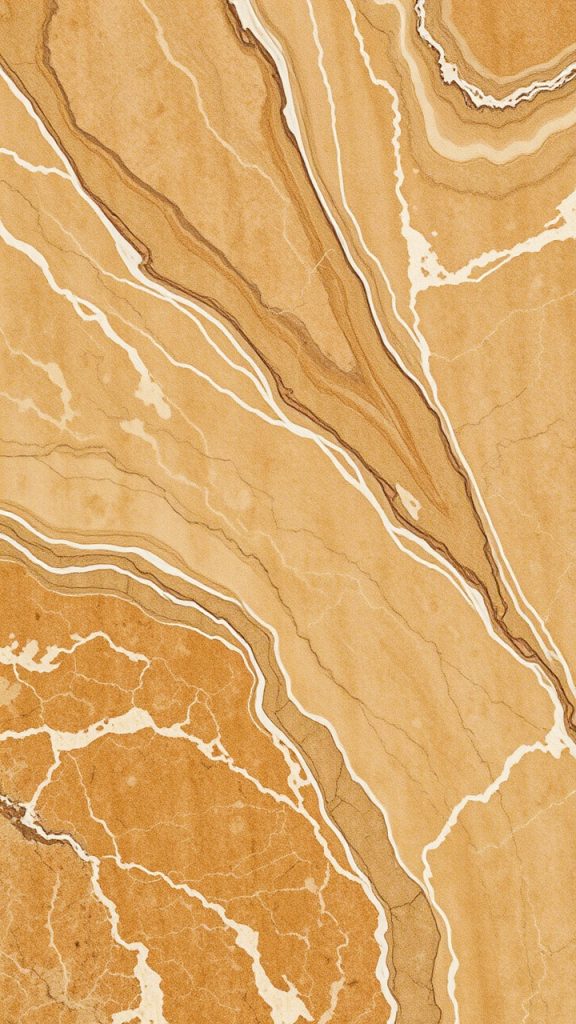
The Technique: Faux Marble Painting
Replicating the look of natural marble or stone finishes using layers of paint, glazes, and tools like feathers, sponges, and soft brushes to create veins and mottled patterns.
Why It’s Trending in 2025
It offers timeless luxury and natural elegance without the cost and weight of real stone. Contemporary versions tend to be more subtle and less obviously “faux” than older styles.
Key Steps/How-To
- Start with a base coat, typically white or off-white to mimic marble.
- Mix glazes in various shades of gray, beige, or vein colors.
- Use a feather or fine artist’s brush to apply delicate, irregular vein patterns sparingly.
- Soften and blend the veins with a soft brush or sponge to create natural mottling.
- Build depth through multiple thin, layered glaze applications.
Tools & Materials
- Base coat paint
- Accent paints for veins
- Glazing liquid
- Feathers
- Sea sponge
- Soft blending brushes
- Fine artist’s brushes
Best Applications
Accent walls, fireplace surrounds, columns, tabletops, or powder rooms for a luxurious, natural statement.
19. Using Painter’s Tape for Abstract Art / Murals: Guided Creativity
The Technique: Tape-Guided Abstract Murals
Creating large-scale abstract art or simplified murals on walls using painter’s tape not only for clean edges but as a key design element to define shapes, negative space, and guide color placement.
Why It’s Trending in 2025
This method democratizes modern art for DIYers, offering crisp, defined shapes without requiring freehand mural skills. The tape creates bold, clean lines within a contemporary abstract composition.
Key Steps/How-To
- Lightly sketch your abstract or mural concept on the wall.
- Apply painter’s tape to block out sections, form geometric shapes, or outline color zones.
- Paint inside or around taped areas, layering colors as desired.
- Carefully remove the tape to reveal crisp edges. Repeat taping and painting for layered effects if needed.
Tools & Materials
- Multiple paint colors
- High-quality painter’s tape (various widths helpful)
- Brushes and rollers
Best Applications
Large accent walls in living rooms, dining rooms, home offices, or modern bedrooms seeking a bold artistic statement.
20. Scumbling or Mottling Technique: Soft, Broken Color
The Technique: Scumbling
Applying paint with a dry or slightly damp brush in loose, irregular scrubbing, swirling, or dabbing motions so that the underlying base coat partially shows through. This produces a soft, cloudy, and textured painterly effect.
Why It’s Trending in 2025
Scumbling adds subtle visual texture and depth without strong patterns, offering a gentle, atmospheric ambiance. It’s softer and more organic than techniques like sponging, fitting well with natural, rustic, and traditional aesthetics.
Key Steps/How-To
- Begin with a fully dry base coat.
- Using a stiff-bristled brush, lightly apply a small amount of contrasting or complementary paint with dabbing, swirling, or scrubbing strokes.
- Avoid full coverage; allow the base color to peek through for a broken, multi-toned effect.
- Build depth by layering multiple thin scumbled coats in different colors if desired.
Tools & Materials
- Base coat paint
- One or more accent paint colors
- Stiff-bristled brushes (old brushes work well)
Best Applications
Adding soft, aged character and subtle texture throughout a room, creating a warm, lived-in backdrop perfect for rustic, traditional, or vintage-inspired interiors.
FAQs About Popular 2025 Painting Techniques
1. Which painting techniques are easiest for beginners?
- Dry Brushing (#6)
- Simple Stenciling (#7), especially using a single large stencil
- Basic Color Washing (#8)
- Painted Arches or Organic Shapes (#13) with careful taping or freehand
- Precision Taping for Geometric Designs (#4) with patience
2. Which techniques are best for hiding minor wall imperfections?
- Limewashing (#1)
- Roman Clay/Faux Plaster (#2)
- Dry Brushing (#6)
- Scumbling (#20)
These textured techniques effectively camouflage small dents, bumps, or uneven surfaces.
3. Do I need expensive or specialized tools for these techniques?
- Limewashing and Roman Clay may require specific brushes or trowels.
- Paint Sprayer (#12) obviously needs a sprayer tool.
- Many other techniques (Dry Brushing, Stenciling, Color Washing, Precision Taping) can be done well with standard high-quality brushes and painter’s tape.
4. How important is primer when using these advanced techniques?
Primer is almost always essential. It improves paint adhesion, evens out surface porosity, blocks stains, and creates a better base for the finish.
5. Can I combine multiple painting techniques in one room or on a single wall?
Definitely! For example, you could limewash a room and add a stenciled border, or use dry brushing to add subtle texture over a color-washed wall. Just make sure the overall look is balanced and not overwhelming.
6. How do I choose colors for techniques like Ombre, Color Blocking, or Layering?
- Ombre works well with analogous colors (next to each other on the color wheel) or different shades of the same hue.
- Color Blocking can use complementary colors for contrast or analogous colors for harmony.
- For Layering, pick colors that blend nicely when seen through each other.
Always test your combinations on a sample board before applying.
7. Are matte or glossy finishes better for these 2025 trends?
- Matte and low-sheen (eggshell) finishes dominate textured and artisanal techniques (like Limewash, Roman Clay, Dry Brushing), enhancing depth and softness.
- High Gloss (#9) is popular for lacquered looks on smooth surfaces and ceilings.
8. How can I practice these techniques before painting a large wall?
Use large pieces of cardboard, scrap drywall, or primed poster board to practice. This helps you get familiar with the tools, paint behavior, and technique motions before working on your wall.
9. What’s the best way to clean up after using specialty paints like limewash or Roman clay?
Follow the manufacturer’s instructions carefully. Limewash is usually water-based but can be caustic, so gloves are recommended. Roman clay products also typically clean up with water but may have special tool-care guidelines. Always clean tools thoroughly right after use.
10. How durable are these specialty finishes?
- Limewash is breathable and long-lasting but may show water spots more than acrylics (although newer formulas have improved durability).
- Roman Clay is quite durable once sealed properly.
- High-quality acrylic paints are generally very durable.
Proper surface preparation is key to lasting results.
11. With all the texture trends, are smooth walls still in style in 2025?
Absolutely! Smooth walls remain timeless and perfect for showcasing bold colors, precise geometric patterns, or high-gloss finishes. The trend toward texture adds options and character but doesn’t replace smooth finishes.
Conclusion – Elevate Your Walls with Technique in 2025
The world of wall painting in 2025 is rich with creative potential, moving far beyond simple color choices to embrace the artistry of application. Mastering these trending techniques, or even just experimenting with one or two, can profoundly transform your living spaces, infusing them with personality, texture, and a unique, contemporary edge.
Whether you’re drawn to the organic allure of limewash, the precision of taped geometrics, or the immersive experience of color drenching, the power to create stunning, on-trend walls is literally in your hands. Don’t be afraid to step outside your comfort zone, practice a new method, and watch as your walls become a testament to your creativity and style. Your inspired interior awaits!
Leave a Reply