Tired of staring at those unsightly dings, minor cracks, or uneven patches on your walls? Wall imperfections are a common frustration for homeowners and renters alike. They can make even a beautifully furnished room feel a little… off. Before you resign yourself to expensive plastering work or complex renovations, consider the transformative power of paint! With the right techniques and a little creativity, wall painting can be an incredibly effective and budget-friendly solution to conceal those flaws and breathe new life into your space.
Will walk you through 11 easy ways to hide wall imperfections using wall painting. We’ll explore everything from choosing the right paint finish to employing clever decorative techniques. Get ready to say goodbye to those blemishes and hello to smoother, more beautiful walls!
The Power of Illusion – How Paint Can Mask Imperfections
Paint works its magic by playing with light and perception. Different colors, finishes, and application methods can either highlight or diminish the appearance of surface irregularities. The key is to choose strategies that absorb light, create texture, or draw the eye away from the problem areas.
Preparation is Key – Don’t Skip These Crucial First Steps
Before we dive into the painting techniques themselves, it’s essential to prepare your walls properly. Skipping this stage can undermine your efforts, no matter how clever your painting strategy.
- Clean Your Walls Thoroughly: Dust, grime, and grease can prevent paint from adhering properly and can even highlight imperfections. Use a sugar soap solution or a mild detergent to clean your walls. For tougher stains like nicotine or water marks, a specialist stain-blocking primer might be necessary after cleaning. Rinse with clean water and allow the walls to dry completely.
- Address Major Issues: While painting can hide minor flaws, significant holes, deep cracks, or loose plaster need to be addressed.
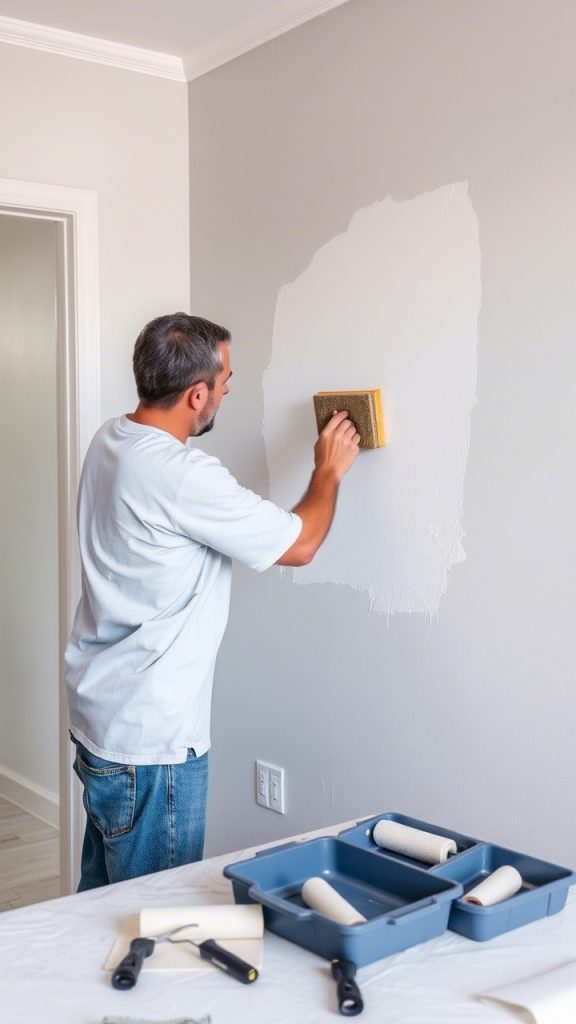
- Fill Holes and Cracks: Use a good quality spackle or joint compound for nail holes, small dents, and minor cracks. Apply it with a putty knife, slightly overfilling the imperfection. Once dry, sand it smooth so it’s flush with the wall. For larger cracks, you might need to use joint tape along with the compound to prevent them from reappearing.
- Sand Uneven Surfaces: Gently sand down any bumps, old paint drips, or poorly patched areas. Use sandpaper appropriate for your wall type – typically medium-grit followed by fine-grit for a smooth finish. Remember to wear a dust mask and eye protection.
- Prime Time: Primer is your best friend when it comes to imperfect walls. It creates a uniform surface for the paint to adhere to, improves coverage, and can help to seal stains and minor imperfections.
- Choose the Right Primer:
- Standard Latex Primer: Good for most surfaces and minor color changes.
- Oil-Based Primer: Better for stain blocking (water, smoke, ink) and for surfaces previously painted with oil-based paint. However, they have stronger odors and require mineral spirits for cleanup.
- High-Build Primer: This is a fantastic option for uneven walls. It’s thicker than standard primer and can fill in minor imperfections, creating a smoother base for your topcoat.
- Tinted Primer: If you’re painting a dark color, consider having your primer tinted grey or a shade close to your topcoat. This can improve the richness of the final color and reduce the number of coats needed.
- Choose the Right Primer:
Now that your walls are prepped and primed, let’s explore the painting techniques that will help you achieve a flawless-looking finish.
11 Easy Ways to Hide Wall Imperfections Using Wall Painting
Tired of staring at those unsightly bumps, minor cracks, and uneven patches on your walls? Wall imperfections, whether from past repairs, settling of the house, or just everyday wear and tear, can be a real eyesore. They can make an otherwise beautiful room feel unfinished or poorly maintained. While extensive wall repairs like plastering or drywall replacement are options, they can be costly, time-consuming, and messy. But what if there was an easier way to reclaim the beauty of your walls? The answer lies in the transformative power of paint!
Wall painting, when done thoughtfully and with the right techniques, offers a surprisingly effective and budget-friendly solution to camouflage a multitude of minor sins on your walls. It’s not just about slapping on a new color; it’s about strategic choices in paint types, finishes, colors, and application methods that can visually minimize or even completely obscure those frustrating flaws. This comprehensive guide will walk you through 11 easy ways to hide wall imperfections using wall painting, empowering you to achieve a smoother, more polished look in your home without breaking the bank or your back.
Whether you’re a seasoned DIYer or a painting novice, these techniques are designed to be accessible and achievable. Get ready to learn how a simple can of paint, combined with a little know-how, can work wonders in concealing dings, dents, and uneven textures, leaving your walls looking refreshed and flawless.
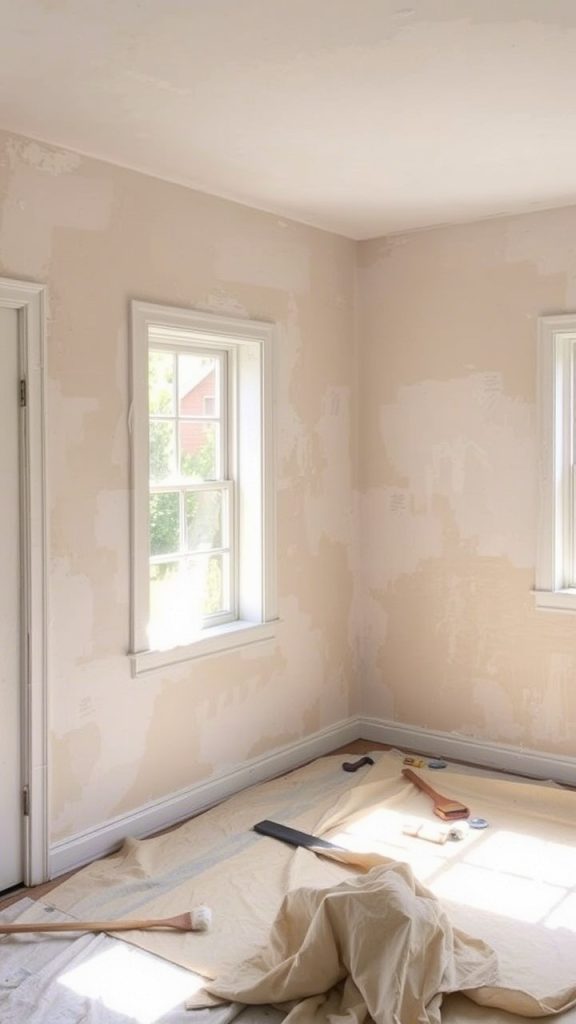
1. The Unsung Hero: Impeccable Wall Preparation
Before you even think about dipping your brush into a can of paint, the absolute most crucial step in hiding wall imperfections is thorough wall preparation. Skipping or rushing this stage is like building a house on a shaky foundation – the flaws will inevitably show through, no matter how expensive your paint or how skilled your application. Proper preparation creates a smooth and uniform canvas, allowing your chosen paint and technique to perform optimally in concealing imperfections.
Why it Works to Hide Imperfections: Proper prep addresses the physical imperfections directly. Filling cracks and holes eliminates them before painting. Sanding smooths out bumps and rough patches. Cleaning removes grease and grime that can cause paint to adhere poorly and highlight flaws. Priming creates an even surface with consistent absorption, preventing blotchiness that can make imperfections more noticeable.
Step-by-Step Guide:
- Inspect Your Walls Thoroughly: Carefully examine every inch of the wall surface under good lighting. Identify all imperfections: nail holes, screw holes, cracks, dents, loose paint, stains, and uneven textures. Use painter’s tape to mark them so you don’t miss any.
- Clean the Walls: This is a non-negotiable step. Walls accumulate dust, grime, grease (especially in kitchens), and fingerprints. Paint won’t adhere properly to a dirty surface.
- For general cleaning, use a solution of mild detergent and warm water. A sponge or a soft cloth works well.
- For greasy areas, use a stronger grease-cutting cleaner like trisodium phosphate (TSP) or a TSP substitute, following the manufacturer’s instructions and safety precautions.
- Rinse the walls with clean water afterwards to remove any soap residue.
- Allow the walls to dry completely – usually at least 2-4 hours, but overnight is better.
- Repair Damages:
- Small Nail Holes & Dents: Use a lightweight spackling compound. Apply it with a flexible putty knife, pressing it firmly into the hole or dent. Apply slightly more than needed to allow for sanding. For deeper holes, you might need two applications, letting the first one dry completely.
- Cracks: For hairline cracks, spackle might suffice. For larger or recurring cracks, it’s better to use a flexible caulk or joint compound with paper or mesh tape. This allows for slight movement without the crack reappearing. Score the crack slightly to create a V-groove for better adhesion of the filler.
- Loose or Flaking Paint: Scrape away all loose and flaking paint using a paint scraper. Feather the edges of the remaining paint with sandpaper to create a smooth transition.
- Sand for Smoothness: Once all fillers are completely dry (check product instructions, typically a few hours to overnight), it’s time to sand.
- Use fine-grit sandpaper (120-150 grit is usually good for general wall sanding, 220 grit for a finer finish on spackle).
- Sand the filled areas until they are perfectly flush and smooth with the surrounding wall. Be careful not to over-sand, which can damage the drywall paper.
- Lightly sand the entire wall surface. This “scuffs up” the existing paint, creating a slightly rougher texture (called a “tooth”) that helps the new primer and paint adhere better.
- For larger areas or more significant texture issues, a pole sander can make the job easier and ensure more even pressure.
- Wipe Down Dust: After sanding, your walls will be covered in fine dust. This must be removed completely. Use a vacuum cleaner with a brush attachment, followed by a tack cloth or a damp microfiber cloth. Ensure the walls are dust-free and dry.
Tools and Materials:
- Painter’s tape
- Mild detergent, TSP (or substitute)
- Buckets, sponges, clean cloths
- Putty knives (various sizes: 1-inch, 3-inch, 6-inch)
- Spackling compound, joint compound
- Flexible caulk
- Drywall tape (paper or mesh)
- Paint scraper
- Sandpaper (various grits), sanding block, pole sander
- Vacuum cleaner with brush attachment, tack cloth
Tips for Best Results:
- Don’t skimp on drying times for cleaners and fillers. Patience is key.
- When sanding, use a light touch and check your progress frequently by running your hand over the surface. It should feel smooth and even.
- Wear a dust mask and eye protection during sanding.
- Good lighting is essential throughout the preparation process to spot and address all imperfections.
While preparation itself isn’t a painting technique, it’s the bedrock upon which all other imperfection-hiding strategies are built. A perfectly prepped wall is already halfway to looking flawless.
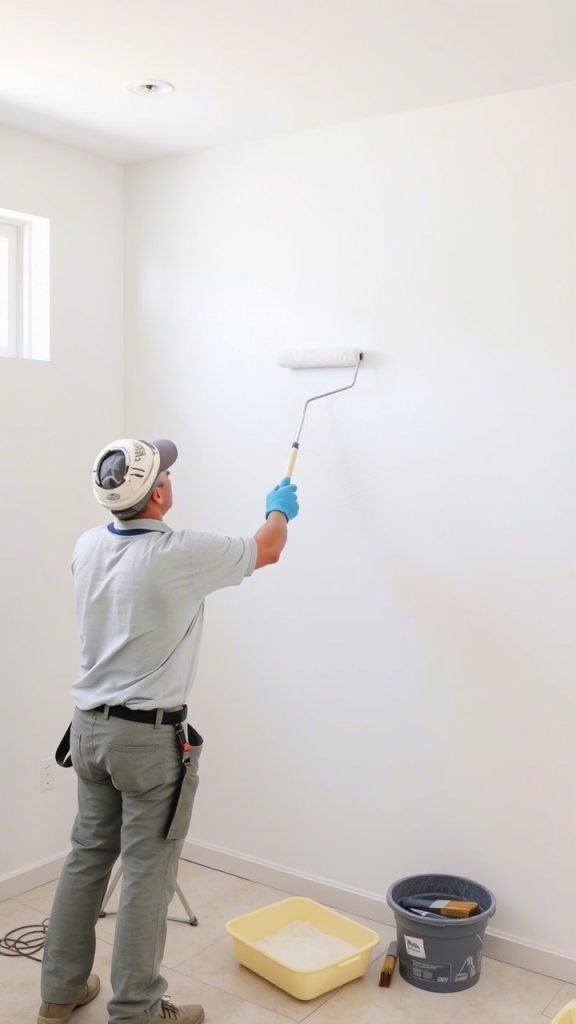
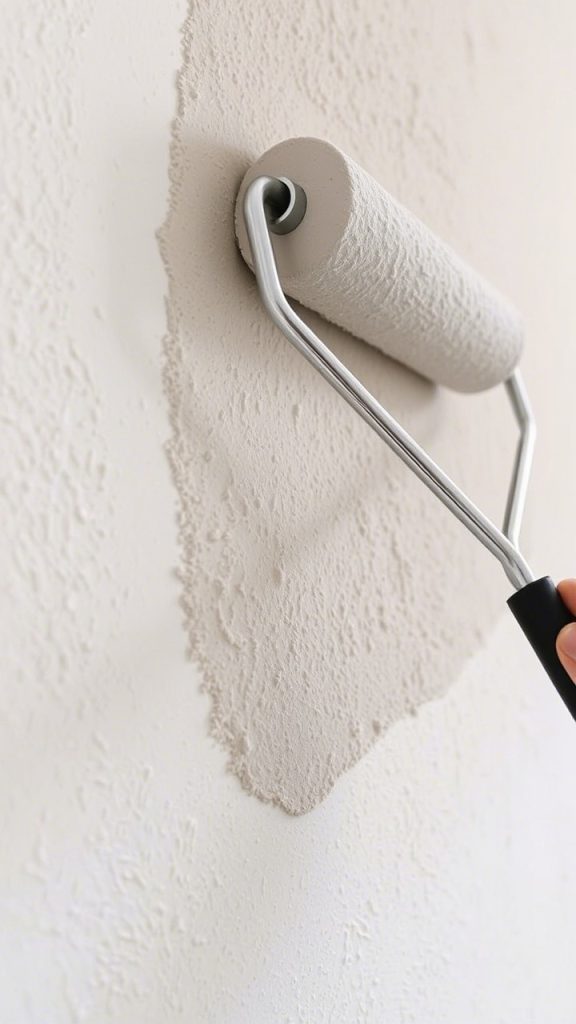
2. Embrace the Power of Flat or Matte Finishes

One of the simplest yet most effective ways to hide wall imperfections with paint is by choosing the right paint sheen. Glossier paints, like semi-gloss or high-gloss, have a reflective surface. This reflectivity acts like a spotlight, highlighting every tiny bump, dent, and uneven spot on your wall. Conversely, flat or matte finishes absorb light, which helps to mask these minor flaws.
Why it Works to Hide Imperfections: Light reflection is the enemy when you’re trying to hide imperfections. Bumps and indentations create subtle shadows and highlights when light bounces off them. Glossy paints amplify these light variations, making the flaws more obvious. Flat and matte finishes have a very low sheen, meaning they scatter light in many directions rather than reflecting it directly. This diffusion of light softens the appearance of the wall, making it harder for the eye to pick out minor textural irregularities.
Step-by-Step Guide (Choosing and Using):
- Understand the Sheen Spectrum:
- Flat: Has no shine. Offers the best hiding power for imperfections. Can sometimes be harder to clean.
- Matte: Has a very slight sheen, often described as velvety. Offers excellent hiding power, very similar to flat, but can be slightly more durable and cleanable than a true flat.
- Eggshell: Has a low, subtle sheen, like an eggshell. Offers a good balance of washability and some imperfection hiding, but less than flat or matte.
- Satin: Has a soft, pearl-like sheen. More durable and easier to clean than eggshell, but will show more imperfections.
- Semi-Gloss: Noticeably shiny. Very durable and washable, ideal for trim, doors, kitchens, and bathrooms, but will highlight wall flaws significantly.
- High-Gloss: Very shiny and reflective. Most durable and easiest to clean, but will show every single imperfection.
- Assess Your Needs: Consider the room and its use.
- For living rooms, dining rooms, bedrooms, and ceilings where durability is less of a concern and hiding flaws is paramount, flat or matte is an excellent choice.
- Modern flat and matte paints have improved in terms of washability, but they may still scuff or burnish more easily than higher-sheen paints.
- Select Your Paint: When purchasing paint, specifically ask for a flat or matte finish. Many paint lines offer both.
- Prepare Your Walls Thoroughly: As discussed in Way #1, even with a flat finish, good preparation is still crucial for the best results.
- Apply the Paint: Use standard painting techniques (brushing for cutting in, rolling for main surfaces). Flat and matte paints are generally forgiving to apply.
Tools and Materials:
- High-quality flat or matte latex paint
- Standard painting tools (brushes, rollers, paint tray, drop cloths)
Tips for Best Results:
- Ceilings: Flat paint is almost always the best choice for ceilings, as they often show imperfections due to the way light rakes across them.
- Touch-Ups: Flat paints are generally the easiest to touch up without the repaired area flashing (appearing different from the surrounding paint). Matte finishes are also quite good for touch-ups.
- Consider Washable Matte: If cleanability is a concern, look for premium “washable matte” paints that offer better durability than traditional flat paints.
- Lighting: Observe how light hits your walls. Walls that receive a lot of direct, raking light will benefit most from a flat or matte finish.
Choosing a flat or matte finish is a foundational strategy. It won’t make a large hole disappear, but it will significantly reduce the visibility of minor bumps, roller marks, and slight unevenness in the underlying surface, giving your walls a much smoother and more sophisticated appearance.
3. Go to the Dark Side: Utilizing Darker Paint Colors
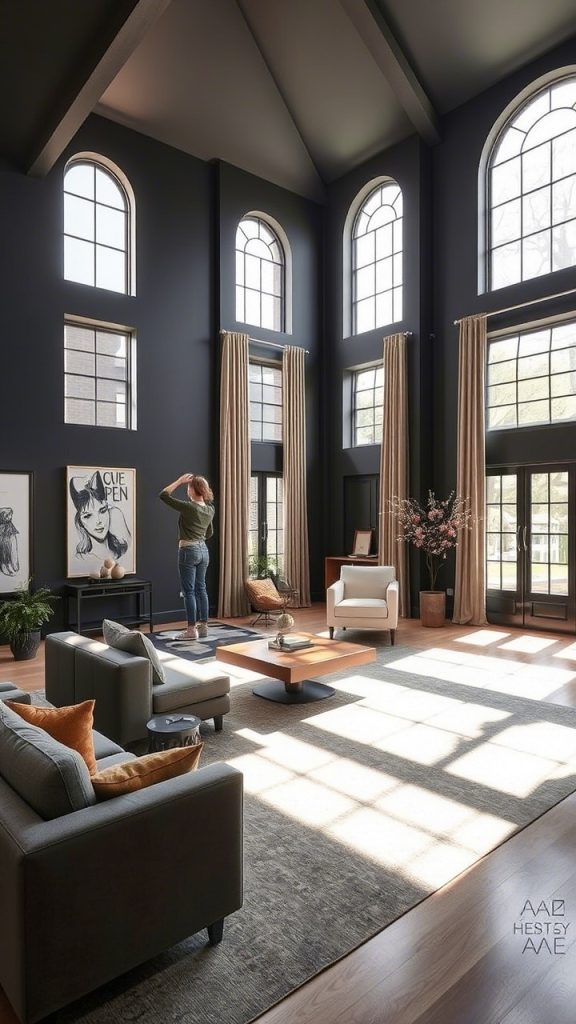
Just as paint finish plays a role in how light interacts with your walls, so does paint color. Darker paint colors tend to absorb more light than lighter colors, which reflect it. This light absorption quality makes darker hues more forgiving of minor wall imperfections.
Why it Works to Hide Imperfections: Similar to how matte finishes work, darker colors reduce the play of light and shadow across a surface. Imperfections are often noticeable because they cast tiny shadows or catch light in a way that contrasts with the surrounding flat surface. Darker colors minimize these contrasts. Lighter colors, especially whites and pastels, reflect a lot of light, which can make every undulation and flaw stand out.
Step-by-Step Guide (Choosing and Using):
- Consider the Room’s Lighting and Size: Dark colors can make a room feel smaller or cozier. This isn’t necessarily a bad thing, but it’s something to be aware of.
- In rooms with plenty of natural light, dark colors can look rich and dramatic without feeling oppressive.
- In smaller rooms or rooms with limited light, you might want to use a dark color on an accent wall rather than all four walls, or ensure you have excellent artificial lighting.
- Choose Your Dark Shade: The options are vast – deep blues, rich greens, charcoals, plums, chocolate browns, or even a sophisticated black.
- Consider the mood you want to create. Dark colors can be bold, comforting, or elegant.
- Get paint samples and test them on your wall in different lighting conditions (daylight and artificial light at night) before committing.
- Pair with a Low Sheen: For maximum imperfection-hiding power, combine a dark color with a flat or matte finish (as discussed in Way #2). A dark, glossy paint will still show flaws.
- Prime Appropriately: If you are painting a dark color over a much lighter existing color, using a tinted primer (gray or a shade close to your topcoat) can help you achieve better coverage and a truer final color with fewer coats. This also contributes to a more uniform base, which helps hide imperfections.
- Apply Carefully: Dark colors can sometimes show application marks (like roller lines) more readily if not applied evenly.
- Maintain a wet edge while rolling to avoid lap marks.
- Apply thin, even coats. Two or even three thin coats are better than one thick coat.
Tools and Materials:
- High-quality dark-colored paint in a flat or matte finish
- Tinted primer (optional, but recommended for drastic color changes)
- Standard painting tools
Tips for Best Results:
- Accent Walls: If you’re hesitant to paint an entire room dark, an accent wall can be a great way to introduce a dark color and strategically hide imperfections on that particular wall.
- Quality Matters: Higher-quality paints generally have more pigments, which provide better coverage, especially for dark colors. This can lead to a richer, more uniform finish that is better at concealing flaws.
- Consider the Undertones: Dark colors have undertones (e.g., a blue-black vs. a brown-black). Make sure the undertone complements other elements in your room, like furniture and fabrics.
- Don’t Fear Blemishes During Application: Dark, wet paint can look alarmingly uneven. Trust the process; as it dries, the color will even out. The second coat is usually where the magic happens.
While not a solution for significant structural damage, opting for darker paint colors, especially in a matte finish, can make a noticeable difference in minimizing the appearance of minor dings, ripples, and other surface irregularities that light, reflective colors would typically accentuate.
4. The Power of Primer: Creating a Flawless Base
We touched on priming during wall preparation, but its role in hiding imperfections, especially when painting, deserves its own spotlight. Applying a quality primer is a critical step that goes beyond just helping paint stick; it plays an active role in creating a uniform surface that can obscure minor flaws and ensure your topcoat looks its best.
Why it Works to Hide Imperfections: Primer works in several ways to help conceal wall blemishes:
- Evens out Porosity: Walls, especially those with patches or previous repairs, can have varying levels of porosity. Spackle, drywall, and old paint absorb new paint at different rates. This can lead to a blotchy appearance in the topcoat, highlighting the repaired areas. Primer seals the surface and creates a uniform porosity, so the topcoat absorbs evenly.
- Provides “Hide”: Some primers, particularly high-build or stain-blocking primers, have a thicker consistency and more solids. They can fill in very fine hairline cracks, minor sanding scratches, and slight texture variations, creating a smoother base.
- Blocks Stains: If your imperfections include water stains, crayon marks, or smoke damage, these can bleed through multiple coats of regular paint. A stain-blocking primer will seal these in, preventing them from marring your final finish.
- Improves Adhesion and Coverage of Topcoat: While not directly hiding flaws, good adhesion prevents paint peeling or chipping later, which would create new imperfections. Better coverage means your topcoat can do its job more effectively without needing excessive layers, which can sometimes highlight texture.
Step-by-Step Guide (Choosing and Using Primer):
- Assess Wall Condition:
- New Drywall: Always requires primer to seal the paper and joint compound.
- Patched or Repaired Walls: Essential to prime over spackle or joint compound to prevent “flashing” (where the patched areas look different through the topcoat).
- Stained Walls: Use a stain-blocking primer. Oil-based primers are traditionally excellent for tough stains, but many high-quality water-based stain blockers are now available and are easier to work with.
- Drastic Color Changes: If going from a dark color to a light color, a white or tinted primer is crucial. If going from light to very dark, a tinted primer (usually gray) helps the dark topcoat achieve its true richness with fewer coats.
- Glossy Surfaces: If your existing walls have a gloss or semi-gloss finish, a bonding primer will help the new paint adhere properly after light sanding.
- Choose the Right Type of Primer:
- Latex (Water-Based) Primers: Good for most interior applications on drywall, plaster, and previously painted surfaces. Low odor, easy cleanup.
- Oil-Based (Alkyd) Primers: Excellent for blocking stains (water, smoke, tannin), good for adhesion to slick surfaces, and provides a very smooth base. Higher VOCs, stronger odor, requires mineral spirits for cleanup.
- Shellac-Based Primers: Ultimate stain blockers (severe smoke, water stains, odors, wood tannins). Dries very quickly. Requires denatured alcohol for cleanup.
- High-Build Primers: These are specifically designed to fill in minor imperfections and create a very smooth surface. They are thicker than standard primers.
- Prepare the Surface: Complete all cleaning, repairing, and sanding steps (Way #1) before priming.
- Apply the Primer:
- Stir the primer thoroughly.
- Cut in the edges with a brush and then roll the main surfaces, just like you would with paint.
- Apply an even coat. Don’t try to achieve full “hide” with the primer if it’s not a high-hide primer; its main job is to seal and prepare the surface.
- Allow the primer to dry completely according to the manufacturer’s instructions. Drying times vary, but typically range from 1 to 4 hours. Some specialty primers may require longer.
- Lightly Sand (Optional but Recommended): For the smoothest possible finish, especially if using a high-build primer, lightly sand the primed surface with fine-grit sandpaper (220 grit) once it’s fully dry. This removes any minor nubs or imperfections in the primer coat. Wipe away sanding dust with a tack cloth before applying your topcoat.
Tools and Materials:
- Appropriate type of primer for your wall condition
- Paintbrushes and rollers (you might use older ones for oil-based primer)
- Paint tray and liners
- Fine-grit sandpaper (optional)
- Tack cloth (optional)
Tips for Best Results:
- Don’t Skip Spot Priming: Even if you’re not priming the entire wall, always spot prime any patched or repaired areas.
- Tint Your Primer: For deeper topcoat colors, having your primer tinted close to your finish color can reduce the number of topcoats needed and improve the final color richness. Most paint stores can tint primer.
- Ventilation: Ensure good ventilation, especially when using oil-based or shellac-based primers.
- Read the Can: Always follow the specific instructions on your chosen primer regarding application, drying times, and cleanup.
Using a quality primer is an investment in the final look of your painted walls. It’s an essential step that creates a consistent, smooth, and well-sealed surface, which inherently helps to downplay and hide minor wall imperfections, allowing your chosen color and finish to shine.
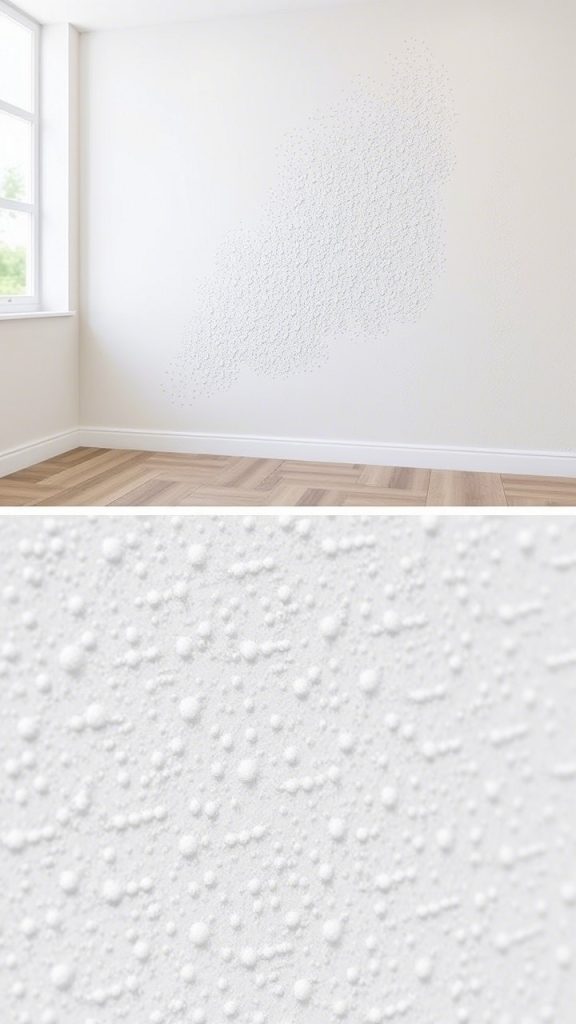
5. Add Subtle Dimension: Using Textured Paint
When faced with walls that have more than just minor dings – perhaps widespread unevenness, old plaster quirks, or paneling grooves you want to minimize – textured paint can be a game-changer. These paints contain additives like sand, silica, or other materials, or they are designed to be applied in a way that creates a tangible, three-dimensional surface.
Why it Works to Hide Imperfections: Textured paint works by creating an intentionally uneven surface. Instead of trying to achieve perfect smoothness (which can be difficult on a flawed wall), you’re introducing a consistent pattern of highs and lows. This new, deliberate texture camouflages the underlying, random imperfections because the eye is drawn to the overall pattern rather than the minor flaws hidden within it. It effectively levels the playing field by making the entire wall slightly irregular in a controlled way.
Types of Textured Paint & Application:
- Pre-Mixed Textured Paint (e.g., Sand Finish):
- What it is: Paint that comes with a sand-like aggregate already mixed in. Available in various grit sizes (fine, medium, coarse) for different levels of texture.
- How to Apply:
- Thoroughly stir the paint frequently during application, as the texture particles can settle.
- Apply with a brush for cutting in. For rolling, use a special textured paint roller or a roller with a thicker nap (e.g., 3/4 inch or more) to pick up and distribute the texture evenly.
- Some sand finishes can be applied in patterns (e.g., swirls, criss-cross) using a brush or trowel while wet for a more decorative look.
- Hiding Power: Good for minor to moderate unevenness, hairline cracks, and rough patches. The coarser the texture, the more it can hide.
- Texture Additives:
- What it is: Granules (sand, perlite, synthetic particles) sold separately that you mix into standard latex paint (usually flat or eggshell). This gives you more control over the amount of texture.
- How to Apply:
- Gradually add the texture granules to your paint, mixing thoroughly until you achieve the desired consistency. Start with less; you can always add more.
- Apply as you would pre-mixed textured paint, stirring frequently.
- Hiding Power: Similar to pre-mixed, with the advantage of customizable texture levels.
- Smooth or Roll-On Texture (Non-Aggregated):
- What it is: Thicker, plaster-like paints that create texture through the application method rather than by containing particles. Often sold as “wall texture paint” or “smooth texture.”
- How to Apply:
- Can be applied with special texture rollers (honeycomb, looped, etc.) that create specific patterns.
- Can also be applied with a trowel, putty knife, or even a notched trowel and then “knocked down” (smoothed lightly with a knife once partially set) to create various effects like skip trowel, knockdown, or Venetian plaster-like finishes.
- Hiding Power: Excellent for moderate to significant imperfections, as you are essentially applying a thin new surface layer. Can hide paneling grooves (often with multiple coats) and more prominent unevenness.
Step-by-Step General Guide:
- Wall Preparation is Still Key: Clean and prime the walls as usual (Ways #1 and #4). Good adhesion is critical for textured paints. Ensure any major holes or cracks are filled, though the texture will hide minor ones.
- Choose Your Texture Type: Decide whether a fine, medium, or more pronounced texture is appropriate for your room and the severity of the imperfections.
- Gather Specific Tools: Besides standard painting tools, you might need:
- Special texture rollers
- Trowels or putty knives of various sizes
- Mixing attachments for drills (for additives)
- Protect Surfaces: Textured paint can be messier than regular paint. Use ample drop cloths and tape off trim carefully.
- Practice First: If you’re new to textured paint, practice your technique on a piece of scrap drywall or cardboard to get a feel for the application and the resulting finish. This is especially important for trowel-on textures.
- Apply the Textured Paint:
- Work in manageable sections.
- Maintain consistency in your application technique to ensure a uniform look across the entire wall.
- For rolled textures, apply in one direction, then lightly cross-roll if recommended.
- For troweled textures, the pattern is created by your hand movements.
- Allow Adequate Drying Time: Textured paints, especially thicker ones, may take longer to dry completely.
Tools and Materials (Varies by Type):
- Textured paint or texture additives + base paint
- Appropriate rollers (textured, thick nap) and/or trowels, putty knives
- Mixing tools
- Standard painting prep and cleanup supplies
Tips for Best Results:
- Lighting: Consider how light will hit the textured surface. Strong sidelight can enhance the texture, which is usually the desired effect.
- Consistency: The biggest challenge with textured paint is achieving a consistent look. Work methodically and try to maintain the same pressure and technique.
- Start in an Inconspicuous Area: If possible, begin painting on a wall that is less visible to perfect your technique before moving to more prominent areas.
- Don’t Overwork It: Once applied, avoid going back over partially dry areas too much, as this can create a messy, uneven appearance.
- Future Removal: Be aware that removing textured paint can be a labor-intensive process, often requiring extensive sanding or scraping. This is a long-term commitment.
- Ceilings: Textured paint (like popcorn or orange peel, though popcorn is less popular now) has long been used on ceilings to hide imperfections.
Textured paint offers a robust solution for walls with more noticeable flaws. By embracing texture, you shift the focus from trying to eliminate imperfections to creating a new, interesting surface that effectively conceals them.
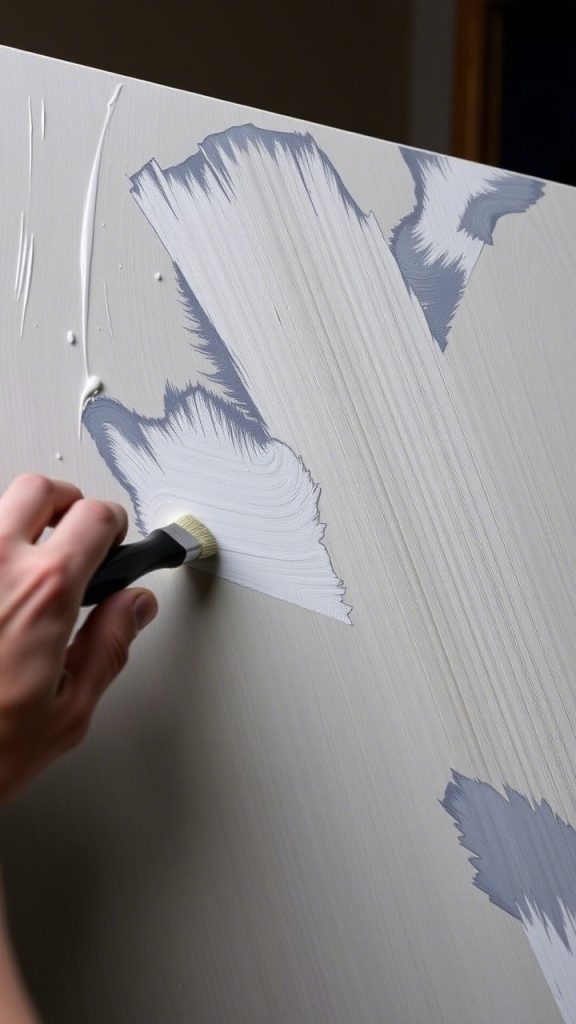
6. Artistic Disguise: Faux Finish Techniques (Sponging, Rag Rolling)
If you’re looking for a more decorative way to hide imperfections, faux finish techniques like sponging or rag rolling can be both effective and aesthetically pleasing. These methods involve applying one or more translucent glaze coats over a base paint color using tools like sea sponges or crumpled rags. The result is a layered, subtly mottled appearance that cleverly distracts the eye from minor wall flaws.
Why it Works to Hide Imperfections: Faux finishes create visual texture and depth. The variations in color and pattern break up the flat plane of the wall, making it difficult for the eye to focus on small bumps, dents, or slight unevenness. The layered effect means that light doesn’t reflect uniformly, further helping to mask imperfections that would be obvious on a solid-colored, smooth wall. It’s a form of optical illusion – you’re giving the eye something more interesting to look at than the flaws.
Popular Faux Finish Techniques:
A. Sponging:
- What it is: Applying a glaze coat (a mixture of paint and glazing liquid) with a natural sea sponge over a dried base coat. Can be “sponging on” (adding color) or “sponging off” (removing some of the wet glaze).
- How to Apply (Sponging On):
- Apply your base coat (often a lighter color) and let it dry completely (24-48 hours). A satin or eggshell base coat works well.
- Mix your glaze. Typically, 1 part paint (your sponging color, often darker or contrasting) to 4 parts glazing liquid. Glazing liquid extends the paint’s drying time, making it workable.
- Dampen a natural sea sponge with water and wring it out thoroughly.
- Dip the sponge lightly into the glaze mixture, then dab off any excess onto a piece of cardboard or newspaper. You want an open, varied texture on the sponge, not a saturated blob.
- Begin dabbing the sponge onto the wall in a random pattern. Rotate your wrist and vary the pressure to avoid creating repetitive marks. Overlap sponged areas slightly.
- Work in small sections (e.g., 3×3 feet). Step back frequently to check the overall effect.
- You can use multiple glaze colors for a more complex look, letting each layer dry or working wet-on-wet carefully.
- Hiding Power: Good for minor to moderate imperfections, as the mottled pattern distracts the eye.
B. Rag Rolling:
- What it is: Applying or removing a glaze coat using a crumpled rag. “Ragging on” adds texture; “ragging off” creates a softer, more subtle look.
- How to Apply (Ragging On):
- Apply your base coat and let it dry completely.
- Prepare your glaze mixture.
- Take a lint-free rag (cheesecloth, old t-shirts, or special ragging cloths work well), dampen it slightly, and bunch it into a loose, random shape.
- Dip the rag into the glaze, wring out excess.
- Roll, twist, or dab the rag onto the wall, creating a textured pattern. Change the rag’s shape frequently to avoid repetition.
- How to Apply (Ragging Off):
- Apply your base coat and let it dry completely.
- Roll a thin, even layer of glaze mixture onto a section of the wall.
- While the glaze is still wet, take a clean, dry, bunched-up rag and use it to dab or roll off some of the glaze, revealing the base coat underneath and creating a softer, more broken color effect. Use fresh rags as they become saturated.
- Hiding Power: Similar to sponging, effective for minor to moderate flaws. Ragging off can create a more delicate, fabric-like texture.
General Step-by-Step Guide for Faux Finishes:
- Thorough Wall Prep: (Way #1) Imperfections should still be minimized as much as possible, though these techniques are forgiving.
- Prime if Needed: (Way #4) Especially if changing colors drastically or if walls have stains.
- Apply Base Coat: Choose your base color and apply 1-2 coats. Allow it to cure fully (usually 24-48 hours) before applying a glaze, especially if you plan on “ragging off” or using techniques that involve friction. An eggshell or satin finish for the base coat is often recommended as it allows the glaze to move more easily.
- Mix Your Glaze: Combine your chosen paint color(s) with a glazing liquid (also called scumble glaze or extender). Follow the ratio recommendations on the glazing liquid (typically 1:4 paint to glaze, but can vary). Stir thoroughly. Glazing liquid makes the paint more transparent and extends the open (workable) time.
- Practice Your Technique: This is crucial! Use a large piece of cardboard or a spare board to practice applying the glaze with your chosen tool (sponge, rag) until you achieve the look you want.
- Work in Manageable Sections: Faux finishes require you to work while the glaze is wet. Work on one small section at a time, completing it before moving on. This helps maintain a wet edge and blend sections seamlessly.
- Maintain Randomness: The key to a good faux finish is to avoid obvious patterns or repetitive marks. Vary your hand pressure, angle, and tool orientation.
- Step Back Frequently: Periodically step away from the wall to view your work from a distance. This helps you see the overall pattern and ensure consistency.
Tools and Materials:
- Base coat paint (latex, usually eggshell or satin)
- Top coat paint for glaze (latex, any sheen, but often similar to base)
- Glazing liquid
- Natural sea sponges, lint-free rags (cheesecloth, cotton)
- Paint trays, buckets for mixing
- Painter’s tape, drop cloths
- Practice boards
Tips for Best Results:
- Color Choices: Consider using colors that are analogous (next to each other on the color wheel) or a few shades lighter/darker than each other for a subtle effect. Higher contrast will be bolder.
- Less is More: It’s easier to add more glaze than to take it away. Start with a light application.
- Keep Tools Clean/Rotated: Have several sponges or rags on hand. Rinse sponges periodically (if using latex) or switch to a fresh rag when it becomes oversaturated with glaze.
- Corner Work: Corners can be tricky. Try to feather the effect into the corner from both sides. A smaller piece of sponge or rag can be helpful.
- Patience: Faux finishing takes more time and patience than standard painting, but the results can be uniquely beautiful and effective at hiding flaws.
Sponging and rag rolling are just two examples of many faux finish techniques. They offer a creative and artistic approach to wall imperfections, turning a problem into a design feature.
7. The Soft Touch: Color Washing Technique
Similar to other faux finishes, color washing is a painting technique that creates a soft, subtly textured appearance that can gently camouflage minor wall imperfections. It involves applying a thin, translucent layer of glaze (a mix of paint and glazing liquid) over a solid base coat, often using broad, soft brushstrokes or a rag. The result is a dreamy, watercolor-like effect with subtle variations in color and depth.
Why it Works to Hide Imperfections: Color washing works by breaking up the solid expanse of color on a wall. The slight variations in opacity and the layered effect mean that light doesn’t reflect evenly, making it harder to spot small bumps, shallow divots, or repaired areas. The gentle, flowing nature of the finish distracts the eye from minor underlying flaws, drawing attention instead to the soft, cloud-like texture of the paint itself. It’s less about aggressive texture and more about subtle visual distraction.
Step-by-Step Guide to Color Washing:
- Exemplary Wall Preparation: (Way #1) As always, start with the cleanest, smoothest surface possible. Fill and sand any noticeable imperfections.
- Priming for Success: (Way #4) Apply a quality primer, especially if there are stains or you’re making a significant color change.
- Apply the Base Coat:
- Choose your base color. Often, a lighter color is used for the base, with a slightly darker or complementary color for the wash. However, a darker base with a lighter wash can also create interesting effects.
- Apply one or two coats of your base paint (latex is common) in an eggshell or satin finish. The slight sheen of these finishes allows the wash to glide more easily and gives you more open time.
- Let the base coat dry thoroughly, typically 24-48 hours.
- Mix Your Color Wash Glaze:
- Choose your wash color. This is the paint that will be thinned down to create the translucent effect.
- In a separate container, mix your wash paint with a glazing liquid (scumble glaze or faux finish glaze). A common ratio is 1 part paint to 4-6 parts glazing liquid, but this can be adjusted depending on how translucent you want the wash to be. More glaze means a more transparent wash.
- Stir thoroughly. Some people also add a small amount of water (if using latex paint and glaze) for further thinning, but test this carefully.
- Practice Your Technique: On a large piece of cardboard or a spare board primed and painted with your base coat, practice applying the color wash. Experiment with different brushstrokes or rag techniques to achieve the desired look.
- Applying the Color Wash:
- Work in manageable sections (e.g., 3×3 feet or 4×4 feet). You need to complete a section while the glaze is still wet to blend it smoothly.
- Brush Application: Dip a wide, soft brush (a faux finish brush or a good quality paintbrush) into the glaze. Offload some excess. Apply the wash to the wall using broad, sweeping, crisscross, or circular strokes. The goal is to create a soft, uneven layer of color. Don’t aim for solid coverage.
- Rag Application (Optional): You can also apply the wash with a rag, dabbing or wiping it on for a different textural effect.
- Softening/Blending: While the wash is still wet, you can use a clean, dry, soft brush or a soft, lint-free rag to gently blend and soften the wash. This helps to remove harsh lines and create a more ethereal look. Lightly drag the dry brush over the wet glaze, or pounce with the rag.
- Overlap Sections: As you move to a new section, slightly overlap the previous one, blending the edges while both are still wet to avoid hard lines.
- Allow to Dry: Let the color wash dry completely. The color may lighten or change slightly as it dries. If a more intense color or greater depth is desired, a second coat of wash can be applied after the first is fully dry.
Tools and Materials:
- Base coat paint (latex, eggshell or satin)
- Wash paint (latex, any sheen but often similar to base)
- Glazing liquid
- Wide, soft brushes (faux finish brushes, good quality paintbrushes)
- Optional: Soft, lint-free rags, cheesecloth
- Paint trays, mixing containers, stir sticks
- Painter’s tape, drop cloths
- Practice boards
Tips for Best Results:
- Subtlety is Key: Color washing often looks best when the effect is subtle. If the contrast between the base coat and the wash color is too stark, or if the wash is too opaque, the effect can look heavy-handed.
- Consistency in Application: Try to maintain a similar application style (e.g., pressure, length of strokes) across the entire wall for a cohesive look, even though the effect itself is intentionally varied.
- Working with a Partner: For large walls, it can be helpful to have one person apply the wash and another person follow behind to soften and blend.
- Natural Light: Observe how the color wash looks in natural daylight and with artificial lighting, as the effect can change.
- Consider the Room’s Style: Color washing lends itself well to romantic, traditional, cottage, or rustic styles, but can be adapted for contemporary spaces with careful color choices.
- Protect the Finish: Once dry, if the wall is in a higher traffic area, you might consider a very light coat of a clear, flat water-based varnish for protection, but test this first as it can alter the appearance.
Color washing is a more forgiving technique than trying to achieve a perfectly smooth, solid finish, making it an excellent choice for walls with minor character flaws. It adds a touch of handcrafted elegance and depth while cleverly drawing the eye away from those little imperfections.
8. Delicate Camouflage: The Stippling Effect
The stippling effect is another classic decorative paint technique that can do an admirable job of hiding minor wall imperfections. It involves applying paint or glaze in a series of small, distinct dots or dabs, typically using a special stippling brush. This creates a fine, uniform, and subtly textured surface that breaks up the flatness of the wall and diffuses light.
Why it Works to Hide Imperfections: Stippling works much like other textured or faux finishes: it creates an overall pattern that is more interesting to the eye than the minor flaws beneath it. The dense pattern of dots helps to obscure small bumps, hairline cracks, or slight unevenness in the drywall because these imperfections get lost in the texture. The way light plays on the multitude of tiny raised points also helps to minimize the appearance of shadows that flaws might otherwise cast on a flat surface.
Step-by-Step Guide to Stippling:
- Prepare the Wall Meticulously: (Way #1) Even though stippling hides flaws, a well-prepared base is still important for adhesion and the best final look.
- Prime if Necessary: (Way #4) Ensure an even and well-sealed surface.
- Apply the Base Coat:
- Choose your base color. This will be the color that subtly shows through or forms the foundation of the stippled look.
- Apply one or two coats of your base paint (latex is common) in any sheen, though eggshell or satin can provide a good ground. Let it dry completely (24-48 hours).
- Choose Your Stippling Paint/Glaze:
- Option 1 (Paint Only): You can stipple with undiluted paint, often a color that contrasts slightly with the base coat (either lighter or darker).
- Option 2 (Glaze Mixture): For a softer, more layered effect, you can mix your stippling paint with a glazing liquid (e.g., 1 part paint to 1-4 parts glaze). This makes the stippling color more translucent and extends the working time.
- Select Your Stippling Brush:
- A true stippling brush has a flat or slightly domed head with densely packed, stiff bristles of uniform length. They come in various sizes.
- For a coarser effect, other brushes or even sponges could be adapted, but a stippling brush gives the classic, fine-dotted appearance.
- Practice Your Technique: This is essential for stippling. On a practice board painted with your base coat:
- Dip just the very tips of the stippling brush bristles into your stippling paint or glaze. You don’t want to overload the brush.
- Offload any excess by dabbing the brush onto newspaper or cardboard until it leaves a clear pattern of dots rather than a smear.
- Hold the brush perpendicular to the surface and dab (pounce) it straight on and off. Don’t drag or wipe.
- Vary the spacing and overlap of your dabs to achieve the desired density and coverage.
- Applying the Stippling Effect to the Wall:
- Work in small, manageable sections.
- Begin dabbing the brush onto the wall, starting in a corner or along an edge.
- Continue pouncing the brush, slightly overlapping the previous dabs to create a consistent, all-over pattern. Reload the brush with paint/glaze as needed, always offloading excess.
- The goal is to cover the base coat with a dense pattern of dots. The base color may still peek through slightly, contributing to the depth of the finish.
- Avoid pressing too hard, which can cause the paint to splay and lose the distinct dot effect.
- Maintain Consistency: Try to use the same amount of pressure and maintain a similar dot density across the entire wall for a uniform appearance. Step back occasionally to assess your work.
- Touching Up: If an area looks too sparse, you can go back and add more stippled dots once the first pass is dry or nearly dry.
Tools and Materials:
- Base coat paint
- Stippling paint (or paint for glaze mixture)
- Glazing liquid (optional)
- Stippling brush(es) of appropriate size
- Paint trays, mixing containers
- Newspaper or cardboard for offloading paint
- Painter’s tape, drop cloths
- Practice boards
Tips for Best Results:
- Brush Quality: A good quality stippling brush will make a significant difference in the outcome.
- Light Touch: Use a light, pouncing motion. Let the tips of the bristles do the work.
- Color Choices:
- For a subtle effect, choose a stippling color that is only a shade or two different from the base coat.
- For a more noticeable effect, use more contrasting colors.
- Metallic stippling paint over a matte base can create a glamorous, shimmering effect.
- Clean Your Brush: If working for extended periods, especially with unglazed paint, you may need to clean your stippling brush periodically as paint can dry in the bristles, affecting the dot pattern.
- Corners and Edges: Use a smaller stippling brush or the edge of your main brush to carefully work into corners and along edges for a neat finish.
- Alternative Tools for Different Effects: While not traditional stippling, you can achieve similar dotted or textured effects with sea sponges, crumpled plastic wrap, or even specialized texture rollers for a faster, though perhaps less refined, result.
Stippling requires patience and a methodical approach, but it’s a relatively easy technique to master with practice. The resulting fine texture is excellent at diffusing light and masking those minor wall imperfections that can mar a standard paint job, lending a sophisticated and classic feel to a room.
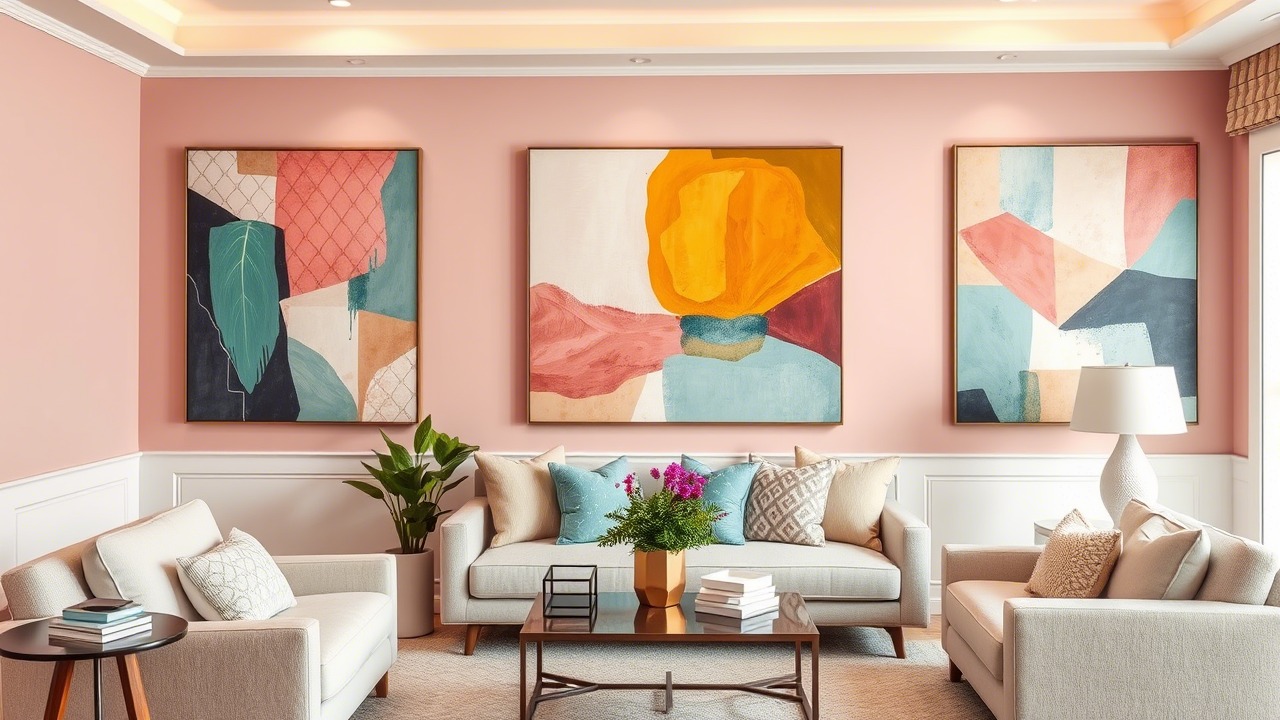
9. Strategic Distraction: Accent Walls with Bolder or Textured Finishes
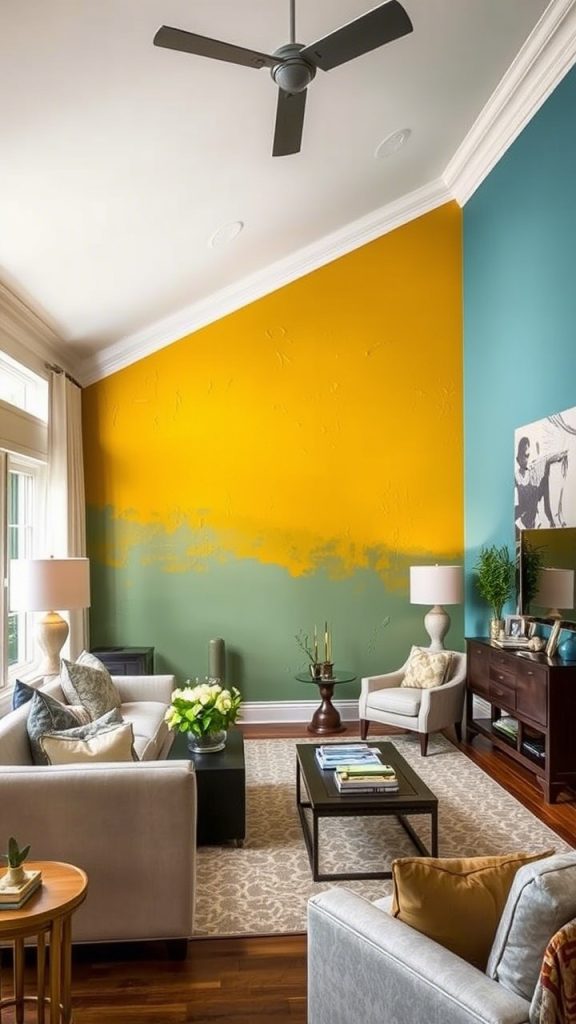
Sometimes, the best way to hide imperfections on most of your walls is to draw the eye to one stunning focal point. This is where a strategically chosen accent wall comes into play. By making one wall particularly interesting with a bolder color, a more pronounced texture (like those discussed in Way #5 or #6), or even wallpaper, you effectively diminish the noticeability of minor flaws on the adjacent, more simply painted walls.
Alternatively, if one specific wall has the most imperfections, you can make that wall the accent wall, using a more robust imperfection-hiding technique on it while keeping the other walls simpler.
Why it Works to Hide Imperfections: This method relies on the principle of visual hierarchy and distraction.
- Drawing the Eye: A compelling accent wall naturally becomes the focal point of the room. People’s attention is drawn to its unique color, pattern, or texture, and they are less likely to scrutinize the other walls for minor defects.
- Concentrated Camouflage: If the most flawed wall becomes the accent wall, you can employ a more intensive imperfection-hiding technique there (e.g., a rich textured paint, a faux finish like Venetian plaster, or even paneling or shiplap covered by this guide’s scope if painted). This allows you to address the problem area effectively without having to apply such an intensive finish to the entire room.
Step-by-Step Guide (Conceptual):
- Identify the Best Wall for an Accent:
- Natural Focal Point: Often, the wall you see first when entering a room, the wall behind a bed, a fireplace wall, or a wall with significant architectural features is a good candidate.
- The Problem Wall: If one wall is particularly troublesome, consider making it the accent wall and applying a more forgiving finish to it.
- Choose Your Accent Wall Strategy:
- Bold Color: Paint the accent wall in a significantly darker, brighter, or more saturated color than the other walls. Combine this with a matte finish (Way #2 and #3) for added flaw-hiding on that wall.
- Textured Paint: Apply one of the textured paint finishes (Way #5) to the accent wall. This could be a subtle sand texture or a more dramatic troweled finish.
- Faux Finish: Use techniques like sponging, rag rolling, color washing, or stippling (Ways #6, #7, #8) on the accent wall for a decorative and flaw-hiding effect.
- Paint a Mural or Geometric Design: If you’re artistic, a hand-painted mural or a bold geometric pattern can be a stunning accent that completely overshadows any minor underlying imperfections.
- (Beyond Paint, but for Context): Wallpaper (especially textured or patterned), wood paneling, shiplap, or stone veneer are also popular accent wall choices that excel at covering imperfections.
- Select Colors and Finishes for Other Walls:
- Paint the remaining walls in a more neutral or lighter color, using a flat or matte finish to help them recede and minimize any of their own minor flaws.
- The goal is to create a contrast that makes the accent wall pop.
- Execute with Precision:
- Accent Wall Prep: Prepare the accent wall thoroughly, especially if it’s the one with more flaws and you’re using a technique that requires a good base.
- Clean Lines: Use high-quality painter’s tape to get crisp, clean lines where the accent wall meets the other walls and the ceiling. This is crucial for a professional look.
- Apply your chosen technique to the accent wall carefully.
- Paint the remaining walls with your chosen color and finish.
Tools and Materials:
- Varies greatly depending on the chosen accent wall technique (e.g., specific paints, textures, faux finish tools).
- High-quality painter’s tape is essential.
- Standard painting preparation and application tools for the other walls.
Tips for Best Results:
- Balance is Key: The accent wall should complement the room’s overall style and color scheme, not overwhelm it.
- Consider Room Size: In very small rooms, a very dark or busy accent wall might feel a bit much. Sometimes a more subtle textural accent works better.
- Lighting: Pay attention to how light interacts with your chosen accent finish. A textured accent wall can look dramatic with uplighting or downlighting.
- Flow with Adjoining Spaces: If the room opens into another space, consider how the accent wall will look from that vantage point.
- Test Your Ideas: Before committing, use large paint samples or create a sample board for your textured/faux finish to see how it looks in the room’s light.
Using an accent wall strategically is a clever design trick. It allows you to either divert attention from less-than-perfect areas or to tackle a problem wall with a targeted, high-impact solution, enhancing the room’s overall appeal while minimizing the visibility of flaws.
10. The Layering Trick: Applying Multiple Thin Coats
It might seem counterintuitive – wouldn’t more paint just highlight bumps? Not necessarily. When done correctly, applying multiple thin coats of paint, rather than one or two thick coats, can significantly help in creating a smoother, more uniform surface that better conceals minor imperfections.
Why it Works to Hide Imperfections:
- Better Leveling: Thin coats of paint have a better chance to flow and level out as they dry. A thick coat is more likely to sag, run, or retain brush and roller marks, which can accentuate underlying flaws. Each thin coat contributes to building a smoother plane over the minor variations in the wall.
- Improved Coverage and Hide: While a single thin coat won’t provide much coverage, two or three thin coats will collectively offer superior hide and a more opaque, even color compared to one thick coat that might still show through in spots or dry unevenly. This uniform color saturation helps to prevent blotchiness that can make imperfections more noticeable.
- Filling Microscopic Voids: Each thin layer can help to fill in extremely fine surface textures or sanding scratches that a single thick coat might just bridge over, leaving tiny air pockets.
- Reduced Risk of “Flashing”: Thick coats, especially over patched areas, can dry at different rates or absorb differently, leading to “flashing” where the sheen or color looks inconsistent. Multiple thin coats, especially when preceded by good priming, promote more uniform drying and absorption.
Step-by-Step Guide (Focus on Application):
- Complete Thorough Wall Preparation: (Way #1) This method works best on a well-prepped surface.
- Prime the Walls: (Way #4) A good primer coat is your first “thin coat” and sets the stage.
- Choose Quality Paint: Higher-quality paints generally have better leveling properties and higher solids content, which contribute to a smoother finish even in thin coats.
- First Thin Coat:
- Load your brush or roller with a moderate amount of paint. Don’t try to saturate it. If using a roller, roll off excess in the paint tray.
- Apply the paint with light, even pressure. Don’t push hard to try and stretch the paint or force it into the wall.
- Focus on achieving a consistent, albeit thin, layer. It’s okay if the underlying primer or old color shows through a bit; that’s what subsequent coats are for.
- Avoid going back over areas that have already started to dry, as this can create texture. Maintain a wet edge.
- Let this first coat dry completely according to the manufacturer’s instructions. Rushing this step is a common mistake.
- Second Thin Coat:
- Apply the second coat in the same manner as the first – light, even pressure, focusing on consistency.
- You should notice significantly better coverage and a more uniform color with this coat.
- Let it dry completely.
- Third Thin Coat (If Necessary):
- Assess the wall after the second coat is dry. If the coverage is perfect and the color is rich and even, a third coat might not be needed.
- However, for very light colors over dark, or if you want the absolute smoothest finish, a third thin coat can make a difference.
- Apply it with the same care as the previous coats.
Tools and Materials:
- High-quality paint (flat or matte finish is still recommended for flaw hiding)
- Good quality rollers (appropriate nap length for your wall texture – a 3/8″ or 1/2″ nap is common for most walls)
- Good quality paintbrushes for cutting in
- Paint tray and liners
Tips for Best Results:
- Don’t Overload Your Brush/Roller: This is the key to thin coats. It’s better to reload more frequently than to apply too much paint at once.
- Proper Rolling Technique: Use the “W” or “N” pattern to apply paint with your roller, then fill it in with parallel strokes without lifting the roller. This helps distribute the paint evenly.
- Light Pressure: Let the tools do the work. Pressing too hard creates roller lines and can squeeze paint out unevenly.
- Adequate Drying Time Between Coats: This is crucial. Applying a new coat before the previous one is fully dry can lead to peeling, bubbling, or a tacky, uneven finish. Check the paint can for recommended recoat times. Humidity and temperature can affect drying times.
- Sand Lightly Between Coats (Optional, for Perfectionists): For the ultimate smooth finish, you can very lightly sand with ultra-fine sandpaper (220 grit or higher) between fully dried coats. This is usually only done in high-end applications but can further refine the surface. If you do this, wipe away all dust with a tack cloth before recoating.
Applying multiple thin coats requires a bit more patience, but the payoff is a more professional, durable, and smoother finish that is much better at concealing minor wall imperfections than a hastily applied thick coat. It’s a technique that professionals use to achieve that flawless look.
11. Visual Play: Subtle Patterns or Low-Contrast Designs

Our final easy way to use painting to hide wall imperfections involves a bit of creative flair: introducing subtle patterns or low-contrast designs. Similar to faux finishes, these visual elements can distract the eye from minor flaws, but they often offer a more contemporary or structured aesthetic.
Why it Works to Hide Imperfections: Any break from a monolithic, flat color can help to camouflage imperfections. When the eye has a pattern to follow or a design to interpret, it’s less likely to focus on small dings, dents, or slight unevenness in the underlying wall surface.
- Low-Contrast is Key for Flaws: While bold, high-contrast patterns can be striking, they can also highlight wall unevenness if the lines appear wavy or distorted due to surface irregularities. Subtle patterns with low contrast (colors that are close in shade or value) are more forgiving. The gentle variation is enough to distract but not so sharp as to draw attention to imperfections in the pattern itself.
- Visual Texture: Even simple painted patterns add a layer of visual texture that can help to obscure minor physical texture on the wall.
Ideas for Subtle Patterns and Low-Contrast Designs:
- Tone-on-Tone Stripes:
- Paint the wall a solid base color (preferably flat or matte).
- Once dry, use painter’s tape to create stripes.
- Paint the stripes using the same color as the base, but in a slightly higher sheen (e.g., matte base with eggshell stripes, or eggshell base with satin stripes). Alternatively, use a color that is just one or two shades lighter or darker than the base.
- The subtle shift in sheen or color creates a sophisticated pattern that can mask imperfections. Wider stripes are often more forgiving than very narrow ones.
- Subtle Geometric Shapes (e.g., Chevrons, Triangles):
- Using painter’s tape, create large-scale geometric patterns.
- Use a low-contrast color scheme. For example, a light gray base with slightly darker gray shapes, or a beige wall with cream-colored shapes.
- This adds interest without being overwhelming and can cleverly hide flaws within the fields of color.
- Color Blocking with Related Hues:
- Divide the wall into larger sections (e.g., the bottom third a slightly darker shade than the top two-thirds).
- Use colors from the same family or that have a harmonious, low-contrast relationship.
- The line where the colors meet, if crisp, can draw the eye, while the large fields of matte color help hide imperfections within them.
- Sponged or Stamped Subtle Patterns:
- Instead of an all-over faux finish, consider using a sponge or a custom stamp to create a repeating, subtle pattern with a low-contrast glaze or paint. For instance, a very light damask pattern stamped in a slightly darker shade.
- This needs to be done carefully to ensure the pattern itself doesn’t highlight flaws if the wall is very uneven.
Step-by-Step General Guide:
- Wall Preparation and Base Coat: (Ways #1, #2, #3, #4) Start with a well-prepared wall painted in your chosen base color and finish (flat or matte is ideal for the base). Let it dry completely.
- Plan Your Design: Sketch your pattern on paper first. Measure your wall and plan the layout carefully, especially for geometric designs or stripes, to ensure symmetry and proper spacing.
- Transfer Design/Tape Off:
- For stripes or geometric shapes, use a level, measuring tape, and pencil to mark your lines lightly on the wall.
- Apply high-quality painter’s tape (like FrogTape or ScotchBlue for sharp lines) precisely along your marked lines. Press the edges of the tape down firmly with a putty knife or credit card to prevent paint bleed.
- Apply the Pattern Paint/Glaze:
- Using your chosen low-contrast color or sheen, paint within the taped-off areas.
- Apply thin, even coats (Way #10). Two thin coats are usually better than one thick one.
- For subtle sheen stripes, ensure the paint is applied evenly.
- Remove Tape Correctly:
- This is crucial for sharp lines. Remove the painter’s tape while the pattern paint is still slightly tacky (usually within 30 minutes to an hour of application, depending on the paint).
- Pull the tape off slowly, at a 45-degree angle away from the painted line. If you wait until the paint is fully dry, it might chip or peel off with the tape.
- Allow to Cure: Let the entire wall cure fully before placing furniture against it or attempting to clean it.
Tools and Materials:
- Base coat paint
- Pattern paint (low-contrast color or different sheen)
- High-quality painter’s tape (various widths can be helpful)
- Measuring tape, level, pencil
- Paintbrushes, small rollers (for patterns)
- Craft knife (for complex tape designs, use with care)
- Optional: Stencils, custom stamps, sponges for specific pattern effects
Tips for Best Results:
- Keep it Simple: Overly complex patterns on an imperfect wall can sometimes backfire if the wall’s unevenness distorts the pattern. Simpler, larger-scale, low-contrast designs are often safer.
- Test Tape Adhesion and Removal: If you’re unsure about your tape or technique, test it on an inconspicuous area or a sample board first.
- Patience with Taping: Accurate taping is time-consuming but essential for a professional-looking result.
- Consider the Scale of the Room: Larger patterns can work well in larger rooms, while smaller, more delicate patterns might be better for smaller spaces or as a more subtle backdrop.
Introducing subtle patterns or low-contrast designs is a stylish way to manage minor wall imperfections. By giving the eye something gently engaging to focus on, you can cleverly divert attention from the little flaws that might otherwise be noticeable on a plain, solid-colored wall. This approach combines flaw concealment with a personalized decorative touch.
Frequently Asked Questions
Q1: What is the absolute best paint finish for hiding wall imperfections?A1: Flat paint finishes are generally considered the best for hiding imperfections. Matte finishes are a very close second and can offer slightly more durability and washability than a true flat. Both absorb light, which minimizes the appearance of bumps, dents, and uneven textures.
Q2: Will dark paint colors make my room look too small?A2: Dark colors can make a room feel cozier or more intimate, which can sometimes be perceived as smaller. However, they also recede visually, which can sometimes make walls seem further away. The effect depends on the amount of natural light, the height of the ceilings, the specific shade chosen, and the room’s furnishings. Using a dark color on an accent wall or in a well-lit room can often avoid making the space feel cramped while still offering excellent imperfection-hiding qualities.
Q3: Do I really need to prime my walls if I’m using a paint-and-primer-in-one product?A3: While paint-and-primer-in-one products are convenient and have improved, for walls with noticeable imperfections, stains, significant color changes, or unpainted drywall/patches, using a dedicated, separate primer is almost always recommended. A dedicated primer will do a better job of sealing stains, ensuring even porosity for the topcoat, and providing a truly uniform base, which is crucial when trying to hide flaws.
Q4: Can textured paint hide larger cracks or holes?A4: Textured paint is excellent for hiding minor to moderate surface irregularities, like bumps, shallow dents, or old plaster unevenness. However, it’s not a substitute for proper wall repair. Larger cracks, holes, or significant structural damage should always be properly filled, patched, and sanded (Way #1) before applying any paint, including textured paint. The texture can then help camouflage any residual signs of the repair.
Q5: Are faux finishes like sponging or rag rolling outdated?A5: Like many design trends, the popularity of certain faux finishes can ebb and flow. However, when done thoughtfully with contemporary color palettes and a subtle hand, techniques like sponging, rag rolling, or color washing can look timeless and sophisticated. The key is to avoid overly busy or high-contrast applications if aiming for a modern look. They remain a very effective way to add character and hide imperfections.
Q6: How can I hide imperfections on a ceiling?A6: Ceilings are notorious for showing imperfections due to the way light rakes across them. The best strategies are: * Use a flat white ceiling paint. White helps brighten the room, and the flat finish is crucial for minimizing shadows from imperfections. * Ensure thorough preparation: scrape any loose texture, fill cracks, and sand smooth. * Consider a very subtle texture if imperfections are widespread, but modern aesthetics often favor smooth (though perfectly flat-painted) ceilings. * Apply paint in thin, even coats, often perpendicular to the main light source.
Q7: Is it harder to clean walls painted with flat or matte finishes?A7: Traditionally, flat paints were more difficult to clean and could burnish (develop shiny spots) if scrubbed. However, many modern premium flat and matte paints are formulated to be much more washable and durable. While they might not be as robust as a semi-gloss, for most living areas, a quality washable matte is a good compromise for hiding flaws and allowing for gentle cleaning.
Q8: What’s the easiest painting technique for a beginner to hide minor flaws?A8: For a beginner, the easiest and most impactful approach is a combination of: 1. Thorough wall preparation (cleaning, filling small holes, light sanding). 2. Using a quality primer over any patched areas. 3. Applying two thin coats of a high-quality flat or matte paint in a medium to darker color (if appropriate for the room). These steps are fundamental and don’t require special artistic skills but yield excellent results in hiding minor imperfections.
Q9: Can I paint over wallpaper to hide imperfections in the wallpaper or the wall underneath?A9: Painting over wallpaper is generally not recommended if you’re aiming for a flawless finish. The wallpaper seams will likely show through, and if the wallpaper has any texture, that will also be apparent. If the wallpaper is peeling or damaged, painting over it can exacerbate the problem. While some primers are designed for painting over wallpaper, the best approach is usually to remove the wallpaper, prepare the wall surface properly, and then paint. If the imperfections are under the wallpaper, removing it is the only way to address them properly.
Q10: How do I avoid lap marks or roller streaks, which can look like imperfections?A10: Lap marks (visible lines where roller strokes overlap) occur when you paint over an area that has already started to dry. To avoid them: * Maintain a “wet edge”: Always roll from the unpainted section into the previously painted, still-wet section. * Work in manageable sections, completing a full wall from top to bottom (or side to side) without stopping for long breaks in the middle. * Don’t overload your roller, but ensure it’s sufficiently loaded for even distribution. * Apply light, consistent pressure. * Using quality paint with good leveling properties and allowing adequate drying time between coats also helps. Flat or matte finishes are more forgiving of minor lap marks.
Conclusion
Dealing with wall imperfections doesn’t always require extensive and expensive renovations. As we’ve explored, the strategic use of wall painting offers a powerful arsenal of techniques to minimize, camouflage, and even creatively obscure a wide range of minor flaws. From the foundational importance of meticulous wall preparation to the clever use of paint finishes, colors, textures, and application methods, you have numerous accessible options at your fingertips.
Choosing a flat or matte finish, opting for darker or subtly patterned colors, or employing artistic faux finishes like sponging and color washing can all dramatically reduce the visibility of bumps, dents, and unevenness. Textured paints provide a more robust solution for more widespread irregularities, while the simple act of applying multiple thin coats can yield a surprisingly smoother and more professional result. And never underestimate the power of a well-executed accent wall to draw the eye and become a stunning focal point.
The key to success lies in understanding how light, color, texture, and sheen interact on a surface, and then using that knowledge to your advantage. By combining these easy-to-implement painting strategies with patience and attention to detail, you can transform your imperfect walls into surfaces that look smooth, polished, and intentional. So, roll up your sleeves, choose your techniques, and get ready to rediscover the beauty of your walls, one carefully considered brushstroke at a time. Your home will thank you for it!
Leave a Reply